.jpg)
Blogger recently implemented Google Plus comments on their Blogger platform, and we know that many bloggers like you have gone ahead and implemented this new functionality to your blogger blogs. But a lot of our readers have been asking us how to add Google Plus comments, or Google Plus comments API to Blogger custom templates? This feature turns on and off smoothly for default templates. But most bloggers don't use default templates. For them, we have compiled this short tutorial on how to implement Google Plus commenting system on custom Blogger Templates.
Why enable Google Plus comments?
Google Plus comments are much more flexible, and allow you to keep track of your conversations better. They also help keep the discussions organized. Besides, readers can share their comments, or make comments on your Google Plus posts to make them appear on your blog. This expands your reach as your followers' extended circles can see your content too.
Although there's some controversy regarding the usefulness of this commenting system versus the harms (something we discussed at length in our last post), the choice is really yours. But if you do want to implement this feature on your custom Blogger templates, then here's how you can do that.

Enabling Google Plus comments
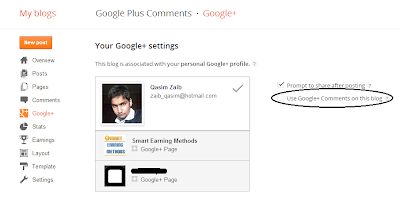
To start off, first log into your Blogger account, and click on the blog you want to add Google Plus comments to. Now, click on the Google+ option on the left sidebar. You must be the admin of a blog to be able to view this option.
Now, you need to upgrade our account, and integrate it with Google Plus if you haven't already done so. You will get a "Get Started" button if you haven't. Follow the simple instructions, and then move on to the next step.
Check the option that says Use Google+ Comments on this Blog - For default templates, this is pretty much all you need to do.
For custom templates, here's what you need to do;
- Click on the Template tab from the left sidebar, and then click on Edit HTML.
- From the code editor, press Ctrl + F, and search for 'threaded_comments'
- You should see the following lines of code
<b:if cond='data:blog.pageType == & quot;static_page"'>
<b:if cond='data:post.showThreadedComments'>
<b:include data='post' name='threaded_comments'/>
<b:else/>
<b:include data='post' name='comments'/>
</b:if>
</b:if>
<b:if cond='data:blog.pageType == & quot;item"'>
<b:if cond='data:post.showThreadedComments'>
<b:include data='post' name='threaded_comments'/>
<b:else/>
<b:include data='post' name='comments'/>
</b:if>
</b:if>
- Replace the code written in bold with the following line.
<b:include data='post' name='comment_picker'/>
Take care not to make a mistake while editing. And it would be a good idea to backup your template (Backup/Restore option at the top-right), just in case.
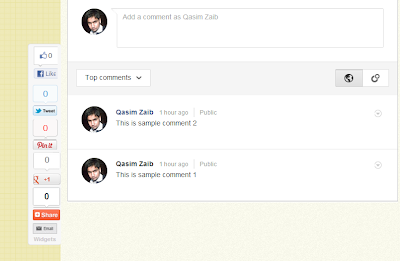
For comments to work on custom templates, you need to add the code as well as to enable it. You can see the demo of a custom template above for yourself. I hope this post answered all your questions. If not, please feel free to ask more questions in the comments below. Cheers :)


