How To Add Pop Up Page Take Over Follow Buttons In Blogger

How To Add Pop Up Page Take Over Follow Buttons In Blogger

You might be the one who wants to have fans on social media pages which give response to all your posts and to get such fans you need to ask people who are interested in your content most, to like or follow your social profile and the best place to get right fans like your page or follow your profile is your own blog or site. Because people visiting your blog are obviously interested in your content so the best way to get real fans and audience is your own blog. But the problem is people don't like pages and don't follow profiles so its hard to get real fans. Despite of placing social follow buttons in different positions e.g in header, on sidebar and other places you hardly get fans thats why people usually try to get fake fans and that is like cheating yourself.

So now its time to optimize your blog or site with smart plugin to get real fans and you can do it by installing a plugin that will show a like or follow button in the center of the page after covering the whole page. It is called page over follow plugin. It will boost your social media response upto 50%. I also use this plugin and got 60 likes on my Facebook fan page so far and i am using this plugin for a month. So it is really good plugin because it is giving me real likes in less time.

Let me tell you something about this plugin now. This plugin is powered by Hellobar. Hellobar is an online tools website which allows you to use their tools to get more email subscribers, social followers, multiply your traffic by circulating featured links etc. This plugin works perfectly and doesn't have any effect on page loading speed.

So in this post I am going to show you how to install page over social media follow plugin in blogger using Hellobar! Follow below steps.

Also read: How To Add New Facebook Page Plugin/Like Box In blogger

HOW TO INSTALL HELLOBAR IN BLOGGER?

Step 1: Go to Hellobar and Sign up.

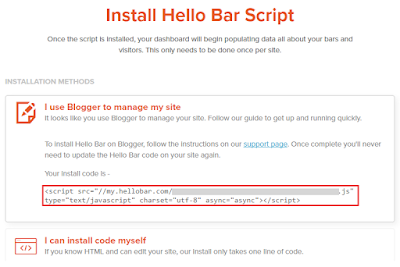
Step 2: Login to your Hellobar account and copy your hellobar code. If you didn't find any code click on settings in the menu and click on Installation Instructions.

how to install hellobar in blogger

Step 3: Copy the code you found on installation instructions page.

how to install hellobar in blogger 101helper

Step 4: Go to blogger dashboard > Edit Html.

Step 5: Search for <head> and below it paste the copied code.

That's it your hellobar is installed, create page over follow plugin by following below steps.

You May Like:  Facebook Pop-Up Like Box With Lightbox For Blogger

HOW TO ADD POP UP PAGE TAKE OVER FOLLOW BUTTONS(FACEBOOK, TWITTER ETC)?

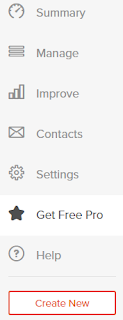
Step 1: Login to your Hellobar account and click on Create New in the menu on left hand.

hellobar facebook pop-up like plugin

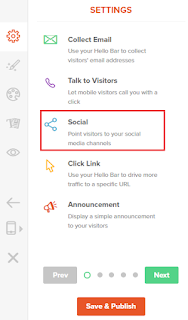
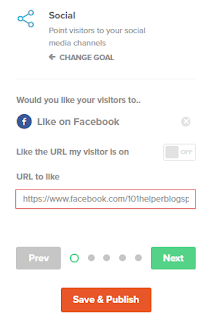
Step 3: Choose Social in the Settings and hit the Next button.

facebook pop up like box blogger

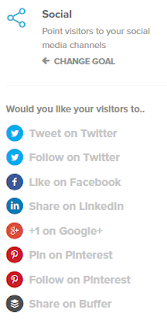
Step 4: Choose social network of which you want to install button and click on next button .... lets choose Facebook, You can choose twitter follow button, Google+1 button, Pinterest follow button and share buttons too!

facebook like button pop up blogger

Step 5: Enter url of your fanpage in case if you selected Facebook in step 4 or if you selected twitter or pinterest then enter usernames and click on next button.

page over facebook like button for blogger

Don't miss: How To Add Cool Twitter Follow Box To Blogger

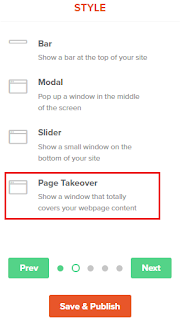
Step 6: Now choose the style of your plugin, you have four options Bar, Model, Slider and Page Takeover. You can see preview of your plugin on right side of the page. You can choose any of the four styles but as I am creating this post for Pop Up Page Take Over Follow Buttons so I am choosing Page Takeover.

facebook, twitter, pinterest pop up follow buttons blogger

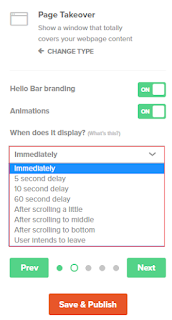
Step 7: Set up time delay for your plugin and click on next.

facebook pop up page over plugin blogger

You can also enable Animations for your facebook pop up plugin.

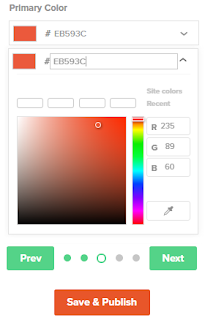
Step 8: Select a color for your page over plugin using the color selector and click on next.

facebook, twitter follow popup gadget

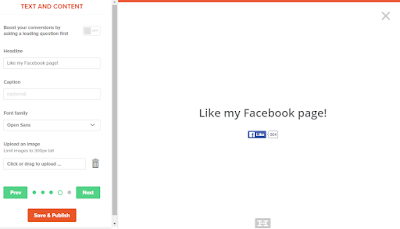
Step 9: Add a Headline to your gadget e.g Like us on Facebook or Like my Facebook page, it will show up above the like button as shown in below image, you have other options too, customize your gadget and click on next.

101helper blogger gadgets

Step 10: Set targeting settings of your gadget, you can show it to everyone or to specific visitor if you have a pro account. Other option is to continuously show pop up or stop showing it when visitor provides a response. So choose the option which you like!

I suggest to choose "stop showing after visitor provides a response" because if you show pop-up on every page your visitors would surely be annoyed.

fb gadgets for blogger

Final step: Click on Save & Publish.

I have shown installing Facebook pop up page over plugin in this post but you can create others too like Twitter or Pinterest or Linkedin etc and you can also have different styles like bar or slide out.

I hope you enjoyed this post, you can use other Hellobar gadgets too to engage your visitors to your site. Don't forget to share this amazing post with others.

Search Tags: How to install facebook, twitter, linkedin, pinterest follow and share pop up page over gadget in blogger, pop up facebook like gadget for blogger, twitter pop up follow gadget,how to install hellobar in blogspot.

Blogger.com turns on HTTPS on all blogspot domain blogs

For many bloggers, enabling the free HTTPS support for your blog on blogspot offers a number of benefits. However, if the latest news from Blogger.com is true you may not need to manually enable the HTTPS support from now on. Every current non-HTTPS blogs are going to be automatically changed to HTTPS and this means a whole new world for bloggers and webmasters who use this particular domain.

First, this means that all blogs on blogspot will be granted a free SSL Certificate whether it is something that you want or not. Before, the webmaster was the one who decided whether the HTTPS was right for your site. Today, it has become mandatory which means that you will need to be prepared for the benefits and potential consequences.

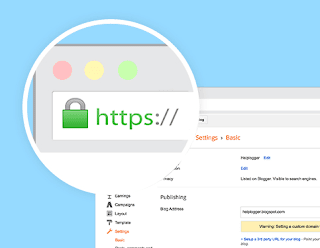
Blogger.com turns on HTTPS on blogspot blogs

The Blogger.com HTTPS Notification

The notification that was sent out by Blogger.com essentially stated that everyone who visits a blog on their domain would be able to view it through an encrypted connection. In addition, all bookmarks and links will still work on your site, but the HTTPS Availability setting will no longer be present and your blog will always use the HTTPS version that is available.


Those who log into their Blogger account will see the message and can interpret for themselves the ramifications of what it truly means. It should be noted that this is only for domains on Blogger.com that are free and that the custom ones will continue to go on functioning as they have in the past. That means there will be no support provided by free SSL HTTPS to custom domains.

While this will naturally cause some concern for webmasters because Blogger.com does have some limitations that are well known, the truth is that this particular change may bring about a better, more secured experience to those visiting the sites as well as have a positive impact on search engine optimization (SEO).

What is HTTPS?

The use of Hyper Text Transfer Protocol Secure (HTTPS) is basically a secure version of HTTP. This means that the data which is transferred between the user and server is now encrypted and protected from access or hacking from unwanted third parties.

HTTPS as a ranking signal

Perhaps the most notable impact is how it will affect the SEO of your site. With Google in particular placing a higher importance of HTTPS as compared to HTTP sites, the secured connection actually makes a positive impact thanks to the additional security. Better security means higher ratings for your blog.

In addition, your blog might actually run a little better with a secured connection as compared to your competition, some of which might not enjoy such a connection.

Since all of your traffic will now be automatically diverted, there will not be a negative effect in terms of loss or lowering of your SEO. In fact, this is actually a good move for blogspot.com and is certainly a worthwhile addition to all of their blogs as the support offers solid benefits for every blogger who uses their domain.

How To Add Youtube Channel Subscribe Button In Blogger

How-to-Add-a-YouTube-Subscribe-Button-in-Blogger

Video tutorials ofcourse is the best way of teaching or explain something and it has become very popular also thats why there are alot of blogs and sites which contains video content. Although video content doesn't make you eligible for  Adsense approval but you can monetize your videos(youtube ads) if they are not copied so making money with videos is also trending rather than creating blogs but as there is a common problem of getting traffic,seo and all that with blogs or sites the same problem is with video channels. Major reason for it is you don't have interesting videos or people can't reach to your videos so you need to get more subscribers so that they can find your videos and you get enough views. So this tutorial is basically about installing youtube subsribe button in blogger, it will help you to a greater extend in getting subscribers. So lets start, follow below mentioned steps to install youtube subscribe button in blogger:


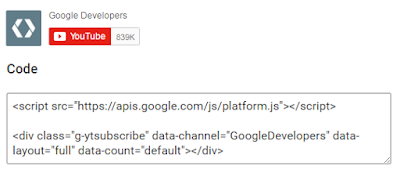
Step 2: Replace GoogleDevelopers with your own channel's ID.

How to find Youtube Channel ID?

1. Go to Youtube Advanced settings page.

2. Copy your channel ID shown on Advanced settings page below user ID.


Step 3: After replacing GoogleDevelopers with your channel's ID, you will see your channel button in the preview below on the page. Now make customizations like Layout, Theme, Subscribe count.

how to add youtube channel button in blogger

Step 4: Finally copy code of your channel's subscribe button.

how to get code of youtube subscribe button in blogger

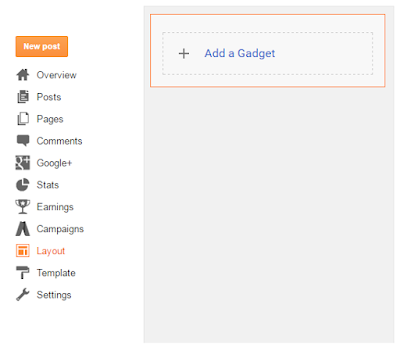
Step 5: Go to blogger dashboard > Layout and click on Add a gadget.

how to add a gadget in blogger 101helper

Step 6: Click on Html/Javascript.

how to add a gadget in blogger 101helper blogspot

Step 7: Paste the copied code and click on save.

That's it you have successfully installed your youtube subscribe button in your blog. If you want to get more subscribers try adding the same code in your posts or below post header or footer. I hope you like this post. Follow our channel on youtube and stay in touch with us on social networks. Thanks for visiting 101Helper.

Search tags: How to install youtube channel button in blogger, how to get youtube subscribers fast, how to add youtube channel subscribe button in blogger blog, how to get youtube channel id,101helper blogging tutorials.