Glossy Red-Grey Tabs Menu

This new menu has two different variations. The color combination can either be red in active mode and grey on mouse hover or vice versa. It is a shiny navigation menu that is mainly created for including blogger pages such as Home, Contact, About. That's why I ignored adding a drop down column to it. Very soon we will also learn how to create mega menus with multi columns in drop down view. But first lets see a demo first,

Grey-Red Theme

blogger menu

Red-Grey Theme

glossy tabs menu


Live Demo

Add This Menu To Blogger

  1. Go to Blogger > Design
  2. Choose HTML/JavaScript widget
  3. Paste the following code inside it,

<style>
.mbt-red-grey-menu{
border:5px solid #cd0000;
padding:0;
clear:both;
}

.mbt-red-grey-menu{
margin:0px;
padding: 0;
float: left;
font: bold 13px Arial;
width: 100%;
overflow: hidden;
margin-bottom: 1em;
border: 1px solid #625e00;
border-width: 1px 0;
background: black url(https://blogger.googleusercontent.com/img/b/R29vZ2xl/AVvXsEiOpcjvBrsBjNCmI2e74p3UnsXI-sXGpKstVy292tae1jOumDOYdQim1JKi8RsnD7w-_1kWpQgyeuUdld_EFsZfRLl5QORgIXMbxwvHpwCPtEyTTXwRCbyhh9FOj7QlTuZJn5VmPSnW9Mg/s400/blockdefault.gif) center center repeat-x;
}

.mbt-red-grey-menu li{
display: inline;
}

.mbt-red-grey-menu li a{
float: left;
color: #fff;
padding: 9px 11px;
text-decoration: none;
border-right: 1px solid white;
}

.mbt-red-grey-menu li a:visited{
color: #fff;
}

.mbt-red-grey-menu li a:hover, .mbt-red-grey-menu li a.selected{
color: #fff;
background: transparent url(https://blogger.googleusercontent.com/img/b/R29vZ2xl/AVvXsEjIJH4BfX4TEtCJNKujmdS8HQ8b-T1-zelzcuT5lOSS8aiDLptKLzPnZzR60nLhFEd-fWV6n-maIr3r9W3EekUftCrzCkXuEszm8nAVe8z1iu_Q3WwXJTIM_gqvqOdd2TK21S7F915FtOU/s400/blockactive.gif) center center repeat-x;
}

</style>


<ul  class="mbt-red-grey-menu">
<li><a href="#">Home</a></li>
<li><a href="#" >About Us </a></li>
<li><a href="#">Contact Us</a></li>
<li><a href="#">Sitemap</a></li>
</ul>


      Make these changes:

Replace the # sign in each case with related Page URL.

The above code is for Red-Grey theme if you wish to use the other theme instead then simply swap the position of the two image links in the above code (shown in purple).

To add a new link then paste the following code each time you want just before </ul>

<li><a href="#">page-name</a></li>

     4.   Save your widget and drag it just below your blog header. (Blog header is the widget where you add blog title and description)

     5.   Hit the Save button at the top-right corner of Page Elements page

     6.   You are all done!

Visit your blogs to see it working just perfectly. If you would like to select a different menu out of 30-40 menus created by MBT then you can search our blog to find something more exciting. Feel free to let me know if you needed any help. I am sure this menu will let you better organize your blog. Peace brothers. :>

Create Automatic Tabs Menu From Labels Widget

automatic tabs menuYes you heard it right! Thankfully now you can create a tabs menu using blogger's official labels widget. Tab links will be automatically updated and added to your menu whenever you create a new tag/category. This widget is really helpful for those of our readers who wanted an automatic method rather the traditional techy way of drop down menus. I have tried my best to make it worth looking and worth trying. This is again a first time shared post by MBT on automatic Tabs Menu for blogger blogs. Lets see a demo first,

Live Demo

How To create the Navigation Menu?

  1. Go To Blogger > Design > Edit HTML
  2. Backup your template
  3. Search for this code,

]]></b:skin>

    4.   Just above it paste the following CSS code,

/* MBT Automatic Tabs Menu */


.mbt-label-list h2 {
    display: none;
}
.mbt-label-list a {
    color: #333333;
}
.mbt-label-list {
    background: #E1D4C1;
    height: 35px;
border:1px solid #DBC8AD;
-moz-border-radius:6px;
-webkit-border-radius:6px;
box-shadow: 5px 5px 5px #CCCCCC;
    margin: 0 auto;
    padding:0px;
    text-shadow: 0 1px 0 #E1D4C1;
    text-transform: none;
    width: 960px;
}
.mbt-label-list li {
    border-right: 1px solid #666;
    color: #333333;
    float: left;
    font: bold 12px Arial;
    margin: 0 2px 5px 0;
    padding: 0px 14px;
    text-transform: uppercase;
}
.mbt-label-list ul {
    float: left;
    list-style: none outside none;
    margin-bottom: 0;
    margin-left: 10px;
 
    padding: 0;
    width: 920px;
}

This CSS code is responsible for the color and look of your tab links and background.

  • If you wish to change the background color of the menu then edit    #E1D4C1
  • To change link colors change this #333333 . Edit it twice.

5.   Now search for this code,

<div id='content-wrapper'>

If you are using the new blogger designer template then search for this code instead,

<div class='tabs-outer'>

   6.  Just above any of these matching codes paste the following HTML code,

<div class='mbt-label-list'> <b:section class='mbt-label-list' id='mbt-label-list' preferred='yes' showaddelement='no'>
<b:widget id='Label1' locked='true' title='Labels' type='Label'/>
</b:section></div>
<div class='clear'>&#160;</div>

This code will create a labels widget in your PageElements page.

   7.   Save your widget and you are all done!

Visit your page elements page and open the label widget at top,

labels widget

Choose the following settings:

  1. Choose All labels only if your number of labels are less than 10. Else choose selected labels to decide which label links you wish to display in tabs.
  2. Set sorting to alphabetically or by frequency which ever you like. Choosing by frequency will display your most used label tabs first in the menu and the least used labels last in the menu.
  3. Choose Display as list
  4. You can decide whether to show or hide the label counts. So  uncheck "Show number of posts per label" if you don't want label count to be displayed next to each tab.
  5. Hit save and bingo you are all set!

tabs menu settings

Visit your blogs to see this brilliant new trick working just perfectly as shown in the demo. Please feel free to ask any related questions. Will try my best to reply as soon as possible. Kindly share it with your friends if you think this new trick proved useful and unique for most of you. God bless pals! :)

Should you Enable Blogger Dynamic Views?

Dynamic views

Blogger has now officially introduced Dynamic views for all blogs by default. Now you can change the layout of your custom template into different shapes. A dynamic view is an automated code that rearranges your div areas and automatically changes the default style sheet settings into different flavours and colours. In short it provides your readers with better readability. This new feature helps you to arrange your posts, comment body and sidebar in different orientation. It arranges them into either a stream of thumbnail images or table containing columns of your latest posts. However this new feature has some advantages as well as some drawbacks which I have shared below.


How to Enable dynamic View For your blog?

  1. Go To blogger > Design > Template Designer
  2. Now you have 7 different layout options namely classic, Flipcard, magazine, mosaic, sidebar, snapshot, Timeslide.
  3. Choose the one you like and hit the "Apply to Blog" button at the top-right corner
  4. Done!


Advantages of Dynamic Views

This dynamic view has the best advantage of being compatible with all major browsers such as Mozilla, IE8 and Chrome and Safari. It also uses light theme that tremendously helps in reducing your blog load time. The layout are perfectly coded so each widget will remain at its position and wont interrupt neighboring widgets during load time. Stylesheet is the one officially provided by blogger and it rarely contains any image so again helps your blog to load quickly. Blogs with this feature enabled are better browsed, bookmarked and viewed even on smart phones.

Disadvantages of Dynamic Views

You don't have complete control over the appearances of your widgets and post body. While applied most widgets stop working and are misaligned. No special attention is paid to sidebar section. All widgets get replaced or deleted. The sponsor area and subscription area disappears. Again applying it though provides you with main delightful bonuses but if you are running a professional blog with ads on it then better quit this feature. However if you are running a personal diary or non-commercial blog then you can surely go for it in order to let your fans enjoy different flavors of your site.

I hope this little info proves helpful to most of you.

Enable Facebook Timeline For your Profile Now!

facebook timeline

Facebook new and amazing development just to arrive and this amazing Profile layout change method is called "Timeline" This new feature displays a hierarchy of all your experiences  date-wise like post updates, comments, photo and video uploads.  Timeline is your collection of photos, posts and apps that tell your story. You can see what you did in last year or last month. All Facebook status updates that you made or the fun you had so far can be reviewed by rolling back to the old days using this brilliant new feature. At present this feature can be enabled only through the developers page and will be visible to only those people who have enabled Facebook developers App. However very soon Facebook will publically enable the Profile Timeline for all. So why wait when you can try it now!


How To Enable Time Line Feature?

The steps are extremely simple and needs no expert skills. Carefully follow these,

  1. In your Facebook Search book write " Developer" and hit enter
  2. Activate the App if you have previously not activated the Developer App
  3. Click on the Create new app button towards your top-right-corner side
  4. Give your app a name and name space. You can keep any name you want for example I kept "Timeline" as the app name  and "Ahmedzai" as the name space.
  5. Follow the easy instructions and submit the security captcha code. Hit continue and you have successfully created the app and almost done
  6. Now you can see your App name on your app page. Towards the left side Look for the "Open Graph" Link, and click the "Get Started using open graph" link. Fill the blanks as shown below,

time line settings

Fill the first blank with anything say for example Read and the second with Book.  Hit Get Started and You will see three Edit Settings Page. Go through all of them if you wish to change something but you can leave them as default if you wish. I only changed the layout look on the second page.

    Now visit your Facebook Homepage and you will see an invitation at the top saying:

"Introducing Timeline - a New Kind of Profile"

timeline invitation

   7.  Hit the Get it Now button and start exploring this brilliant new feature! Enjoy! :)

Create a Simple "Tree Menu" in Blogger

Tree MenuEver wondered to create an expandable Tree menu in a simple one step method? There we have it today! A Tree Menu is different from other navigation menus that we have released so far. It has has branches and sub-branches. You can add links to it or even simple text and hang it on your blog sidebar. It helps to organize data in a hierarchal method. Most often we use tree menus for displaying blog archives. It contains a Expand and Contract Link that collapses and shrinks the tree branches. So lets add this beautiful menu to blogger blogs in easiest possible way.


Live Demo


Add Tree Menu To Your Blogs

  1. Go to blogger > Design
  2. Choose HTML/JavaScript widget
  3. Paste the following code inside it,

<style>
.treeview ul{
margin: 0px;
padding: 0;
}

.treeview li{
background: white url(https://blogger.googleusercontent.com/img/b/R29vZ2xl/AVvXsEjAAWRvZ4JnB2CcfCOptWbu4y7tckSnr4GMnCrcVPMZRsO-Ip2rqKkAWYe6ariaR3v1FYhkPV0Z-sLK_KevFzHmggjINHPQCsDYi69CIlv6XPQVB1RQ_zHLRzucvtqupYcawu_i9ulabmU/s400/list.gif) no-repeat 0px 3px;
list-style-type: none;
padding-left: 32px;
margin-bottom: 3px;
}

.treeview li.submenu{
background: white url(https://blogger.googleusercontent.com/img/b/R29vZ2xl/AVvXsEhUYfb2_j9rbXJj-QXY-GmnQBL_dN0ezfPUfCEFrM-VY3DADJzC-akdd6ZA8ZJ7wVSBH30ETOgd131FiQ2y1awCGKXVnpX4Zpy1JfGOjsPuSH4A9HlIT4fq4T7ZA-2ikCZs-4DPhUnVzv4/s400/closed.gif) no-repeat  0px 3px;
cursor: hand !important;
cursor: pointer !important;
}


.treeview li.submenu ul{
display: none;
}

.treeview .submenu ul li{
cursor: default;
}
</style>


<script type="text/javascript" >
var persisteduls=new Object()
var ddtreemenu=new Object()

ddtreemenu.closefolder="https://blogger.googleusercontent.com/img/b/R29vZ2xl/AVvXsEhUYfb2_j9rbXJj-QXY-GmnQBL_dN0ezfPUfCEFrM-VY3DADJzC-akdd6ZA8ZJ7wVSBH30ETOgd131FiQ2y1awCGKXVnpX4Zpy1JfGOjsPuSH4A9HlIT4fq4T7ZA-2ikCZs-4DPhUnVzv4/s400/closed.gif" //set image path to "closed" folder image
ddtreemenu.openfolder="https://blogger.googleusercontent.com/img/b/R29vZ2xl/AVvXsEihU3J1jRmWX3SxXUdCEtHg_aS7z4KpoEvMd00egKwVuIR7NmXcGBGJhOrUC89JgNY7PSABO0edAstRDsCmyMgAbi1Ef3F4TmaFLacmco-2WKF2J_ofKEM6k7x80DJO43LzqM2pKNh_i-8/s400/open.gif" //set image path to "open" folder image

//////////No need to edit beyond here///////////////////////////

ddtreemenu.createTree=function(treeid, enablepersist, persistdays){
var ultags=document.getElementById(treeid).getElementsByTagName("ul")
if (typeof persisteduls[treeid]=="undefined")
persisteduls[treeid]=(enablepersist==true && ddtreemenu.getCookie(treeid)!="")? ddtreemenu.getCookie(treeid).split(",") : ""
for (var i=0; i<ultags.length; i++)
ddtreemenu.buildSubTree(treeid, ultags[i], i)
if (enablepersist==true){ //if enable persist feature
var durationdays=(typeof persistdays=="undefined")? 1 : parseInt(persistdays)
ddtreemenu.dotask(window, function(){ddtreemenu.rememberstate(treeid, durationdays)}, "unload") //save opened UL indexes on body unload
}
}

ddtreemenu.buildSubTree=function(treeid, ulelement, index){
ulelement.parentNode.className="submenu"
if (typeof persisteduls[treeid]=="object"){ //if cookie exists (persisteduls[treeid] is an array versus "" string)
if (ddtreemenu.searcharray(persisteduls[treeid], index)){
ulelement.setAttribute("rel", "open")
ulelement.style.display="block"
ulelement.parentNode.style.backgroundImage="url("+ddtreemenu.openfolder+")"
}
else
ulelement.setAttribute("rel", "closed")
} //end cookie persist code
else if (ulelement.getAttribute("rel")==null || ulelement.getAttribute("rel")==false) //if no cookie and UL has NO rel attribute explicted added by user
ulelement.setAttribute("rel", "closed")
else if (ulelement.getAttribute("rel")=="open") //else if no cookie and this UL has an explicit rel value of "open"
ddtreemenu.expandSubTree(treeid, ulelement) //expand this UL plus all parent ULs (so the most inner UL is revealed!)
ulelement.parentNode.onclick=function(e){
var submenu=this.getElementsByTagName("ul")[0]
if (submenu.getAttribute("rel")=="closed"){
submenu.style.display="block"
submenu.setAttribute("rel", "open")
ulelement.parentNode.style.backgroundImage="url("+ddtreemenu.openfolder+")"
}
else if (submenu.getAttribute("rel")=="open"){
submenu.style.display="none"
submenu.setAttribute("rel", "closed")
ulelement.parentNode.style.backgroundImage="url("+ddtreemenu.closefolder+")"
}
ddtreemenu.preventpropagate(e)
}
ulelement.onclick=function(e){
ddtreemenu.preventpropagate(e)
}
}

ddtreemenu.expandSubTree=function(treeid, ulelement){ //expand a UL element and any of its parent ULs
var rootnode=document.getElementById(treeid)
var currentnode=ulelement
currentnode.style.display="block"
currentnode.parentNode.style.backgroundImage="url("+ddtreemenu.openfolder+")"
while (currentnode!=rootnode){
if (currentnode.tagName=="UL"){ //if parent node is a UL, expand it too
currentnode.style.display="block"
currentnode.setAttribute("rel", "open") //indicate it's open
currentnode.parentNode.style.backgroundImage="url("+ddtreemenu.openfolder+")"
}
currentnode=currentnode.parentNode
}
}

ddtreemenu.flatten=function(treeid, action){ //expand or contract all UL elements
var ultags=document.getElementById(treeid).getElementsByTagName("ul")
for (var i=0; i<ultags.length; i++){
ultags[i].style.display=(action=="expand")? "block" : "none"
var relvalue=(action=="expand")? "open" : "closed"
ultags[i].setAttribute("rel", relvalue)
ultags[i].parentNode.style.backgroundImage=(action=="expand")? "url("+ddtreemenu.openfolder+")" : "url("+ddtreemenu.closefolder+")"
}
}

ddtreemenu.rememberstate=function(treeid, durationdays){ //store index of opened ULs relative to other ULs in Tree into cookie
var ultags=document.getElementById(treeid).getElementsByTagName("ul")
var openuls=new Array()
for (var i=0; i<ultags.length; i++){
if (ultags[i].getAttribute("rel")=="open")
openuls[openuls.length]=i //save the index of the opened UL (relative to the entire list of ULs) as an array element
}
if (openuls.length==0) //if there are no opened ULs to save/persist
openuls[0]="none open" //set array value to string to simply indicate all ULs should persist with state being closed
ddtreemenu.setCookie(treeid, openuls.join(","), durationdays) //populate cookie with value treeid=1,2,3 etc (where 1,2... are the indexes of the opened ULs)
}

////A few utility functions below//////////////////////

ddtreemenu.getCookie=function(Name){ //get cookie value
var re=new RegExp(Name+"=[^;]+", "i"); //construct RE to search for target name/value pair
if (document.cookie.match(re)) //if cookie found
return document.cookie.match(re)[0].split("=")[1] //return its value
return ""
}

ddtreemenu.setCookie=function(name, value, days){ //set cookei value
var expireDate = new Date()
//set "expstring" to either future or past date, to set or delete cookie, respectively
var expstring=expireDate.setDate(expireDate.getDate()+parseInt(days))
document.cookie = name+"="+value+"; expires="+expireDate.toGMTString()+"; path=/";
}

ddtreemenu.searcharray=function(thearray, value){ //searches an array for the entered value. If found, delete value from array
var isfound=false
for (var i=0; i<thearray.length; i++){
if (thearray[i]==value){
isfound=true
thearray.shift() //delete this element from array for efficiency sake
break
}
}
return isfound
}

ddtreemenu.preventpropagate=function(e){ //prevent action from bubbling upwards
if (typeof e!="undefined")
e.stopPropagation()
else
event.cancelBubble=true
}

ddtreemenu.dotask=function(target, functionref, tasktype){ //assign a function to execute to an event handler (ie: onunload)
var tasktype=(window.addEventListener)? tasktype : "on"+tasktype
if (target.addEventListener)
target.addEventListener(tasktype, functionref, false)
else if (target.attachEvent)
target.attachEvent(tasktype, functionref)
}

</script>


<a href="javascript:ddtreemenu.flatten('treemenu1', 'expand')">Expand  +</a> | <a href="javascript:ddtreemenu.flatten('treemenu1', 'contact')">- Contract</a>
<p></p>
<ul id="treemenu1" class="treeview">
<li><a href="#">Item 1</a></li>
<li><a href="#">Item 2</a></li>

<li>Folder 1
    <ul>
    <li><a href="#">Sub Item 1.1</a></li>
    <li><a href="#">Sub Item 1.2</a></li>
    </ul>
</li>
<li><a href="#">Item 3</a></li>

<li>Folder 2
    <ul>
    <li><a href="#">Sub Item 2.1</a></li>
    <li>Folder 2.1
        <ul>
        <li><a href="#">Sub Item 2.1.1</a></li>
        <li><a href="#">Sub Item 2.1.2</a></li>
        </ul>
    </li>
</ul>
</li>

<li><a href="#">Item 4</a></li>
</ul>


<script type="text/javascript">

//ddtreemenu.createTree(treeid, enablepersist, opt_persist_in_days (default is 1))

ddtreemenu.createTree("treemenu1", true)
ddtreemenu.createTree("treemenu2", false)

</script>


The yellow part is our concerned code of study:

  • Replace # with Link's URL
  • Replace Item 1, 2 ,3 with your Link Title text
  • To add a new link simple add the following code just above </ul>

<li><a href="#">Item 5</a></li>

  • To create a sub menu then add this code just above </ul>

<li>Main title 
    <ul>
    <li><a href="#">Sub title 1</a></li>
    <li><a href="#">Sub title 2</a></li> 

<li><a href="#">Sub title 3</a></li> 
    </ul>
</li>

Just remember that a link line starts with <li> and ends with </li> tag.

    4.   Save your widget and you are all done!

Visit your blog and see a drop down Tree Menu handing on your sidebar. If you faced any difficulty or if you want any help in creating more menus and sub menus then please do not hesitate to leave your comment. I hope this proves helpful for most of you. Peace out buddies! :)


Code by dynamicdrive, Bloggerized by MBT

Open Multiple Webpages Using a single Link

linking multiple sitesI have been using a simple JavaScript call function to open multiple sites on a single click. This function declares several URL’s in its body and once the function is called either through a hyperlink or an image, the click triggers the function and all URLs declared open up in new browser tab window. I have been using this simple trick on my EntreCard traffic service and you can surely check out that page as a demo. Lets learn how to create such a link.

Create List of URLs

Write down all website URLs by using the simple code below,

<!-- MBT MULTIPLE LINKS CODE -->
<script type='text/javascript'>
//<![CDATA[


    function LINKNAME() {
    var http = "LINK1";
    var win1 = window.open(http);
    var http = "LINK2";
    var win1 = window.open(http);
    var http = "LINK3";
    var win1 = window.open(http);
    var http = "LINK4";
    var win1 = window.open(http);
   
    }

//]]>
</script>


  • Replace LINKNAME with anything you wish to write. Replace it with any name you may remember say for example "multiplelinks"
  • Replace Link1,2,3,4 with your URLs. A URL/link should contain http:// For example: http://www.mybloggertricks.com
  • To add another link simply add the following code above }

   var http = "LINK5";
    var win1 = window.open(http);

Once done then add the code to blogger by following these steps:

  1. Go To blogger > Design > Edit HTML
  2. Search for </head>
  3. Paste the large code above just above </head>
  4. Save your template.

Create a Hyperlink or Image Link

Now there are two ways in which you can open these sites. You can either trigger them all using a simple text link or you can use a cute image as I did on the demo page.

Text Link Method:

Use this code anywhere on your post editor or sidebar to make the link appear which when clicked will open multiple/several sites


<a rel="nofollow" href="javascript:LINKNAME()">link text</a>


Outcome:

Link 1 Click it carefully! :)

Make sure that LINKNAME matches in this code and the previous Javascript I shared above. If you have written a different name for it then keep both names same for the above code and this one.

Replace link text with anything you wish to write to display the link name.

Image Link Method:

<a rel="nofollow" href="javascript:LINKNAME()"><img src="Image Link" /></a>


In this case all steps are same except that now you need to add an image instead of displaying link text. Kindly replace Image Link with the URL of your uploaded image.

Outcome:

Click it carefully! :)


When to use this method?

You may make use of opening several websites using a single link only if you are running a directory or if you want to share several links with your users but you don't want to directly link them. It is a great SEO method as well because Google allows you too keep the number of links to at most 100 per page but what if you want to link 1000 sites on a single page? Then this method comes to your rescue. I hope you find it helpful. Do let me know if you needed any help. Good night buddies!:>

jQuery Gooey Tab Menu For Blogger

Gooey menus are simple jquery menus that uses lava lamp effect to create CSS menus. Whenever you move your mouse cursor on a menu item, the gooey moves dynamically as you move right and left. Unlike our previously published drop down menus and tabs menus, this menu has some eye-catching effects which makes them stand out. You can easily customize them and add them with a click of a mouse to your blogspot blogs. I have kept the installation again limited to the use of a single widget so lets get to work then!

image


Live Demo

Adding Gooey Menu

  1. Go To Blogger > Design
  2. Choose a HTML/JavaScript widget (the one just below your header)
  3. Paste the following code inside it

<script type="text/javascript">
/* jQuery Gooey Menu
* Created: April 7th, 2011 by DynamicDrive.com. This notice must stay intact for usage
* Author: Dynamic Drive at http://www.dynamicdrive.com/
* Visit http://www.dynamicdrive.com/ for full source code
*/

jQuery.noConflict()

jQuery.extend(jQuery.easing, {easeOutBack:function(x, t, b, c, d, s){ //see http://gsgd.co.uk/sandbox/jquery/easing/
        if (s == undefined) s = 1.70158;
        return c*((t=t/d-1)*t*((s+1)*t + s) + 1) + b;
    }
})


var gooeymenu={
    effectmarkup: '<li class="active"></li>',

    setup:function(usersetting){
        jQuery(function($){ //on document.ready
            function snapback(dur){
                if ($selectedlink.length>0)
                    $effectref.dequeue().animate({left:$selectedlink.position().left, width:$selectedlink.outerWidth()}, dur, setting.fx)
            }
            var setting=jQuery.extend({fx:'easeOutBack', fxtime:500, snapdelay:300}, usersetting)
            var $menu=$('#'+setting.id).find('li:eq(0)').parents('ul:eq(0)') //select main menu UL
            var $menulinks=$menu.find('li a')
            var $effectref=$(gooeymenu.effectmarkup).css({top:$menulinks.eq(0).position().top, height:$menulinks.eq(0).outerHeight(), zIndex:-1}).appendTo($menu) //add trailing effect LI to the menu UL
            $effectref.css({left:-$menu.offset().left-$effectref.outerWidth()-5}) //position effect LI behind the left edge of the window
            if (typeof setting.selectitem!="undefined"){ //if setting.selectitem defined
                var $selectedlink=$menulinks.removeClass('selected').eq(setting.selectitem).addClass('selected')
            }
            else{
                var $selectedlink=$menulinks.filter('.selected:eq(0)') //find item with class="selected" manually defined
            }
            setting.defaultselectedBool=$selectedlink.length
            $menulinks.mouseover(function(){
                clearTimeout(setting.snapbacktimer)
                var $target=$(this)
//alert($target.position().left+" "+$target.get(0).offsetLeft)

                $effectref.dequeue().animate({left:$target.position().left, width:$target.outerWidth()}, setting.fxtime, setting.fx)
                if (setting.defaultselectedBool==0) //if there is no default selected menu item
                    $selectedlink=$target //set current mouseover element to selected element
            })
            if ($selectedlink.length>0){
                snapback(0)
                $menu.mouseleave(function(){
                    setting.snapbacktimer=setTimeout(function(){
                        snapback(setting.fxtime)
                    }, setting.snapdelay)
                })
            }
                $(window).bind('resize', function(){
                    snapback(setting.fxtime)
                })
        })
    }
}
</script>

<style>


ul li.active{ /*IE6 hack- hide gooey effect from that browser*/
_visibility: hidden; /*IE6 rule*/
}


/* -------MBT Gooey Menu--------*/
ul.framemenu{
margin-top:6px;
margin-bottom:15px;
padding: 0;
list-style: none;
position:relative;
text-align: left; //set value to "left", "center", or "right"*/
}

ul.framemenu li{
display: inline;
}

ul.framemenu li a{
font: bold 14px Arial, Verdana, sans-serif;
color: black;
padding: 12px 10px 5px 18px;
margin-right: 10px; /*spacing between each menu link*/
text-decoration: none;
}


ul.framemenu li.active{ /*style of LI that gets dynamically added to menu to create background effect*/
position:absolute;
width:0;
border:4px solid #FFA500; border-radius:15px; -moz-border-radius:15px;
-moz-box-shadow: 0 0 4px rgba(120,120,120,0.7);
-webkit-box-shadow: 0 0 4px rgba(120,120,120,0.7);
box-shadow: 0 0 4px rgba(120,120,120,0.7);
}
</style>


<ul id="gooeymenu4" class="framemenu">
<li><a href="#">Home</a></li>
<li><a href="#">CSS Codes</a></li>
<li><a href="#">Forums</a></li>
<li><a href="#">Tools</a></li>
<li><a href="#">JavaScript</a></li>
<li><a href="#">CSS Gallery</a></li>
</ul>

<script>
gooeymenu.setup({id:'gooeymenu4', selectitem:0, snapdelay:500})

</script>


Just edit the yellow highlighted part with your page titles and Urls. Replace the # signs with your page URLs. To add another another tab simple create another li tag area and add it above </ul> as shown  below,

<li><a href="#">Page Name</a></li>

To change the border colour replace #FFA500 with any hexadecimal color code of your choice. Use our color wheel or chart Tools.

gooey menu

To change the rounded borders of frame to rectangular then simple delete the following code from above,

border-radius:15px; -moz-border-radius:15px;

    4.   Save and you are all set and done!

Visit your blogs to see the new navigation menu hanging just below your header. Let your visitors better explore your site by providing with something that may be worth trying. I will publish more versions of this effect soon so stay tuned. Have fun buddies! :)

*Menu by dynamic drive, Bloggerized by MBT.

Disable Lightbox View The Correct way

Update: Lightbox Effect is Offcially Disabled by Blogger. No Worries now.


Yesterday I shared a short code that somehow helped to deactivate and remove the lightbox view for images appearing on blogger blogs. However some of the technical problems linked with it was that you were asked to paste the code just below the closing body tag and technically speaking that is against W3C standards. This was one reason why some widgets and Adsense ads got effected and did not display correctly. I have found a much better way of dealing with this problem brought by blogger team and it is really easy to implement. So kindly delete the previous code that I earlier shared and follow this new one.


Disable Lightbox view in Blogger Easily


  1. Go To Blogger > Design

  2. Choose HTML/JavaScript Widget

  3. Paste the following code inside it


<script type="text/javascript">
//<![CDATA[
var lightboxIsDead = false;
function killLightboxundefined) {
if undefinedlightboxIsDead) return;
lightboxIsDead = true;
var images = document.getElementsByTagNameundefined'img');
for undefinedvar i = 0 ; i < images.length ; ++i) {
images[i].parentNode.innerHTML = images[i].parentNode.innerHTML;
}
}

if undefineddocument.addEventListener) {
document.addEventListenerundefined'DOMContentLoaded', killLightbox, false);
} else {
document.attachEventundefined'onDOMContentLoaded', killLightbox);
window.attachEventundefined'onload', killLightbox);
}
//]]>
</script>

     4.  Save the widget and drag the widget anywhere to the bottom

     5.   you are all done!


Now this was a much neater and cleaner way. Which will work without disturbing the flow of other gadget on your blog. Happy blogging. enjoy! :)


Code Credits:Englishjavadrinker


How To Disable Lightbox View For Blogger Images?

Update: Lightbox Effect is Offcially Disabled by Blogger. No Worries now. Try a more correct way

lightbox view in bloggerBlogger just announced today that they have now automatically added Lightbox view effect to all blogs by default. Now when you click on your images or photos, a wide black I frame window opens that fades the page in the background and shows you the image in foreground without leaving the page. Lightbox is also called as Greybox or thickbox. It is a cool image effect that you have seen widely used everywhere especially on Facebook and Google+. But for some people like me this effect has turned into a headache. Even the read more buttons on my blog when clicked popped in a new window instead of taking the user to the full post page. So of course there must be a way to disable it completely in your blogs and if you wish to apply it with complete control then you may add this effect manually by reading any tutorial found online on Lightbox view.

How to disable Lightbox view?

After digging into the CSS bundle link from the source file of my test blog, I managed to find the CSS class that enabled this effect and tried adding the display none property to the class but it badly effected the over all appearance of images everywhere.

Following is the CSS Link for lightbox

http://www.blogger.com/static/v1/widgets/3353720152-widget_css_lightbox_bundle.css


Following is the Javascript that activates the effect


_WidgetManager._RegisterWidget('_BlogView', new _WidgetInfo('Blog1', 'main', null, document.getElementById('Blog1'), {'cmtInteractionsEnabled': false, 'showBacklinks': true, 'postId': '5886606793797837055', 'lightboxEnabled': true, 'lightboxModuleUrl': 'http://www.blogger.com/static/v1/jsbin/3312549355-lbx.js'}, 'displayModeFull'));


I tried calling the javascript and switched the lightboxEnabled command to false but it didn't work. It may sound funny to you all but yes I need help from you all here. If anyone of you knows how to override this function then please let me know because javascript is what I lack in my skills. So this post today ends for the first time as a question from me to you all. Any help is appreciated.


PS: I have posted my question to blogger team and I am sure they will provide us with a good solution.


UPDATED: SOLUTION FOUND CLICK HERE


There is still one solution


If you don't want the lightbox feature for a specific image then simply add the target="_blank" tag just after the image img tag. See the following example


Click it and you will find lightbox effect works here


Click it and you will find that bingo no effects is applied!


This is what I find as somehow helpful in controlling the image view. I am sure Blogger team will come up with a more effective solution soon.


Solution Found!


As mentioned earlier the only problem I faced was in calling the JavaScript function and even after calling it correctly I was not able to disable the effect. Thanks to EnglishJavaDrinker I just get to know that instead of adding the JavaScript above </head> we must add it between <body> and </head> which sounds really weird but it is working just perfectly!


Do this in order to disable the effect:


  1. Go To blogger > Design > Edit HTML


  2. Backup your template


  3. Search for </body>


  4. Paste the following code just below </body>


<script type='text/javascript'>

document.getElementById(&#39;main&#39;).innerHTML = document.getElementById(&#39;main&#39;).innerHTML.replace(&quot;&#39;lightboxEnabled&#39;: true,&quot;,&quot;&#39;lightboxEnabled&#39;: false,&quot;);


</script>


     5.  Save your template and you are all done!


I hope this will be helpful to all those who wish to get rid of this annoying effect unfortunately brought by blogger in a really wrong way. Peace and blessings pals! :)

What Exactly are Blog Labels or Categories?

what are blog labelsDiscussing this topic has now become really important since I have observed people confusing labels with keywords spam. Blogger blogs or Wordpress blogs, no matter which platform you may be using, provides you with an option of tagging your posts that you publish. Tag, Label or Category they all mean the same and their purpose is to provide easy navigation to a blog reader. You may be writing several posts per week and if you don't organize them by putting them in relevant categories then you are turning your blog into an unorganized site and this makes  the job for your readers more difficult to navigate from one page to another and this badly effects your PageViews. Lets first discuss a general layman definition for this Label term.


What are Labels?

Labels in blogs are keywords that categorizes your entire blog content. They are simple links to your posts. Labels should be mostly based on general and specific keywords and should contain no more than three words. For example If I am a Chef and I write a blog, I will make sure I label all posts written on Asian dishes as "Asian Dishes" and those on Afghani dishes as "Afghan Food" and so on. This will help my readers to read all posts written on Asian Dishes by simply clicking the Asian Dishes label link.

tags below post titles

The labels that appear below my post titles tells my readers what category does the post belong too. These labels also help widgets such as "Related Posts Widget" to fetch related posts and present it to the reader and thus increase engagement and pageviews. They are also one deciding factor of your blog's bounce rate. When you provide your readers with more comfortable options to navigate your blog, you are actually dropping your bounce rate which means you are forcing visitors to spend more time on your blog and that is indeed a great thing to do! So if you add labels wisely your entire blog will look organized and your traffic will grow.

Do Search Engines Value Labels or Categories?

Search engines especially Google hates them! That's why great emphasis was made in our last SEO posts to tag all labels as noindex, nofollow. Since Labels takes robots to a dynamic page therefore the page gets restricted by robots. By dynamic pages I mean, pages where the content keeps on updating. For example whenever you label a new post, you are adding a new post to your label page. This is just like updating a single post every single day which robots hate! Because an update pings spiders to come and crawl your data again. Pinging search engines to crawl the same page again and again is taken seriously because it wastes precious time. After the latest Google Panda effect, bloggers were advised to tag all their labels as nofollow.

How to Choose correct labels?

Decide at most 10-20 labels for your entire blog and always link new posts to them. Take an example of labels used by MBT blog. Since I frequently write on widgets, templates, blogging tips and SEO tips therefore I have chosen these keywords for letting my users know what categories do the blog offers for healthy reading. You can take an idea by looking at all keywords I used in my label cloud.

label cloud

Keep these points in mind:

  1. Use at most 20 labels for your entire blog
  2. Use at most three words for defining a label
  3. Give preference to short one word labels
  4. Use your main SEO keywords in your labels. (Not to help search engines but to help your visitors better understand the concept behind your blog)
  5. Link each post with relevant label. If a post doesn't relates to any category then create a general Label link and name it "Miscellaneous"
  6. Use no more than two or three labels for each post

That's all I had to share. If you wish to know how to create labels in BlogSpot blogs and how to organize, delete or add labels then kindly read this post:

1000+ Background Patterns For Blogger Comment Box!


backgrounds and patterns
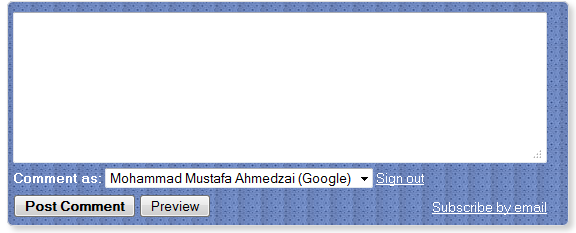
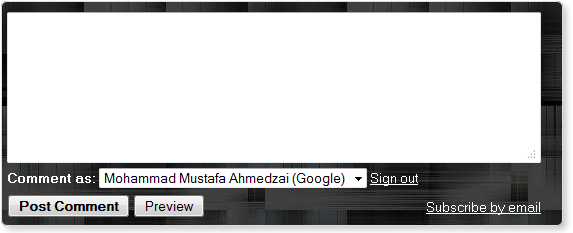
Whether you like flowers, Christmas, EID, Greenery or Dark and light backgrounds then thankfully now you give any color and look to your blogger comment forms. The code that we previously released can be used to give any background pattern to your comment box you like. Some patterns were created by us and the rest have been taken from other sources. To add a different background pattern of your choice you can then search for it at BackgroundLabs which is an excellent resource for free backgrounds and patterns. You can choose from thousands of different flavours of background categories. The steps of adding them is extremely easy. Lets get to work then!


Blogger Comment Box Series


3. Over 1000 Background Themes For Blogger Comment Box!


NOTE:


1) If you wish to try different mouse hover effects and add Admin and Spam Icons to your Comment Box then kindly read: Customize Blogger Comment Form


2) If you wish to Replace blogger comment form with Facebook Comment Box then read : Facebook comment Plugin For Blogspot


Add Background Theme To Your Blog


  1. Go To Blogger > Design > Edit HTML

  2. Backup your template

  3. Click the "Expand Widget Templates" box

  4. Search for this,


]]></b:skin>

    5.     Just above it paste this code,


#mbt-form iframe{

background:#ffffff url(IMAGE-LINK) repeat;

border:1px solid #ddd;

-moz-border-radius:6px;

-webkit-border-radius:6px;

box-shadow: 5px 5px 5px #CCCCCC;

padding:5px;

font:normal 12pt "ms sans serif", Arial;

color:#2F97FF;

width:560px; height:213px !important;

}

#mbt-form a{

color:#fff;

}

Replace IMAGE-LINK with any of the backgrounds you may choose from backgroundlabs website or the ones I have shared below.

To change the HEXADECIMAL color of the text "comment as" simply change #2F97FF and to change the width of the box then edit width:560px .

     6.    Next search for this,


<div class='comment-form'>

     7.   Replace it with the code below,


<div id='mbt-form'>

    8.   Save your template and you are all done!


Backgrounds and Patterns


Happy Christmas Background


IMAGE LINK:

http://www.backgroundlabs.com/backgrounds/318.jpg

Christmas Comment Box

GARDEN


http://www.backgroundlabs.com/backgrounds/40.jpg

garden

AQUA


http://www.backgroundlabs.com/backgrounds/434.gif

aqua

BLUE OCEAN


https://blogger.googleusercontent.com/img/b/R29vZ2xl/AVvXsEj4kbZxqU-vpbGNodS_ea1OzG0CYDbguXKNCU6u2Nr7BAbhj1s4sp9eBZwBooAZNKRb-ucEIeGztkqt5lp1UHPk0uVY6kleq6r-WuaO7S_hHm2QpemnCJWuGjRo9nWFFCFqQZ0zysiy6wHb/s400/1.png

blue ocean

CHECKER


https://blogger.googleusercontent.com/img/b/R29vZ2xl/AVvXsEinK1506cBkxeQ4JGjpsd25KxClLXlEuWky6tO3aAomMhzW9ZMratx2D9FfsEHLfwQoy5cVD4qo2IoiTRr1r1Q61tY7IiOB-kVYtMbHbKzWAjKZ_uG58CYe6uI01D3MGwXoqauEhJ5PxKab/s400/2.png


checker


CHALK


https://blogger.googleusercontent.com/img/b/R29vZ2xl/AVvXsEg0Se50qx9f0IGGUDG_Wc1fPZ7-ebQK7qfxJ42uqQH1Rw2Qi26EjFOnFBSM1Pxbm2CQ1fYI6foV9EhuOfw6ICzFtcPMlm-xqhW06dp5XJUZyLFMYtGgN8pgychZozsj1h_gqUF1K3UUwh_L/s400/4.png

chalk

WOODEN


https://blogger.googleusercontent.com/img/b/R29vZ2xl/AVvXsEgoGQ9QUlGHRimZfTBg84YqSYX9ZLcCIBhRQN5tcaGUGVZ4Bt9kNHLCBsdDGY98RnPXLVgb9CRXymcXi1bsEbaNv54xVz9IQHO6Nk1kupC3oucRiw1D20yh0YVcoQQcnMuVc3TNEyX7BuGd/s400/7.png

wooden


Blocks


https://blogger.googleusercontent.com/img/b/R29vZ2xl/AVvXsEh3CSWbRYH_NENc14o-fVWMrwGaiF3uKHp0CwWSZZEFbAGiArA2KfedmuOhvy6TQzIX-UF3hqwKwDAPgvkZqFleSlmlyDGgYEzln6i0SGzH5PfivDRtYU48BT3V16QLW6w7UiVdnSWwRnq_/s400/9.png

blocks

TILES


https://blogger.googleusercontent.com/img/b/R29vZ2xl/AVvXsEg7_HvJ9mPulbVrkxkSjWGMChYcB-OEKvDCTqNt7EkNj_989fYhKSpjqEx-vZEeoBhCYokJuMjTqD69psHRB4HfTPwOK8wFLo1OJ98vL_JoEQqeFxJV9s6g9OvTEBU1SdKWUTlCXaRpjNEE/s400/8.png

tiles

METALLIC


https://blogger.googleusercontent.com/img/b/R29vZ2xl/AVvXsEgte6Fza94WG4VE-rs9kv8vBLfytytBItAJXW53gfEJO_FzxSw6IVSG2fm_GxvvigVvlxL9qLRcXb7IR7vy_TxwJusY_rl0eQ_gVciJ5Op26VviM4XRXsvUtq2S4Vu_o79fs26nhNfH9rwb/s400/12.png   

metallic


What is Next?


I am a little busy these days else I would have presented some more excited variations of the same trick. In this weekend or next I will be sharing ways of branding the box with your blog layout. You can add your logos and other animated images to the comment form making it completely different in every style. Stay tuned.

How To add Social Media Links To Blog Feed?

feedflareAdding social media links to Feedburner feeds is really important in order to increase the chances of getting more and more social votes. Whether it may be a stumble, Facebook like, a Digg , Save to Delicious or +1, each link has its own importance. Feedburner Feedflare option even lets you add a "Email The author" Link to your Feed posts. Your readers can easily email you after reading your post either on their Feed Reader or Inbox. This interacts a reader more with the author and helps readership grow. Most of my readers often contact me via the same Author link that appears below blog post that I share.  The steps are extremely simple. Kindly do this,


  1. Log in to your Feedburner account
  2. Go To Optimize Tab
  3. Choose FeedFlare
  4. Activate it
  5. Choose the social services that you like. I recommend Email this, email the author, Stumble it, Save on Delicious, Share on Facebook, Digg this, Add CC license and add to Mix.

social media links in feeds

  1. Hit the Save button and you are all done.

Visit your Feed Link to see it appearing at the footer of each of your blog posts. View my feed page as an example. Click here

Stick Hand Written Signature Below every Blogger Post

hand written signatureTechnology has developed enough that you can now convert your hand written signature into a digital one with simple online tools. Mylivesignature is a great tool that lets you create a digital signature for your self. You can change its font size and font color along with font type and signature slope. You can try using the wizard or their free hand tool to sketch your signature in natural way. However I would prefer the wizard tool which helps you by providing several editing options like font color and background color. Click here to create one now!

After you have created the signature, right click the image and choose "Save picture as" Then Upload it on blogger and follow these steps to add it below every post,

  1. Go To blogger > Settings >Formatting
  2. Inside the Post Template box paste the following code,

<div style="float:left"><img src="Signature-Image-Link" border="0"/> </div>


   Replace Signature-Image-Link with the URL of your upload image. 

3.    Click the save button and you are all done. Now you can see it appearing below each post of your BlogSpot blogs. However if some of you are looking for a way to add twitter headlines along with social media buttons to your Gmail signatures then I guess you should really try wisestamp. there you even create signatures with social media buttons and Twitter feed in hotmail, yahoo and AOL. I hope you find this post helpful.

Blogger Comment Box Black Background Theme


blogger comment boxI will be publishing several pattern themes for Blogger Comment form this month. Everything looks good when you present it in a way that may seem appealing. I would accept that BlogSpot blog does not have a good commenting system but you can use the same Comment box and turn it into something creative and far beautiful than the comment forms of WordPress blogs. Customized Blogger Comment boxes was amongst MBT's many innovative shares and today we will take a step further by releasing different color themes by using different patterns of images. Modern CSS3 properties like box shadow and rounded corners will also be applied to the comment body to make it stand out. So lets try our first theme of the month which is named "Black Theme"


Blogger Comment Box Series


2. Comment Form with Black Background Theme - Just like ours!


NOTE: The custom codes styles discussed below are the most I could try. No further customization could be applied like changing the font size and color inside the comment box though I managed to change the text and link color outside the text area. Hope you will like it.


Apply Black theme To Comment Box


  1. Go To Blogger > Design > Edit HTML

  2. Backup your template

  3. Click the "Expand Widget Templates" box

  4. Search for this,


]]></b:skin>

    5.     Just above it paste this code,


#mbt-form iframe{

background:#ffffff url(https://blogger.googleusercontent.com/img/b/R29vZ2xl/AVvXsEirhrWVSly4bnqvHswyofPv_UHIzmITvBsNvQuIyhDYJk5m8lDb5U-XhWZy5vFlNeHzwWyhGgPp2_4sn_731L17m5aWCwYkN7BA5ZdMRp2ZJ0SuDE3YlA7PgpGOc6pWymjJuqfhjRK1ZGki/s400/11.png) repeat-x;

border:1px solid #ddd;

-moz-border-radius:6px;

-webkit-border-radius:6px;

box-shadow: 5px 5px 5px #CCCCCC;

padding:5px;

font:normal 12pt "ms sans serif", Arial;

color:#2F97FF;

width:560px; height:213px !important;

}

#mbt-form a{

color:#fff;

}

To change the color of the text "comment as" simply edit 2F97FF and to adjust the width of the box then edit width:560px  Leave other things as it is for better and clean look.

     6.    Next search for this,


<div class='comment-form'>

     7.   Replace it  with the code below,


<div id='mbt-form'>

    8.   Save your template and you are all done!

Outcome:

black theme

More variations will be released soon. If you wish you can check my old tutorial for previous design codes. We are designing some unique patterns and I am sure you will like them. For the time being I would rather prefer keeping you all a little thirsty for new designs to arrive. Till then enjoy this new look of your comment forms. Have fun buddies! :)

How To Shift Sidebar Column To Left or right?

SHIFT SIDEBARSThis is just a short but extremely useful trick for all those who wish to change the position of their Post body and Sidebar wrapper. Normally most professional layouts have sidebar arranged to the left but E-commerce blogs or other business blogs look good with left sidebar column. In order to keep your blog layout according to standard rules then you may like changing the position of vertical dv segments in your template. If you want to shift your sidebar to left or right or swap sidebar and post body position then you can easily do this using the simple setup guide below.


Shift sidebar Position In Blogger

  1. Go To Blogger > Design > Edit HTML
  2. Backup your template
  3. Search for this code or a similar code like this,
#main-wrapper { float: left; width: 600px; margin: 0; padding: 0 0 20px; }


Replace float: left;  with float: right;

You have now successfully shifted your post body to right now you need to shift your sidebar column. Search for this,

#sidebar-wrapper { float: right; width: 320px; margin: 0; padding: 0 0 10px; display: inline; }

Replace float:right; with float: left;

You have successfully shifted your sidebar wrapper. View your blogs to see a magic change.  HAVE FUN! :)

How To Find Sponsors For Your Blog?

find advertisersTo answer this question first and foremost ask yourselves why should an advertiser choose your blog? why Should he spend money by advertising his product on your site? What benefits or to be more precise what value does your blog provides to the sponsor? How can you guarantee that his product wont get neglected if he chooses to buy an Ad Spot on your blog? Too many questions but a simple logical answer to all of them and that is provide him with Quality. Read on to understand this logic.


What do Advertisers Look For in your Blog?

The biggest misconception in the minds of web owners and newbie bloggers is that if you have consistent and huge amount of traffic then you are the Man!. The bigger your traffic value the hotter your pockets. Yes that is true but for AdSense alone. The fact for direct Sponsors is entirely different from this propagated set of thinking.

Advertising services like Chitika, Adsense and Infolinks require nothing from you except huge flow of traffic. You surely earn more when you receive great amount of traffic because your Click through rate (CTR) depends on the number of unique visitors and page views made per day. So if Adsense is happy with you then does this means that even Buysellads will give you a thumbs up? The answer is a straight no!

BuysellAds is an advertising service which connects Publishers directly with advertisers. You create Ad Spots on your blog and sponsors come and buy that spot from you. BuysellAds unlike Adsense gives importance to a lot of factors which in order of decreasing importance are:

  1. Alexa Rank ($$ Most Important)
  2. Subscribers and Facebook Likes (Readers)
  3. Page Impressions (Traffic)
  4. PageRank (Trust)

As you can see clearly Alexa holds the most important position followed by your readership no matter whether they are RSS readers or Facebook followers. Page Impressions give an idea of how much traffic you are receiving. If your Page Impressions are greater than 100,000 then it means you are receiving 5000+ pageviews daily which means 2000+ visitors per day. Finally comes the PageRank which has the least importance in the eyes of Advertiser.  Lets now discuss in detail why Alexa is  so much important?

Why Advertisers Value Alexa so much?

advertisers value alexa rankAlexa is an algorithm which is based on the use of Alexa toolbar. This toolbar provides hottest news headlines around the globe and provides you with easy shortcuts to important websites and social networks and resources. That's why it is so popular. Bloggers and journalists often get topic ideas from the news headlines popping in their Alexa bar. This Toolbar is different from any other toolbar. It also tracks which websites are you viewing and how much time are you spending browsing different sites and blogs.  If you have Alexa toolbar installed and you are reading my blog then indirectly you are benefiting me by telling Alexa team "Hey I like MBT Please rank it higher!" and when more and more people visit my blog provided that they have Alexa toolbar installed, I rank higher and higher. As simple as that.

Quick Note: Alexa Rank is good when it is low and bad when it is high. A Blog With Alexa Rank 10k means that only 10,000 websites are better than it. A blog with Alexa Rank 100K means that around 100,000 websites are better than it. A site with Alexa Rank 1 or 2 means that it is the best site found online. No website is better than the one with Alexa Rank 1.0. So a smaller Alexa Rank means higher ranking.

Alexa tells advertiser whether a site is receiving quality traffic or not. By quality traffic I mean people having good tech knowledge, people who enjoy shopping online and people who enjoy reading about new and latest technology updates. These are the people Advertisers are looking for! Alexa toolbar as I said is usually used by webmasters, web owners, journalists, bloggers, technology analysts and everyone who loves being techy.

Alexa does not depend on how much visitors you receive daily. You can receive thousands of visitors per day and yet having an Alexa rank of 100k (Not Good) and someone else could be receiving just 1000-2000 visitors per day and still having an Alexa Rank of less than 15K(Great).

How come Traffic is not important?

It is but Traffic is not the sole backbone of a successful blog. If you have no readership and site rankings but still receiving thousands of visitors per day then your site offer no value to the sponsor. Why? Because it is mostly your blog readers that buy a product after you recommend it and it is usually your shining Alexa Rank that tells a Sponsor "Dude I offer people with credit cards!" If your Alexa Rank is 50k or above then it means that most of your traffic or general audience are teenagers and college boys, surfing for fun and entertainment with no intention to shop online. Thus offering no returns to the sponsor.

You can find a lot of blogs with tons of daily visitors and even good PageRank but with no impressive Alexa rank. The answer as I said lies in offering quality and not quantity. Blogs with no readership, Facebook followers and rankings such as PR and Alexa, offer no value to the advertiser.

How To Improve Blog Rankings then?

blog ranking

Write less but write best. Do not spam search engines with short and duplicated content. Most technology blogs share the same summarized content and circulate it by writing the same post in short paragraphs. Write for your readers and force them to stumble and bookmark your content. Do not worry about Revenue during the initial one year of your career and do not add too many Ads on your blogs. Attract and keep attracting loyal readers for continuous one year. Write at least two posts per day and add social media buttons every where on your blog. Keep post frequency constant and keep tracking your Alexa Rank. Build your network and expand your circle. Do exchange links but at most with 5 quality bloggers. Write unique posts with at least 300 words to avoid Google panda effect.

Final Advice

No one can claim to be successful because there are always bigger names ahead of you but do always keep a closer look on what they do and learn from them. Be polite in tone and always consider yourself a student and never a master. Be patient because a fruitful result does demand time. Give your self a one year of struggling period and track your performance consistently. Do not give up hope if you loose a Rank, just keep posting regularly and write on new and latest topics. Think of what Internet audience would like and always write on current happenings. When Christmas is near then write on posts related to Christmas and when EID is near then write on things that would attract Muslim visitors. 

Genius are you my friend! Just realize your inner strength and potential and utilize your time smartly. May you achieve what you always dreamt for. Wishing you love, peace and a happy successful life online. Peace buddies! :>