Showing posts with label Webmaster Tools. Show all posts

Create mobile-friendly websites in just a few clicks with uKit!


uKit is an advanced Website builder that Lets you Create Business Websites with a simple Drag and Drop Interface. A complete framework with excellent 24/7 Customer service and support


Design Mobile Responsive WebsitesTechnology is developing rapidly and so is the usage complexity with several new Web tools and Mobile apps. Since more and more internet users are turning into webmasters and publishers, the need for an easy-to-use and drag-and-drop website builder is the biggest demand today. Not everyone is well versed with the technical side of designing and developing a website and not anyone can afford the expensive costs of hiring a web developer.  For people who lack coding skills, we recently came across a Web application called uKit, that really impressed us a lot. The website code that uKit generates is semantic, standards-compliant and highly optimized for SEO. It lets you choose templates from several themes, you can edit and customize your website by simply moving elements around and publish it within seconds. No headache of Coding, Webhosting or Optimization is involved. uKit is so far the simplest solution for Small Startup Businesses to kick start their online business dreams by focusing only on their clients/customers without wasting precious time on website development. It lets you create a mobile friendly and responsive website within seconds without any coding skills required.

The video below explains it all:


What Makes ukit unique?

uKit became available to the public in May 2015, offering a free 14 days initial trial, which gives you the opportunity to fully enjoy the system's capabilities before applying for a premium package. If you have any questions or need fast assistance you can directly contact their Technical Support. They also provide Live Customer Support inside the Admin Panel of your Website, and its only thing that outstands them from others. It's surely not a Fly-by-night company but managed and marketed by a corporate firm with an amazing customer service.

They also have a Official Blog where they keep the community informed of recent updates and backstage news.

No business should be trusted unless it has an active customer support or offers a free trial. You can test uKit for free for almost half a month before you could decide to finally upgrade with just $4. This again is a prove of their credibility and the reason which forced us to recommend them to all our readers.

15 days free trial 

Wide Choice of Designs & Design Categories

Appearance matters a lot and we have honestly rarely seen such a comprehensive collection of website designs that we found here.

Partial List of Categories are:

  • Emcee for showmen, event hosts and entertainers;
  • Music for singers, bands and other music-related websites;
  • Construction for businesses providing building and renovation services;
  • Nail Design for nail salons and individual nail artists.
  • Exhibitions,
  • Fashion Model,
  • Tattoo Artist,
  • Flower Shop.
  • Several Designs added weekly!

When you are choosing a design in the Dashboard Wizard, you can click on the Preview button to browse all pages of the design, see how it looks on desktops and mobile devices, and decide whether it suits your needs or not.

Choose a Design theme

If you would like to test a certain design more thoroughly, you can also select it and proceed to website editing.

Test Designs

The number of websites per account is unlimited, and you can experiment with designs as much as you need.

Simple Drag and Drop

For non-techy people, what can be more pleasing than the drag-n-drop feature which lets you to add highly advanced web widgets like Gallery or slider using only your mouse cursor. I really liked this feature because modern portfolio websites or ecommerce sites look great when the landing page has a welcome slider.

Drag and Drop Widgets

Build your Online Store in seconds!

The built-in Business tools like content let you add amazing functions in your website. You can sell products on your website using the ECWID Shopping cart option

Eccomerce tools

you can also collect customer feedback using the Reviews plugin tool and do much more!

Customer Reviews Tool

Strong Backup system

ukit Backup Archive

Unlike Wordpress and Blogger CMS, uKit provides a much better Support for Automatic and Manual Backup. You can manually save your changes before making a new customization. You can then access it anytime through the backup archive. The Automatic Backup function is direct access to the saved copies. It allows you to replicate your site in its previous or earlier states in case you decide that the current one is for some reason not the ultimate one.

What are your Views?

We will keep on sharing such valuable resources to help our community as much as possible with the most trusted, industry-standard tools and applications that may make your online journey even more worthwhile.

Let us know buddies, which feature of uKit inspired you and what are your views on using an automated CMS system like the one we shared today. Is it worth wasting hours on web development or is it much better to invest that extra time in developing your business and Client base and let a tool like Ukit handle all the technical side?

Do share your precious views with us :)

Can Someone Steal Ownership of your Site in Webmaster Tools?


Site ownership

For webmasters, verifying ownership of their website is very important, since it establishes an official connection between you and your website. It is one of the factors among many others that decides a site's trust. Every webmaster has to get his site verified in Google Webmaster Tools to help Google recognize ownership for that site, and provide some advanced tools to the webmaster. But there's one thing that might concern a few people regarding ownership. There are many blogs and websites where people who aren't the owners have access to the site's source code, at least the <body> part of a website. So what if someone adds a meta tag with the body tag and steals ownership of your website?


People who have rights to post on your blog, and even people who comment have some level of access to the body section of your website, since the content they create goes into the body tag.


Usually, website verification require you to add a meta tag to your site. This meta tag is provided by the service you're verifying from, and you, being a website owner, can add this meta tag to your site's source code (usually the head section) and get your website verified.


So what if people who don't own your site add a meta tag for website verification in the <body> section of your website?


As Google's Matt Cutts clarifies, Google only checks for meta tags embedded into the <head> tag of your website. And the head does NOT mean the header. The head contains all the definitions, stylings, rules, and so on. And it is where meta tags should be added. Meta tags with the body don't make much sense.


So as long as others are only editing your website's body section, you needn't worry about any attacks or verification attempts, should any be made. But if you're giving others access to your site's head section, then you should think again by granting such permissions.


If you found anything confusing, please do let me know. I'm here to help. Cheers :)

Google Explains How To Use Search Queries in Webmaster Tools


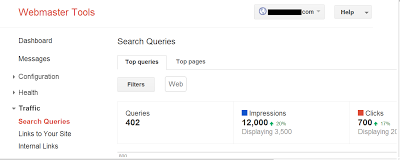
Search Queries


Google Webmaster Tools is a great friend to bloggers and webmasters. It hosts a great many features, and provides a lot of help to both beginner, as well as advanced users. For example, the URL parameter customization tool helps optimize your URLs, you can use Google Webmaster Tools to get advanced index reporting, and so on. The list of features is long and distinguished. Have you ever wondered about what the Search Queries feature under 'Traffic' did in Webmaster Tools? You can use some of the information provided to improve your site. We'll talk about this Search Queries feature in today's post.


In a typical search engine environment, there are three phases. Crawling, Indexing, and Ranking. The ranking includes putting pages on top of search results etc. Search queries have more to do with ranking than anything else. Even though ranking is important, you must keep in mind that it isn't only part of the process. There are a lot of other factors too that contribute towards conversion. With that in mind, let's look at this video from Google, and then talk about Search Queries in Webmaster Tools as discussed by Google.


Search Queries terminology


For beginners, it is important that they know some of the basic terminology so often used in the field. A Query refers to a search word or term that the user enters in the search bar. If your website comes up in the search results visible to the user, then it counts as an Impression. If the user clicks on your site after seeing its impression, then it considered as a Click. Now you must have often heard about CTR, or Click-Through-Rate. This is the ratio of your Clicks versus your Impressions. A low CTR would mean that users see your website, but don't actually open it, since it's not appealing to them.


Another term often used is Qualified Traffic.This refers to the users who clicked on your website, and actually found your content useful. This could be shown by the number of conversions you are getting, such as ad-clicks, sign-ups, subscriptions, and so on.


Investigating Search queries


Search Queries


Understanding your audience


This should be the key focus of any business, online or otherwise. You can use Search Queries, and then go to Filter to see the breakdown of your audience. By default, the filter is set to 'the web'. If you click on it, you will see how your audience is divided. You can then use this information to tailor your content for specific audience. For example, if most of your audience is from the U.S, you could do a special feature that applies to people living there.


Common questions you could ask yourself while targeting your audience are; who is your audience? Where are they located? What age group are they? What are their interests? How do they browse the web? Does your content match up with the queries they enter?


Check your Top Queries


When you go to Search Queries, you'll see a tab labelled 'Top Queries'. Open it, and then Sort by Clicks. This is a nice little feature that will let you know what your top queries have been for a defined time period. You could then create more content based on those queries, and introduce new ones like them.


Another good approach for investigating queries would be to take a notice of the changes that occur to your queries over different periods of time. For example, some businesses might see an increase in traffic near holiday seasons. Currently, you can only see history for three months. We'd recommend you download your data every three months to keep track for longer periods of time.


If you sort your queries by CTR, you will be able to see where your website is making an impression on users, and where it isn't. A low CTR would mean you need to work on those specific queries, whereas a high CTR means you need to learn and apply from the better performing queries.


Checking your top pages


You also have a 'Top Pages' tab in Search Queries on your Webmaster Tools dashboard. You can apply sorts over here as well. Sorting by clicks will let you see what pages have gained traction, and which have stalled. A strategy can then be set up to improve upon the pages who have very few clicks.


With the top queries, we used sorting based on clicks and CTR. But with your top pages, sorting with clicks and impressions sounds more relevant. Now impressions might not always bring in clicks, but the user does go through their abstract, or at least looks at its heading. Pages with the most impressions are usually the highest ranked for certain search queries. So once you know what your most valuable pages are, you can pivot their potential, and use them to feature your other pages that re low ranked, but maintain quality and are related to the high-ranked pages.


Sounds reasonable? You can use these simple approaches to take your business out of the middle lane, and onto the fast one, because that is the aim of every business out there. If you liked these tips, then do share them with others. Also tell us what approaches you are using. All the best :)


URL Redirection for Demo and Download Links in Blogger

url redirection in bloggerLooks like every time we get a new project from university, we get a new idea to implement it on BlogSpot blogs. Last year we were given the task of developing a twitter clone social media network. We made extensive use of HTML Data-[content] attributes and this led us to create custom Iframes to redirect demo and download links in blogger. Most of twitter's user-interface objects are controlled using this parameter and jQuery built-in functions. We will use the exact same approach to control link redirection in blogger without the need for any web hosting account or complex web scripts. This Blogger plugin is indeed the first of its kind. We just hope this small effort proves useful for all Blogger users especially those who share download resources with their readers.

Update: Links will now also open in new tab. Problem fixed.


A special thanks to my classmate "Ahmed Nasir" who is a genius programmer without any doubts.

DEMO: Click the Demo and Download links and observe the URL in address bar.

Salahuddin Ayubi

Demo | Download

How it works?

Today's tutorial will help you to append all specified outgoing links next to your domain address by using dynamic string concatenation technique. The visitor would feel like he is visiting a new website but your domain URL will remain stick in the address bar.

This plugin will enclose the body layout of your blog with a custom stylesheet specified by the ID "MBT-REDIRECTION". We will then create two static pages. One for Demo page and one for download. Both these pages will contain an iframe tag with vacant source location. Using JavaScript we will inject a custom stylesheet that will cover the entire space between the two body tags. The JavaScript will also make sure no scroll bar appears in the window.

For the concatenation to work the link or button you create must include a Data-[content] attribute. Using Jquery we would pick the href location as string and then concatenate it next to the link of your Demo or download page.

With all that said, lets get to work. Kindly follow the easy steps below:

1. Create Demo and Download Pages

  1. Go To Blogger > Pages
  2. Create a Static Page with title Demo or any name you prefer
  3. Switch to its HTML view mode
  4. Replace the code inside it if any with the following code:

<div height="100%" id="iframe-container" width="100%">

<style>

body { padding: 0!important; background: none!important; }

#iframe-container { overflow: hidden; background: none!important; }

#frame { border: 0; }

</style>

<iframe frameborder="0" id="frame" src="" width="100%"> </iframe>

</div>

<script>
document.documentElement.style.overflow = 'hidden';  // firefox, chrome
document.body.scroll = "no"; // ie only
var query = window.location.search.substring(1);
query = query.replace("url=", "");
$('#frame').attr('src', query);
var str = $('#iframe-container').html();
$('#MBT-REDIRECTION').html(str);
$('iframe').height($(window).height());
</script>

  5.  Now setup up your blogger post editor settings. Click options and then under Line Breaks, choose "Use <br> tag" Hit Done.

post editor options

    6.  Save your page

   7. Now create another page with the title "Download". Repeat the exact same steps from Step#3 - Step#6

Note down the URL address of both these pages. We will use them later.

2. String Concatenation

Now we need to enclose the body tags and add an extra piece of jquery code inside the template that will do remaining half of the magic.

  1. Go To Blogger > Template
  2. Backup your template
  3. Click Edit HTML
  4. Search for <body>  or a similar by searching just <body
  5. Paste the following code just below it:

<div id='MBT-REDIRECTION'>

   6. Next find </body>

   7. Paste the following code just above it:


</div><!--MBT-REDIRECTION ENDS-->

    8. Now search for ]]></b:skin>

    9. Paste the following Jquery code just below it:

Update: Script updated

<script>

//<![CDATA[

$(document).ready(function () {
    $('[data-MBTdemo]').click(function (e) {
        e.preventDefault();
        var target = e.target || e.srcElement;
        if ($(target).attr('target') == "_blank") {
            window.open("http://www.mybloggertricks.com/p/demo.html?url=" + $(target).attr('href'), '_blank');
        } else {
            window.location = "http://www.mybloggertricks.com/p/demo.html?url=" + $(target).attr('href');
        }

    });


    $('[data-MBTdownload]').click(function (e) {
        e.preventDefault();
        var target = e.target || e.srcElement;
        if ($(target).attr('target') == "_blank") {
            window.open("http://www.mybloggertricks.com/p/download.html?url=" + $(target).attr('href'), '_blank');
        } else {
            window.location = "http://www.mybloggertricks.com/p/download.html?url=" + $(target).attr('href');
        }

    });

});

//]]>

</script>


  • Replace the orange highlighted code with the URL address of your Demo page.
  • Replace the green highlighted code with the URL address of your Download page.

      10.  Save your template and you are all done!


Now if you try visiting your demo and download pages you will find out a blank page with no content inside it. That's what our code does, injecting custom stylesheet by over riding the default template styles.

3. How to create Links?

Now when you have done all the development part of the tutorial, we come to a stage where we will learn to implement the functionality.

You will create links as you normally do and the only extra piece of information that you need to insert in them are the Data-Content attributes. This is how you need to do.

For Demo Link or Demo Button:

<a href="#" rel="nofollow" data-MBTdemo="true">DEMO</a>


For Download Link or Download Button:

<a href="#" rel="nofollow" data-MBTdownload="true">DOWNLOAD</a>

  • Replace the hash symbol (#) with your demo or download link


Update For Links opening in new tab

I have modified the code by using a conditional if statement that will open links in new tab if target="_blank" attribute is found else it will open the page in same window.

<a href="#" target="_blank"  rel="nofollow" data-MBTdownload="true">DOWNLOAD</a>

You can use redirect as many links per page as you want. The code is efficient enough to pick even an array of data-content attributes.  That simple!

You may now redirect any link inside your blog back to your domain address by giving a pro touch!  

Copyrights

The HTML code and all scripts in this tutorial are the sole property of STC Network. You may not sell the plugin nor affiliate the work to your brand. Developers are requested to link back to this page as the only favor in return if they wish to share the plugin with their audience.

Need help?

If you face any trouble while installing the plugin then please let us know. I just hope that this method of redirecting external links in blogger back to the root domain would help all those webmasters who share resources such as, ebooks, wallpapers, templates,. icons etc. You can even use it to redirect affiliate links! Please let us know if you would like further improvements in the code. Wish you a great blogging experience. Peace and blessings buddies :)

Wordpress 3.5 Upgrade Errors: Forgot to Backup?

wordpress upgrade errorsWordpress version 3.5 recently got released and just like always, many webmasters are striking their heads against the wall due to newly introduced database errors. Wordpress emphasize greatly to backup your database before making any change but most often we forget to backup and click the Upgrade button in hurry- what follows next is a horrible nightmare for those who are not well versed with MySQL database management and error recognition. I recently got into the same trouble while updating our sister blog i.e. Smart Earning Methods.  I forgot to backup the database! Fortunately we receive schedule backups on our Email daily and this was no less than a blessing. The site I updated to WP 3.5, got messed up with plenty of Query errors all pointing to the plugin directory.

As a PHP developer, fortunately it was easy debugging these errors and restoring the database back to its normal working mode. We would share some tips here that will help you in fixing such errors no matter how big or small your problem be, the tips are enough to put your site back to work even if it gets hijacked or entire database gets deleted or crashed.


Things To do Before Upgrading Wordpress


1. Always Take Backup of Database Manually

There are several ways to take wordpress backup. The simplest and best way is to do it manually i.e. Through PHPMyAdmin. I never rely on plugins when it comes to Database and I suggest the same for everyone. However for schedule daily backups, I do make use of a plugin called WordPress Database Backup.

To backup your database through PHPMyAdmin there could be no better tutorial then the one given by the Wordpress Folks themselves:

2. Email the Backup Copy To your Gmail, Hotmail or Yahoo Account

In order to ensure the backup you saved does not get infected while it stays in your hard drive. Its always wise to take two backups and store them on different locations. I normally keep one online using Gmail and one on my hard drive. You can either use the plugin I suggested in step#1 for Scheduling backups to email you the backup file or you can manually email yourself a copy of the backup you saved in step#1.

That's all!

Summary:

*Take backup of your Wordpress Database through PHPMyAdmin and save the same copy both online and offline.


Things To do After Upgrading Wordpress
Update Plugins!

Before even visiting your website to see how it looks after the update you must first update the plugins in you installed. Plugins with available updates would be clearly visible in the notification bar. Simply go to Plugins Tab and tick the check boxes next to all plugins and then select update from the drop down menu and hit Apply. All done! Visit your blog site now to see it working just fine. :)

update plugins


Fighting Plugin Errors

Its very common to see several MySQL errors displaying on your Homepage or Post Pages just after you make the update. This often happens because most Plugins also require compatibility update whenever a new version of Wordpress is released. Most often the developers fail to update their plugins in the wordpress repository. As a result when the new version is rolled out, plugins that aren't updated would fail to function properly and therefore you would see several errors on your screen. These errors look like the following:


Call to undefined function deactivate_plugins() in

/home/xxxx/public_html/xxxxxxxx.com/wp-content/plugins/commentluv/commentluv.php on line 56

The above error occurred for Commentluv plugin. The name of the plugin will be clearly mentioned in your errors and that's what you need to note down. A Plugin error will contain the Plugin  string.

Simply not down the plugin name and go to Plugins Tab to deactivate it. Once it is deactivated/disabled visit your site to find it working just fine. Repeat this process for every single plugin that may be causing issues.

Fighting Database Crash and Hackers

Probably this is the worst nightmare for those who often limit backup to database alone. there are two important things to backup when we talk of safety. They are:

1. Backing Up your Entire Wordpress Site

A database only includes your posts, comments, archives, categories, tags and other configuration data. It never saves the following most important media on your site,

  1. WordPress Core Installation
  2. Plugins
  3. Themes
  4. Images and Files
  5. JavaScript and PHP scripts
  6. Static Web Pages

So imagine a webmaster who sleeps peacefully every night thinking he is all safe because he keeps a daily backup of his database but in fact he is the one who is truly shattered when his site gets hijacked by unwelcomed intruders. He may succeed in saving a copy of the database but what about the site's images, JavaScript, PHP and stylesheets which are the rich elements that give true shape and color to the site?

Therefore you must always keep a backup of this rich media on your hard drive. There are several ways of backing up your entire wordpress site. I wont mention them here because there are several tutorials already written on this topic. The best tutorial so far being the following:

Your webhosting company keeps a backup of your site but you are never sure how fresh that backup copy is. Therefore to be on the safe side always run a Site backup at least once a week. It surely take hours to complete even with FTP, depending on your site size! :)

2. Backing Up Database

A database is the collection of all your site records in the form of tables. Its saves your posts, pages, comments, categories and other related data in well organized collections of tables. When you update, delete or insert any stuff in your wordpress site you are only running queries at front end in MYSQL database using your dashboard as the interface.

Backing up database means keeping a copy of all such important information of your site in a safe folder. A Database never contains your site images, stylesheets, scripts or other resources, it only saves text based records of your site.

We already discussed how to backup database manually using PHPMyAdmin.

Are you safe now?

Well if you have a backup copy of both site and database, then of course you can relax and enjoy your cup of coffee even if the site gets hacked by a moron!


Questions?

If you recently trouble-shooted yourself with any such mishap then feel free to post your query below and I would try my best to respond promptly. I just hope your online journey continues without bugs and errors. Happy wordpress 3.5 experience to all. Peace and blessings buddies! :)

How to Help Google Webmasters Know if your Site is Hacked?


website hacked labelThese days when online earning through blogs and websites is turning into one of the most appealing businesses, there are unavoidable risks of getting your website been hacked. How about malicious content been injected on your website, forcing your readers to never come back to pay a visit? The thought is itself awful, isn’t it? A good news is, Google has lately announced that it has some solutions for those webmasters who are the victim of website hacking.


As I have been saying in my previous posts, Google is smart enough to keep a track of everything, all the time and hence according to the new policies, the site that would be detected as a “hacked website” would be displayed with a warning message “This Site may be compromised”. This has been done to ensure safety of the users who might find the affected site in the search results and find themselves been overloaded with the malicious content.


What makes this news worthy to read is the fact that as a blogger, it is important for you to find whether your blog/website is at risk or not, because in case, it is, then there are wide chances that your website becomes a source to distribute the malicious content among your devoted readers. Moreover, when Google realizes that your site is compromising to facilitate the distribution of malwares, even your site would be having a warning indication in the Google search, affecting your page ranks and your earnings terribly. Therefore, Google has advised all the webmasters to verify their site in Webmaster Tools. Although there are some specific tips for preventing and removing malware from your site, it is still better to be on a safer side to avoid going through a bad phase in business.


A disease can be cured only if you predict it right; however, a dilemma here is that most of the Webmasters do not actually realize when their sites have been infected with the injected malwares. To overcome this, there are two common ways that can help in letting you know that there are malicious third- parties on your website. Let us first see these two ways and then we will talk about how to get your site cleaned from this unwanted mess.


1) Injected Content


As a blogger, you might know by now that what actually these hackers aim for, yes, all they want is to drag your potential traffic to their own sites. One common attempt of doing so is to influence search engines by injecting the links of their sites. This is done way too intelligently where these links are hidden, making their detection difficult by the webmaster. For example, injected malwares appear with your content, making it difficult for the webmaster to identify that he is a victim.


clip_image002


Solution:


Making it easier for you, Google will diagnose all the sites for such injected content, and if your site is one of them, you will receive an e-mail about the notification of this detection. If you would find the content risky, you can then use Fetch as Google tool to check the content of your site.


2) Redirecting Users


There would be hardly anyone who would like to be redirected every time when he visits a site. A good way to hack a site is to redirect its users to malicious sites. This is what the users really hate and might never return to your site in fear of getting redirected again to spammy sites. Again, this can be done in several ways where the hacker might target the viewers who access your site through their mobiles or those who are coming from search engines. It was interesting to find that what actually hackers do. They actually modify the configuration files and serve different users with different contents.


 configuration files


Apart from this, such a hacking can also be done by injecting JavaScript into the source code of your site.


javascripts


Solution:


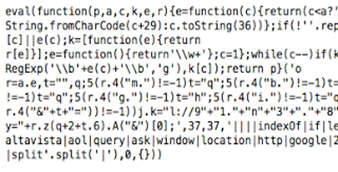
In order to avoid this, you need to keep a track of your server configuration files for such modifications. For the malicious behavior due to the JavaScript injection, the JavaScript may be designed to hide its purpose, helping terms look like, for example, “eval”, “decode” and “escape”.


Cleanup your Site and Prevent Hacking!


With the two common ways stated above, you can get to know whether your site is compromised or not. If you find your site in risk, then it is necessary to clean it up from the changes that the malwares have brought with them, also preventing your site from getting hacked in future again. You can clean up your site by following the instructions given by Google and prevent such compromises too.


However, you need to consider the sensitivity of the matter and must contact the Google team, informing about your site been compromised. For that you need to submit a reconsideration request after you clean up your site. This is important so that Google can then remove its warning label (indicating you as a compromised site) from its search results.


With that, the post comes to an end, We hope that nothing happens to the sites of our readers, because once affected, it really can bring disastrous outcomes.


Best Wishes,


If I quote another source, will I be penalized for duplicate content?


As you all know, Google is pretty hard-up about duplicate content, now more than ever, because an awful lot of blogs and websites have started making money by blatantly copying material from other sources. This not only is unfair to the original source, it also jeopardizes the integrity of search results returned by Google. Hence the stringent TOS (Terms of Service). But what about adding quotations, or sentences/paragraphs quoted from other websites? It does classify as content copied directly from another website. So how does Google treat such content  and is it safe to include it on your website? Well, Google just released a video explaining how Google treats such content.


The issue was addressed by a video from Matt Cutts, head of Google's webspam team. In that video, he talks about the different practices applied by bloggers and webmasters online, and which of them is good and which isn't. You can see the video embedded below.


The ideal case


In an ideal world, people would only copy quotations, or things said by others that they like. For example, quoting a sentence from an author or public figure, quoting someone from their live speech somewhere (chances are, that speech will be copied by someone else too), an announcement, quoting from another blogger whom you find insightful etc. That is how quotes are supposed to work.


If that's the case, and you want to add such content on your site, then you can do it without fear, so long as you link to the original source. Credit should be given where credit is due. Just make sure you put the quotation in a block-quote tag, and everything will be fine.


People often ask, How will Google know whether it's just a quotation, or copied content that could get them penalized? Well, Google has some smart algorithms that will detect whether it's a quote or copied content. Besides, Google might check out your site manually. So don't worry if you've kept your end of the deal, and added a link to the original source and put the content in a block-quote.


When things go bad


Like much else, people are bound to exploit loopholes. Which is why Google is working on leaving as few as possible. It allows you to quote another site. But if you think you're gonna get away with copying an entire article as a 'quote', and then adding a link to the source, then think again. This practice will get you penalized.


Some bloggers also tend to excessively quote in their articles, adding little of value of their own. This will also result in your fall from grace in Google's eyes. So it's best to avoid such practices, and start creating valuable content. As long as you provide useful insights of your own, and quote reasonably with link to the actual source, there's nothing to worry about. Goo luck :)

Use Google's Link Disavow Tool To Remove Bad Links


Disavow Links


Yesterday, we talked about whether or not bad links on your site are worth deleting. The simple answer to the question was, you might as well do it, but it'll be better to adjust your website, rather than trying to bend it. If you've been manually penalized, then this step becomes more or less necessary. But what about the links to your website, which aren't in your control? Luckily, Google has now released a link Disavow tool, which will solve such problems. Quite simply, any unnatural links to your site can be disinherited, or 'disavowed', hence preventing Google from considering them.


Before using


When your website has been manually penalized, you will receive a bunch of messages in your Webmaster Tools, specifying links which look suspicious. You should take your time, and remove as many of them as possible.


If those links are located on another website, you must first contact the site owners, and request a removal of bad links to your website. You should use the disavow links tool only if you don't get any response from the site owners.


How to disavow links?


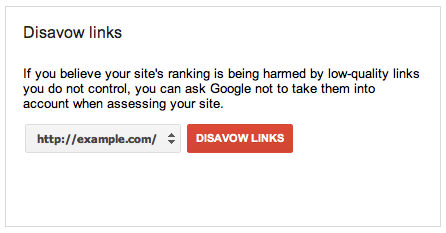
Simply log into your Google Webmaster Tools account, and visit Google's Link Disavow tool. Select a domain from the list, and click on Disavow links. Don't worry, this won't do anything. It will just start the process.


Google Disavow Links Tool


Now, you will be prompted to upload a text file containing a list of all the URL's or domains you want to block out. For whole domains, the format will look like this. domain:example.com. For single links, you can simply put in the full URL. Here is a sample text file from Google.


# Contacted owner of spamdomain1.com on 7/1/2012 to


# ask for link removal but got no response


domain:spamdomain1.com


# Owner of spamdomain2.com removed most links, but missed these


http://www.spamdomain2.com/contentA.html


http://www.spamdomain2.com/contentB.html


http://www.spamdomain2.com/contentC.html


Note: Every different link or domain must be on a separate line. And lines that start with a # aren't counted. You can only upload one file of maximum 2 MB size.


If you need a hand looking for bad links to your site, it'll probably be best to check out Who Links To Your Site in Google Webmaster Tools. Simple go into Traffic >> Links To Your Site >> Who Links The Most >> More. There, you will see a download button where you can download a file containing all links to your site.


When you tell Google to disavow your links, the changes may not be immediate. It could take some time before those links are considered as useless by Google. And Google might not even consider the links you submit if it doesn't trust your submission. Also, if you make a mistake, it might take weeks to rectify, so be careful.


Hope I made myself clear. If there are any confusions, do let us know in the comments below.

Why Breadcrumbs are not SEO Friendly for your Blog?


are breadcrumbs good for blogsNo one knew that a simple Breadcrumb used in the fairyTale of "Hansel and Gretel" would become a website element one day. Breadcrumbs or breadcrumb trail is a navigation system used in websites that offer more usability to the visitor. They appear horizontally above Post titles or below headers. They show user location and tells him what post and which section of the blog category he is on. Breadcrumb provides links back to the pages the user already visited in hierarchical order. Often a colon ( : )or slash ( / ) or even a greater-than sign ( > ) is used as hierarchy separator.  These are now widely used by blog owners in both Wordpress and Blogger platforms. Unfortunately Breadcrumbs destroy the advantages of Permalinks which play great role in targeting rich keywords. Blogger Team has introduced permalinks on all blogspot blogs and we already discussed several ways of optimizing permalinks, now it's the right time to realize how Trailing links effect permalink display in SERPs.


Examples:


Typical breadcrumbs may look like this:


Homepage > Category Page > Sub Category Page


or


Home page / Section page / Subsection page


How BreadCrums Effect SERP Display?


Carefully look at the snapshot below. The first link pointed by red arrow is of our second blog (SEM) and the second link pointed by green is of our current blog (MBT). We are using Breadcrumb in SEM for the past few months  just as experimentation and the results I obtained were not satisfactory. Breadcrumbs is only replacing the permalink which contains our rich keywords and replaces it with the category/label name. As you can see in the snapshot below, instead of displaying keywords in the permalink, Googlebot is instead picking the category title ( i.e. Social Media)  and displaying it instead of the keywords used in URL structure.


Note: I will surely delete Breadcrumb plugin from SEM as soon as I get time.


In MBT Googlebot is displaying the permalink (i.e. google-crawling...) instead of a label or category title because we use no Breadcrumb plugin in our blog. As a result we are getting extra benefit of exposing more keywords on Google search page, thus leading to a higher rank on search engine pages.


breadcrums effect site SEO


If you view any URL of Mashable or even SEOMoz in Google you will find that Google spiders are picking and displaying the permalink instead of the Category or tag title, because both these blogs are using no Breadcrumb plugins anywhere on there platforms.


Mashable:


mashable search display


SEOMOZ:


seomoz search display


Both these two great blogs are making best possible use of keywords to rank higher on search pages to drive organic traffic. They both use no BreadCrum plugin for reasons we already discussed. Therefore you may avoid installing any such widget on your blogger blogs or any WP plugin at your wordpress blogs. Blogs have simple structure and the pages are not sorted too deep (can go to a maximum of two-three trails) so such a plugin serves less in terms of both usability and Optimization.


When can you use Breadcrumbs?


If you have an Ecommerce site where you sell merchandise and the number of pages or categories are heavily tagged then you will for sure use breadcrumb to serve your visitors more. This is one reason why you see this plugin on Ecommerce sites like Ebay. Since Ebay has dozens of pages that are linked to one another via tags therefore a breadcrumb is necessary to keep the user informed about his location on the site.


Do you still want to add it in your blogs?


Though breadcrumb serves no logic in case of blogs but still if you like these trailing links then you can use the rel="noindex"   attribute to inform the robots not to index or crawl the links. This is one way the links will not be indexed and thus wont appear at all in search results page. This is the same logic applied by ebay folks:


ebay breadcrums noindex


Need Help?


If I sounded too technical then please post your queries so that I could help more precisely. I hope this post clears many doubts linked to this Rootline trails and might have given you enough help in deciding what is best for your blog. Peace and blessings pals! :)


Are you using Breadcrumbs on your blog? If yes then what action have you decided after reading todays tutorial? 


Remove Blogger Sitemap Errors In Google Webmaster

Remove sitemap errors

Most tutorial do tell how to submit a blogger sitemap to Google but unfortunately they often fail to mention the correct way. You are still seeing feed proxy errors on your webmaster tool account because Google spiders are getting confused by the sitemap that you submitted. BlogSpot blogs come with Atom Feeds and RSS feeds by default. But since these feed technologies are of low quality therefore we often switch to Feedburner. In blogger Feed settings page we often redirect our default atom feeds to this latest well developed feedburner feeds.

That is where the problem arises. Because when you submit your BlogSpot sitemap to Google you are not telling Google that you updated the feeds and this confuses the robots. When robots indexes your sitemap they get confused by finding a redirection to another feed (feedburner) and this causes the errors on your dashboard.

How To Correctly Submit Blogger Sitemap?

I have written a detailed tutorial last year which discusses every single detail in simple words. The purpose of this post was to draw the attention of new MBT readers to this issue. Please read the tutorial below to remove all errors and help Google better crawl and index your blog.

What is a Sitemap?

Sitemap in simple terms is the text version of all your posts published so far. They come with xml extension. Inn short it gives tell search engines what content to crawl. When you write a new post your sitemap updates and this update pings Google to come and crawl your blog.

Tell Google What Links To Display In Sitelinks

manage sitelinks display

Sitelinks can now easily be controlled and managed via the webmaster dashboard. Sitelinks are links to other pages on your blog or site which appears under the search result for your site. It help users easily navigate deeper into your site. They are generated and ranked algorithmically based on the link structure of your site, and unfortunately not all sites have sitelinks. The number of links appearing below your main homepage link were increased from 8 to 12 but just today I observed that this number has been brought down to six now. I have not heard of any new update though from webmasters blog.


How To Show Sitelinks For BlogSpot blogs?

The easiest answer to this is to add a good Drop down menu to your blog that may link to good internal pages. Next work hard on increasing the number of your backlinks so that your PageRank may increase. Generally blogs with PR>2 are often seen with sitelinks. Therefore to make use of this beautiful two column display of your blog on search results page then you must pay more attention towards better optimizing and maintaining your blog.

How To Control The Sitelinks Display?

Google Displays some of your important pages in two columns where each column contains 6 links on each side making a total of 12. Though from what I see now I think Google has brought down the links number back to 6 from 12. If you don't want a particular link to be displayedi n your sitelinks family then you can surely remove it and Google calls this removal as "Demoting a URL from sitelink"

To do this follow these simple steps,

  1. Sign in to your webmasters account
  2. Go to Site Configuration > Sitelinks
  3. There you will see a box where you can submit links that you don't want to be counted in your sitelinks. This will give a chance for other links on your blog to be displayed in your sitelinks family.

demote sitelink

Keep the first blank empty and submit your complete link on the next blank that says "Demote this sitelink URL" Once you demote a URL it will take around 2-3 days for new circulation of updated sitelinks for your blogger blog or website.

Why should you Demote a sitelink?

Because you want to display your best featured links in your sitelinks and if you are finding a not so important page appearing as a sitelink then may be you are not leaving a good impression on your visitors. Good filtered sitelinks will give more exposure to your blog and will better present the overall content of your site to the visitor.

I just hope this little trick helps you in better maintain and adjusting your sitelinks view. Feel free to suggest or ask for any help if needed. Peace brothers. :>

Please add nofollow Tags To all Blogger Label Links!


UPDATE:  After the Google panda effect only  useless links like comment links should be tagged as nofollow. Links pointing to your post pages should be kept dofollow like labels and archives


nofollow-labels


Google Panda effect is the name most of you might heard. It is a strict Google new algorithm that looks for content farms and link farms and completely stops indexing the publisher. If your blog contains too many irrelevant content or duplicate content or your post quantity is less than 300 words and you have too many tags/category labels on your blog that makes no sense then you can be the next target of Google panda update. Your traffic will drop significantly. If you are receiving 2-3K visitors per day, you will end up with just 400-500 visitors. It really shocked me personally when I surveyed official and un-official blogger templates and amazingly found that all category tags or label tags are dofollow. It is really sad on blogger part but I found the same problem on WordPress blogs as well. Even the tags in wordPress are dofollow but since now many expert SEOs have advised to nofollow the label tags therefore we must not delay any further else the consequences could be huge.


To get an idea of nofollow tags then read these detailed tutorial also:


Nofollow all blogger labels links or Category tags


We will nofollow the labels that appear below your post titles and also the labels appearing in your TAG Cloud.


Lets start correcting things:


  1. Go To Blogger > Design > Edit HTML


  2. Backup your template


  3. Check the "Expand widget templates" box


  4. Search for this,


<a expr:href='data:label.url' rel='tag'>


     5.   Replace it with this,


<a expr:href='data:label.url' rel='tag,nofollow'>


You have now successfully protected your links in the post labels from panda effect. Now lets correct the Label Cloud Links also.


UPDATE: This part is optional because this widget is located on the sidebar and not directly in your post body where actual crawling takes place. So even if you skip it there is no issue.


      6.    Search for this,


<a expr:dir='data:blog.languageDirection' expr:href='data:label.url'><data:label.name/></a>


      7.  Replace it with this code,


<a expr:dir='data:blog.languageDirection' expr:href='data:label.url' rel='nofollow'><data:label.name/></a>

      8.   Save and you are all set!


How to know if you have done all steps correctly?


Simply highlight a label link or cloud link on your blog and then right click and choose "view selection source". You will find you label links having the rel="nofollow" tag attach to it like this,

post label link

and for label cloud it will look like this,

label cloud

I hope your blogs may grow even more and may stay protected from tech errors. We added the nofollow tags to all MBT label links also and we will be updating you more on this. Please let me know if you needed any further assistance. Peace out! :)

Create a Contact Form With File Upload Option

Email contact-formThe contact form that I am using on this blog is from emailmeform and it is all free but customized using CSS. I previously published a post on how to customize contact form provided by emailmeform but later due to change in the coding provided by them the styling do not work for new forms so today we will learn to create a simple contact form with no company Ads and along with an upload option that will allow your visitors to send you files straight from your website. The files can be a text file, video, audio, pdf, gif, png, anything. Follow these steps:
 

Live Demo


Create a Free Web Contact Form

Sign up for a free account at emailmeform

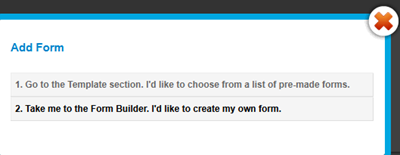
Once you are registered click the "Add a Form" button and choose the form builder option.

add form

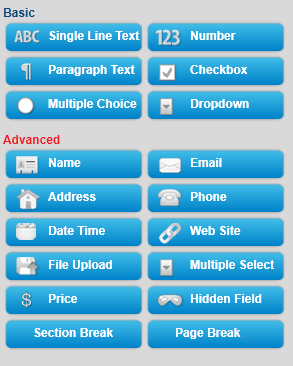
Keep your form simple with some important fields only like Name, Website URL, Email, Age, Country, Subject and Message. The form builder looks like this,

form builder

The form builder has blue buttons at left and display at right. When you click a button on left the effect is displayed on right. Now kindly follow as I instruct for keeping things simple and for creating a simple but informative contact form.

Follow this order:

  1. Click the Name button in advance section
  2. Next click Web site
  3. Next Email
  4. Next Hidden Field. Now click the hidden field section on the right and rename it as Age
  5. Next click Hidden Filed again and rename it as Country
  6. Next click File Upload  (Optional you can leave this option if you don't want users to send you files via email)
  7. Now From the Basic section click Paragraph Text & click it to rename it as Message
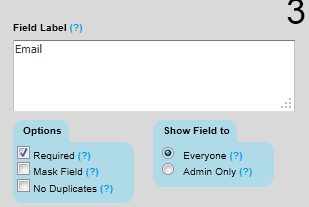
  8. To make a specific form option a must to fill then simply click that row and select required as shown below

edit form fileds


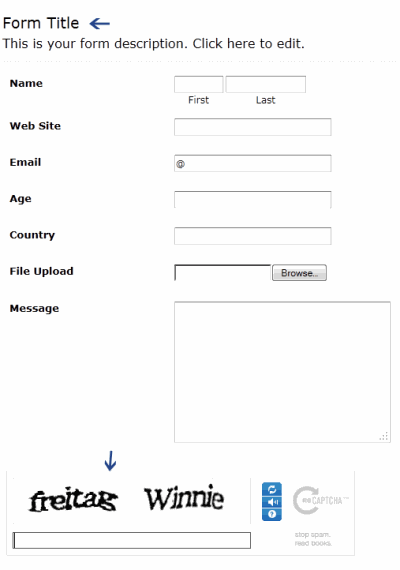
Your contact form now must look something like this:

contact-form

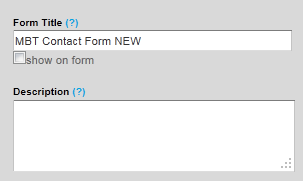
     9.   Click the Form Title and add some message there for your visitors. For example you can write :

We Love To Hear From You

Feel free to ask for any help. We will catch you back as soon as time allows

If you wish you can remove the form title by unchecking the box and deleting the description text. See below

contact form title

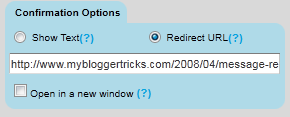
     10.    Now on the form settings choose Redirect URL and insert the page link of your thank you page. A thank you page is something like this

redirect contact form

You may create a separate post for this by giving it an old publishing date. Blogger users can create a Page instead of Post.    

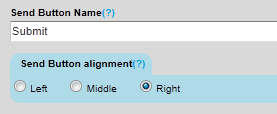
11.  Now replace send Email by submit and align it to right as shown below:

submit button

  12.  Next click the Captcha Code at the bottom and select the none option from the left section as shown below:

remove captcha-code

This security code is often added to prevent spam but I have never used this security code and I honestly have received not even a single spam till today. Just remove it to make the contact form even more neater.

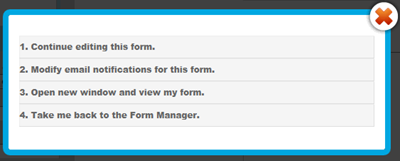
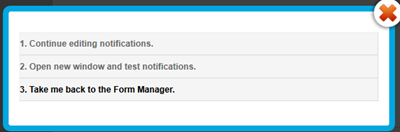
13.   Finally hit the Save Form Button and a window will appear as shown below:

save form

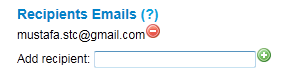
14.   Choose the second option and add a recipient email ID. Choose an ID that you often use so that whenever someone leave a message you may receive it straight in your inbox. You can also add more than one recipients. See below:

add recipient

Leave other options as default. Hit Save! Now choose the third option.

save contact form

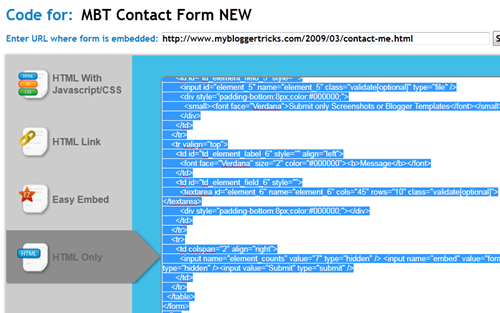
15.   In Form manager Click Code

contact-form-code

16.  Choose the HTML Only option and copy the code. Make sure to enter the URL of the page where you want to embed the contact form. See below

copy code

It is therefore better that first you create a Page on Blogger and publish it. Fetch its URL and paste it in the blank "Enter URL where form is embedded"

Now simply copy the code and paste it in your contact page. To delete the emailmeform logo from the contact form find and delete a similar code like the one below from the code you just copied.

  <div><font face="Verdana" size="2" color="#000000">Powered by</font><span style="position: relative; padding-left: 3px; bottom: -5px;"><img src=
  "http://www.emailmeform.com/builder/images/footer-logo.png" /></span><font face="Verdana" size="2" color="#000000">EMF</font> <a style="text-decoration:none;" href="http://www.emailmeform.com/"
  target="_blank"><font face="Verdana" size="2" color="#000000">Forms Online</font></a>
</div><a style="line-height:20px;font-size:70%;text-decoration:none;" href="http://www.emailmeform.com/report-abuse.html?http://www.emailmeform.com/builder/form/r99G329aiV6k6" target=
"_blank"><font face="Verdana" size="2" color="#000000">Report Abuse</font></a>

Publish the page and bingo you are done! I know the steps are lengthy but the result is indeed worth it. In my coming posts you will learn how to completely customize this contact form with your own colors and styles. See our contact form as an example. I just hope you may have found today's tutorial helpful. If you need any help please do not hesitate to post your question. Have fun buddies! :)

Note: Paste the Contact Form code in Edit HTML mode only and hit the publish button on blogger Post Editor. Do not toggle to compose mode because this will collapse the form.

You may also find our previous tutorial helpful: