Showing posts with label blogger tricks. Show all posts

Use Human Readable "Date Format" in Blog Posts

Change Date Format of Posts in BloggerThis is probably the most request posted on blogger Timestamp and Date header format. This simplest trick of converting date formats in Blogger blogs is thus first time shared online using Data Layout Tags. The date inside BlogSpot posts are displayed in the format "MM/DD/YYYY" which is a non-readable formatting for mentioning the publishing time and date of an article. If you see the date format in MBT posts (i.e. Nov 21, 2015) you will observe that the formatting is done in a more human readable and visual way where Month and Day are comma separated from Year ( i.e. Month Day, Year ). The month is written in short abbreviated way followed by day and then year. A reader gets a clear idea of when the post was published by looking at the date at a glance instead of getting confused with the Western and Asian Date formatting of "MM/DD/YYYY" and "DD/MM/YYYY" respectively. In this tutorial we will use the simple technique of replacing the Timestamp layout tag inside posts with Date Header tag. In our JSON Tutorial series we will discuss a more advanced JavaScript approach to better control the styling of each element in the date formatting.

Before:

non-readable Date format

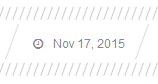
After:

Readable Date Format

Change Blogger Date Formatting inside Blog Posts

Follow these easy steps:

1 Go to Blogger > Template > Backup your template

2 Click Edit HTML

3 Search for this layout tag

<data:post.timestamp/>

4 The above code will appear twice. Once for mobile view and once for desktop view. Replace it twice with this layout tag:

<i class='fa fa-clock-o'/><data:post.dateHeader/>

Note: The yellow highlighted code will show a clock Icon next to the date, if you don't want this FontAwesome icon then simply remove the yellow code.

5 Save your template and you are almost done!

6 Next go to Settings > Language and Formatting > Formatting

From the drop down menu next to the Date Header Format select the first option i.e. Nov 21, 2015:

Post Date Formatting in blogger

You can choose any formatting of your choice, the last two options are also good. In our case we chose the format: Nov 21, 2015

Date header formats

7 Click the "Save Settings" button and you are all done!

Need Help?

What we did was a simple solution to the existing problems faced with Post Date formatting. In our JSON tutorial we will adopt a JavaScript technique to give more advance control over the structure of Date. With that tutorial you will be able to style Month, Day and Year elements separately using CSS classes. The current solution is the easiest way for non-techy users. I hope this helps most in better displaying the Publish Timestamp on their blog posts. Do ask me any question you may have.

Peace and blessings buddies :)

Auto Update Credits Info in Template Footer

autoupdate credits info in template footerIt makes a lot of sense to always add your website name along with Copyrights Date/time in Footer credits to let your users get accustomed to your brand identity and also know that you reserve full copyrights of the content you share on your blog. A credit link consists of mostly your Trademark/benchmark name (i.e. Blog Title) and the Time interval for which you deserve full ownership of your Blog resources and of its use and distribution. When we design Blogger templates we often add Credit links or attribution links at the bottom of the blog footer to let everyone know who designed and developed the template.

In your case if you want to remind your visitors of who owns the content and resources then you can surely use the simple script shared below which will dynamically insert your Blog Title, Blog link and current Year in your blog to let everyone know of your Copyrights. After using this XHTML + JavaScript, no matter how many years may pass by, your footer credits will always show the current Copyrights Legal Date, thus preventing you from manually updating the Date each year and Blog Title each time you update the Site Title. If it is 2015 it will show © 2015 and in 2020 it will automatically get updated to © 2020. Therefore this tutorial will help you Auto Insert Copyrights Legal Date and Trademark in Blogger Footer Credits. Lets get started

Update Blogger footer Credits

1 Go To Blogger > Template > Backup your Template

2 Click Edit HTML

3 Search your Footer Credits code and replace the contents with this Simple code.

INPUT:

<a expr:href='data:blog.homepageUrl'><data:blog.title/>™ </a>© <script type='text/javascript'>document.write(new Date().getFullYear());</script>, All Rights Reserved.

OUPUT:

My Blogger Tricks™ © 2015, All Rights Reserved.

Things to note:

  • data:blog.homepageUrl will be replaced with your Blog Homepage URL
  • <data:blog.title/>™ will be replaced with your Homepage title i.e. Your Trademark
  • The green highlighted script will be replaced with Current new Date of the year. getFullYear() returns the year in four digits. You can learn more about it at JavaScript Date Reference
  • You can replace the bold black text with any custom message you may like

4 Finally save your template!

Your Footer will now be automatically updated each time you change your blogspot blog title or when the new year arrives!

Need Help?

Let me know if you needed any help with this simple XHMTL trick that uses Blogger layout tags and some simple JavaScript. Wish you great weekend buddies. Have fun with friends and family. Peace buddies! =)

How To Manually Add Disqus Comment Widget to Blogger?


Disqus


In a previous post, we talked about integrating Disqus comments in a Blogger blog. That is just one of the ways to add this commenting system to your blog. If you're the geeky type, you'd want to do it manually, just so you know you can control it and customize it to your liking. It can also come in useful when the Disqus gadget installer isn't working. So today, we'll look at a manual way of installing the Disqus commenting system on your blogger blog.


Note that this method requires you to edit your blog's template HTML, so it is advisable to back up your template before continuing. Also, this method won't work on Blogger Dynamic Views templates.


Adding Disqus comments manually


  • From your Blogger dashboard, go to Layout, and then click on Add a gadget in the sidebar

  • Select the HTML/JavaScript widget from the list


Add a widget


  • Enter Disqus as the title and the following in the content;


<!-- Disqus comments gadget -->


We've added a new widget. It is time to tweak it a bit.


  • Now go to the Template section, and go into the Edit HTML mode

  • Find the widget you just created by searching for 'Disqus'. You should see something like this;


<b:widget id='HTML1' locked='false' title='Disqus' type='HTML'>


  • Add a mobile='yes' key-value pair in that line. It will now look like this;


<b:widget mobile='yes' id='HTML1' locked='false' title='Disqus' type='HTML'>


  • Now delete the following code before the closing widget tag...


<b:includable id='main'>

  <!-- only display title if it's non-empty -->

  <b:if cond='data:title != &quot;&quot;'>

    <h2 class='title'><data:title/></h2>

  </b:if>

  <div class='widget-content'>

    <data:content/>

  </div>

  <b:include name='quickedit'/>

</b:includable>


  • ...and replace it with the following code;


<b:includable id='main'>

            <script type='text/javascript'>

                var disqus_shortname = &#39;CHANGETHIS&#39;;

                var disqus_blogger_current_url = &quot;<data:blog.canonicalUrl/>&quot;;

                if (!disqus_blogger_current_url.length) {

                    disqus_blogger_current_url = &quot;<data:blog.url/>&quot;;

                }

                var disqus_blogger_homepage_url = &quot;<data:blog.homepageUrl/>&quot;;

                var disqus_blogger_canonical_homepage_url = &quot;<data:blog.canonicalHomepageUrl/>&quot;;

            </script>

            <b:if cond='data:blog.pageType == &quot;item&quot;'>

                <style type='text/css'>

                    #comments {display:none;}

                </style>

                <script type='text/javascript'>

                    (function() {

                        var bloggerjs = document.createElement(&#39;script&#39;);

                        bloggerjs.type = &#39;text/javascript&#39;;

                        bloggerjs.async = true;

                        bloggerjs.src = &#39;//&#39;+disqus_shortname+&#39;.disqus.com/blogger_item.js&#39;;

                        (document.getElementsByTagName(&#39;head&#39;)[0] || document.getElementsByTagName(&#39;body&#39;)[0]).appendChild(bloggerjs);

                    })();

                </script>

            </b:if>

                <style type='text/css'>

                    .post-comment-link { visibility: hidden; }

                </style>

                <script type='text/javascript'>

                (function() {

                    var bloggerjs = document.createElement(&#39;script&#39;);

                    bloggerjs.type = &#39;text/javascript&#39;;

                    bloggerjs.async = true;

                    bloggerjs.src = &#39;http://&#39;+disqus_shortname+&#39;.disqus.com/blogger_index.js&#39;;

                    (document.getElementsByTagName(&#39;head&#39;)[0] || document.getElementsByTagName(&#39;body&#39;)[0]).appendChild(bloggerjs);

                })();

            </script>

</b:includable>


  • In the code above, change the text CHANGETHIS to your own forum shortname, e.g. MyBloggerTricks.


You now have Disqus installed on your Blogger blog! You can now the widget to you liking!

How To Automatically Add Disqus Comment Widget to Blogger?‏


Disqus commenting system


One of the most common problems bloggers face is comment moderation. If you want to get serious in the world of blogging, you'd do well to get set up with a good commenting platform, because you need one - managing the comments on your blog can be a real pain, and will consume a lot of your time. The Google Plus commenting system is good, but it has its downs. One of the most popular commenting systems today used by Bloggers around the world is Disqus.


Why use Disqus?


  • Email notifications for each comment

  • Custom comment avatars

  • Moderation by email or mobile

  • You can easily post comment, vote, even share comments to social networks.

  • You can easily subscribe to comments.

  • More comments and increased engagement


Adding Disqus to your Blogger blog


  • First up, log onto your Disqus account. If you don't have any, create a new one

  • Click no the Add Disqus to your site option at the top

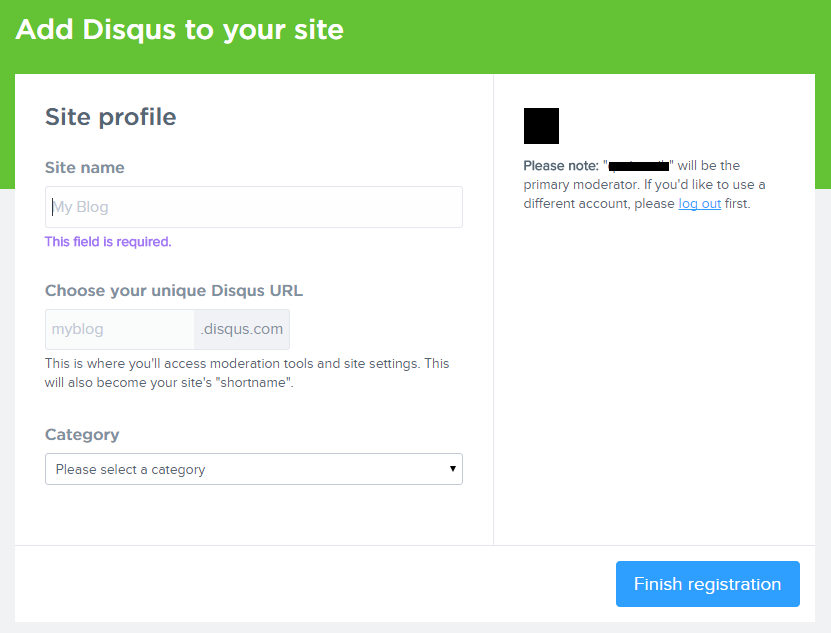
  • Time to fill out your site profile!


Disqus registration


  • Click on Finish Registration, and choose Blogger as your platform on the next screen


Now that we've set up a Disqus account, it's time to integrate it with a Blogger blog.


  • Click on Add [Your Blog Name] to my Blogger site

  • Now click on the Add Widget button on the next window. You have successfully added the Disqus commenting system to your blog. It will appear automatically under your blog posts


Now you're free to start off a new disqus account, or import comments from an existing blog.


There's another, geekier way of adding the Disqus commenting system that gives you more control. We'll share it in the upcoming post, so stay tuned! :)

Replace Threaded comments with Google+ Comments in blogger


Google Plus commenting system

You might be familiar with the latest commenting system Google has introduced that integrates Google+ comments with Blogger blogs. This new commenting system is a major improvement over the default Blogger system, and it supports threaded comments. It also looks a lot better. We earlier shared a tutorial on how to enable this new Google Plus commenting system for Blogger blogs. But some people still have problems implementing it on custom templates. For them, we have compiled this short tutorial on how to effectively implement and use this new improved commenting system.


Switching to Google Plus comments


To enable Google Plus comments for your Blogger blog, you will first have to connect your account to your Google+ account. To do this, just follow these steps.


  • Log into your Blogger dashboard, and choose a blog you want to connect

  • Click on the Google+ button from the left sidebar

  • Click on the Get Started button on the top-left side to connect your account. This will not appear if your account is already linked.

  • Follow the simple instructions to connect your blog.

  • Once connected, you will see an option Use Google+ comments on this blog. Checking this will enable the new Google Plus commenting system.


This will turn your Google Plus comments on for default templates. But it won't work for custom templates. For that, you will have to tweak your template source code and make some edits as instructed in the section below.


Displaying Google comments on custom templates


There are two ways to do this. You could either use the easy way, which is the Revert to default option, or you could do it the geek way, which is via the HTML editor.


The easy way


Custom templates have customized widgets that usually override the default settings. And that is why this commenting system might not work with custom templates. However, if you were to somehow remove those overrides, the commenting system would display on your blog without a hitch.


To do that, you can revert your Blog Widget to defaults in your template HTML editor via the following steps.


  • From inside your blog's dashboard, click on Template from the left sidebar.

  • Click on Edit HTML


(Before moving on, we'd suggest you backup your template, just in case anything goes wrong)


  • Click on the Revert Widget templates to defaults button

  • Now, Be careful to select Blog1 Widget from the list. Do not select any other, as it will reset other widgets to default as well.


This will solve the problem most of the times, but there's a big problem. You will lose the customization in your Blog Widget. So if you want to preserve the look of your current widget, then I'd suggest you use the alternative geek's way.


The geek's way


This isn't as geeky as it sounds. All you have to do is replace a couple lines of code with another. From inside your HTML editor, press Ctrl + F and search for "threaded_comments". You will see a chunk of code as shown below.


<b:if cond='data:blog.pageType == & quot;static_page&quot;'>
   <b:if cond='data:post.showThreadedComments'>
      <b:include data='post' name='threaded_comments'/>
      <b:else/>
      <b:include data='post' name='comments'/>
   </b:if>

</b:if>
<b:if cond='data:blog.pageType == & quot;item&quot;'>
   <b:if cond='data:post.showThreadedComments'>
      <b:include data='post' name='threaded_comments'/>
      <b:else/>
      <b:include data='post' name='comments'/>
   </b:if>

</b:if>


Carefully look at the bolded code, and then replace them with the following line of code.


<b:include data='post' name='comment_picker'/>


If you want to display comment count, you can simply modify the above line of code


<b:include data='post' name='comment_picker'/>


Still not working? Please feel free to mention your queries in the comments below. And please try to be as relevant as possible. Thank you :)

Install GooglePlus Comments Widget on custom Blogger Templates


Google Plus comments on Blogger

Blogger recently implemented Google Plus comments on their Blogger platform, and we know that many bloggers like you have gone ahead and implemented this new functionality to your blogger blogs. But a lot of our readers have been asking us how to add Google Plus comments, or Google Plus comments API  to Blogger custom templates? This feature turns on and off smoothly for default templates. But most bloggers don't use default templates. For them, we have compiled this short tutorial on how to implement Google Plus commenting system on custom Blogger Templates.


Why enable Google Plus comments?


Google Plus comments are much more flexible, and allow you to keep track of your conversations better. They also help keep the discussions organized. Besides, readers can share their comments, or make comments on your Google Plus posts to make them appear on your blog. This expands your reach as your followers' extended circles can see your content too.


Although there's some controversy regarding the usefulness of this commenting system versus the harms (something we discussed at length in our last post), the choice is really yours. But if you do want to implement this feature on your custom Blogger templates, then here's how you can do that.


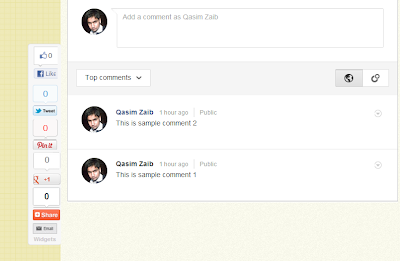
Google Plus comments


Enabling Google Plus comments


To start off, first log into your Blogger account, and click on the blog you want to add Google Plus comments to. Now, click on the Google+ option on the left sidebar. You must be the admin of a blog to be able to view this option.


Now, you need to upgrade our account, and integrate it with Google Plus if you haven't already done so. You will get a "Get Started" button if you haven't. Follow the simple instructions, and then move on to the next step.


Check the option that says Use Google+ Comments on this Blog - For default templates, this is pretty much all you need to do.


Enable Google Plus comments


For custom templates, here's what you need to do;


  • Click on the Template tab from the left sidebar, and then click on Edit HTML.

  • From the code editor, press Ctrl + F, and search for 'threaded_comments'


  • You should see the following lines of code


<b:if cond='data:blog.pageType == & quot;static_page&quot;'>

   <b:if cond='data:post.showThreadedComments'>

      <b:include data='post' name='threaded_comments'/>

      <b:else/>

      <b:include data='post' name='comments'/>

   </b:if>


</b:if>

<b:if cond='data:blog.pageType == & quot;item&quot;'>

   <b:if cond='data:post.showThreadedComments'>

      <b:include data='post' name='threaded_comments'/>

      <b:else/>

      <b:include data='post' name='comments'/>

   </b:if>


</b:if>


  • Replace the code written in bold with the following line.


<b:include data='post' name='comment_picker'/>


Take care not to make a mistake while editing. And it would be a good idea to backup your template (Backup/Restore option at the top-right), just in case.


For comments to work on custom templates, you need to add the code as well as to enable it. You can see the demo of a custom template above for yourself. I hope this post answered all your questions. If not, please feel free to ask more questions in the comments below. Cheers :)


Add Google Plus Followers Gadget To Blogger!


Google Plus Followers' Widget


One of the best perks of using Google is, it has products that seamlessly integrate with each other to provide an easy and comprehensive interface to users. For example, Google Drive can be used to attach files with emails quickly. You can +1 posts outside Google+, and share search results on Google Plus. You can even auto-publish your Blogger blog feed to your G+ profile. And that is by no means the end of it. In fact, Google just announced a brand new feature, the Google Plus Followers gadget for blogger blogs! This new Google Plus followers' gadget for blogspot blogs will provide another layer of integration between your Google Plus profile and your Blogger/Blogspot blog.


The Google Plus followers' gadget


Connecting your Google Plus profile with your blog is a great way to enhance your readership by increasing your followers and engaging better with your audience. You can auto-publish your blog posts on your Google Plus stream so as to deliver your content right where your readers want it delivered. Those readers can then recommend your content directly, which can lead to more exposure. This new Google Plus followers widget is another step towards enhancing your readership and boosting your authority.


This widget will tell the world how many people are following you, and will also show them some friendly faces (different for each person). It also has a follow button by default, which lets users follow your Google Plus profile page with a single click. This will help in getting your content across multiple streams, and to reach more readers on a more personal level through your blog.


Adding this widget to your Blogger blog is really simple. But for it to work, you first have to connect your blogger profile with your Google Plus account. We have detailed the process in a previous post, so make sure you read it first.


Once done, visit the Layout tab on your blogger dashboard, and select "Add a Gadget". You will then be able to see and add this widget easily to your blog.


A note from Google: For those who are using Google Friend Connect followers' widget, they can keep using it, even though Google retired most of Friend Connect services earlier this year. For the time being, it will keep running on Blogger.


Have questions in mind? Feel free to ask us. You can also refer to Google's Help Center for more information on this update. Happy blogging :)

Reposition Navigation Buttons in Blogger!

reposition navigation links in bloggerThe navigation buttons or links that are displayed at the bottom of each comment section in BlogSpot blogs enable visitors to switch between new and old posts or move from one post page to another ordered by date and time. These buttons become less of use when number of comments increase too much. Normally readers do not even observe the navigation deep down and this results in loss of precious pageviews. I have always emphasized that value pageviews more than unique visitors because it is indeed pageviews that turns into revenue generating page impressions both for AdSense or any other Ad Network.  You might have seen the More, Next and Previous button showing inside the top black sticky bar on MBT homepage and post pages. It is really not possible to shift a Post data item to any other widget section in blogger. Doing such results in "Data variable not found in dictionary" error or similar.

We played a work around and used Cascading stylesheet Position properties to allocate fixed positions to these buttons anywhere on the page. This is again a unique addition to Blogger Customization and being implemented for the first time. The tutorial today will not only help you change the position of navigation links but will also teach you to install a custom sticky bar just like the one we are using on our blog. We are pretty sure you will find today's tutorial really easy yet delicious!

PS: Tested with Chrome, Firefox, IE9 & Safari.

STEP1: Adding the sticky bar

First comes first. I have already shared a detailed tutorial on adding a stickybar to blogger. Please first install a stickybar on your blogs and then try step#2 of today's tutorial.

Note: The style that I am using on MBT is different from that of the tutorial so if you want a similar color theme then simply copy the stylesheet from MBT source file or let me know to help you.

STEP2:

Now comes the interesting part. What we will do here is simply shifting your current Newer, Older & Home buttons to the top left of the stickybar and replace them with more fancy buttons like the one we are using.  Follow these steps:

  1. Go To Blogger > Template
  2. Backup your template
  3. Click Edit HTML and then check "Expand Widget Templates"
  4. Search for the following CSS classes and delete them all: You will find three such classes or more starting with either #blog-pager or .blog-pager

#blog-pager {
------
}


#blog-pager-newer-link {
----

---

--
}

#blog-pager-older-link {
-----

---


--
}


   5.   Now after you have deleted them, add the following code in their place:

#blog-pager {
text-align:center;
}
#blog-pager-newer-link {
position:fixed;
z-index:9999;
margin-left:-320px;
top:0px;
margin-top:5px;
}

#blog-pager-older-link {
position:fixed;
z-index:9999;
margin-left:-290px;
top:0px;
margin-top:5px;
}

#blog-pager-more-link {
position:fixed;
z-index:9999;
margin-left:-20px;
top:0px;
margin-top:5px;
}

@media screen and (-webkit-min-device-pixel-ratio:0) {
#blog-pager-newer-link {
position:fixed;
z-index:9999;
margin-left:-627px;
top:0px;
}

#blog-pager-older-link {
position:fixed;
z-index:9999;
margin-left:-597px;
top:0px;
}
}


What we did in step4 and step5 was simply replacing your old code with the new one.

    6.   Next search for the following chunk of code:

Note: You are only concerned with finding the two highlighted codes. The code inside them may look different for your template so just finding these two highlighted tags and then follow step7.

<b:includable id='nextprev'>
  <div class='blog-pager' id='blog-pager'>
    <b:if cond='data:newerPageUrl'>
      <span id='blog-pager-newer-link'>
      <a class='blog-pager-newer-link' expr:href='data:newerPageUrl' expr:id='data:widget.instanceId + &quot;_blog-pager-newer-link&quot;' title='Previous'>&#171; Prev</a>
      </span>
    </b:if>

    <b:if cond='data:olderPageUrl'>
      <span id='blog-pager-older-link'>
      <a class='blog-pager-older-link' expr:href='data:olderPageUrl' expr:id='data:widget.instanceId + &quot;_blog-pager-older-link&quot;' title='Next'>Next &#187;</a>
      </span>
    </b:if>
<span id='home-link'>
    <a class='home-link' expr:href='data:blog.homepageUrl'><data:homeMsg/></a>
</span>
    <b:if cond='data:mobileLinkUrl'>
      <div class='blog-mobile-link'>
        <a expr:href='data:mobileLinkUrl'><data:mobileLinkMsg/></a>
      </div>
    </b:if>
  </div>
  <div class='clear'/>
</b:includable>

     7.  Replace the code inside them with the following code as shown below:

<b:includable id='nextprev'>

<b:if cond='data:blog.url == data:blog.homepageUrl'>
   <b:if cond='data:olderPageUrl'>
      <span id='blog-pager-more-link'>
      <a class='blog-pager-more-link' expr:href='data:olderPageUrl' expr:id='data:widget.instanceId + &quot;_blog-pager-older-link&quot;'><img src='https://blogger.googleusercontent.com/img/b/R29vZ2xl/AVvXsEhi3m-8vZEXeMa-kcCyO6Nub8NBvtNhvU7OLcmh7je06X6BWzHps1TsRNdz5bTLgCpDJMSCOw36l93_Z11yHwHn1ZKDTA8HHhYibEjW-vLkUslIPWaMI8lZD8kyLJiOJixa8nyr5lqVqOeL/s400/more.png'/></a>
      </span>
      </b:if>
</b:if>


<b:if cond='data:blog.url != data:blog.homepageUrl'>
  <div class='blog-pager' id='blog-pager'>
    <b:if cond='data:newerPageUrl'>
      <span id='blog-pager-newer-link'>
      <a class='blog-pager-newer-link' expr:href='data:newerPageUrl' expr:id='data:widget.instanceId + &quot;_blog-pager-newer-link&quot;'><img src='https://blogger.googleusercontent.com/img/b/R29vZ2xl/AVvXsEjKxOy-0ivAbGCqGZOmr49nlqJG-pwGghjnetL6ub3XV86UUlDeJbYFbMi5tv6TMevlHJehwMRaTS5nS1xdH1xVF3sC9eUG6gZ4tag7rrHQQr2SZgDGaRVae3LDnPpk029Chu4yRv2LIOoP/s400/Previous.png'/></a>
      </span>
    </b:if>

    <b:if cond='data:olderPageUrl'>
      <span id='blog-pager-older-link'>
      <a class='blog-pager-older-link' expr:href='data:olderPageUrl' expr:id='data:widget.instanceId + &quot;_blog-pager-older-link&quot;'><img src='https://blogger.googleusercontent.com/img/b/R29vZ2xl/AVvXsEhAjYypyGwzx8T5tb0Q1i8YUJkEex5sjg5hN5GBKsm_QLdKHey1MD2GPE2bWHnwalWUUrQ73cLs8CSjmKe2x7K3VPH1cT_VU4yRfGG9aF07KXR9h-_UrOVLt4__rlx3aT2YriiRH2WfFqCW/s400/Next.png'/></a>
      </span>
      <b:else/>
 
    </b:if>

  </div>
  <div class='clear'/> </b:if>

</b:includable>

It was that easy!

   8. All done! Visit your Blog to see it functioning just fine. :)

How it works?

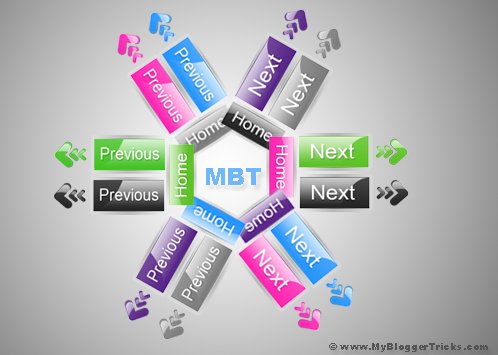
Previous Previous will display newer posts

Next Next will display Older posts

more More will display on homepage alone.

  • Button More is responsible for displaying the next set of previously published posts. It will show a bunch of posts depending on the number of posts you allowed to be displayed on homepage.
  • The other two buttons will help the visitor to navigate between next and previous page. If the visitor is on your newly published post then the Previous button will not show up and Next will show alone.

Everything is operated using conditional statements provided by XHTML 1.0.

If you are looking for read more buttons then do check our Icons and buttons category that has been downloaded over thousands of times and found on almost every Blogger blog today: Download from here

navigation buttons

Questions?

I have one last paper on 29th Nov  after which I will be free for one month to help you all with every query you may have. The blog is being maintained by co-authors because I am not currently available. I am writing posts as soon as I get some spare time. You are most welcomed to ask any question you may have related to this post. Off-topic questions should kindly be avoided. I just hope you find this new addition useful to your overall Pageviews. Wish you more power buddies. Peace and blessings. :)

Show each Author Picture In Post Titles Dynamically

Post Contributed by Hassam Ahmad Awan, a Gold Star MBT contributor and senior co-author. You can catch him always on his blog Bloggingehow

add author pictures beside blog titlesIts a pleasure for me to share one of a Blogger tweak that we managed to implement on BloggingeHow.com recently that makes sure that every author's image is shown up beside their post titles, both on home and post pages. The dynamic tweak enables every individual authors in Blogger based blogs to get them selves showcased. Also as for readers, its a much satisfying thing to know the actual person behind the article. Its much easier to get your self related with the post. It will display author pics dynamically unlike the static way that Mohammad shared months ago which can be find here: Show Profile Avatars next to post titles.
 

Live Demo
 
PS: At MBT a different approach is utilized and that alternative tweak will be shared by Mohammad himself so stay tuned to that.

What the trick?

The most tricky part in implementing the dynamic feature was to align the image and the post titles in a single line and not laying down the actual code for displaying individual authors images. As every other Blogger template is different as of its coding structure, so the below tutorial might not exactly match with your template, though you would be given the idea of what sort of code to search for in order to get to that point in the code where you have to implement the Dynamic author's profile images in Blogger.

Step #1 Open Edit HTML section

  1. Navigate towards your Blogger Dashboard >> Template >> Edit HTML
  2. backup your template. 
  3. Hit 'Expand Widget Templates' and find the following code
<h2 class='post-title entry-title'>
 
Though, note that you might not find the exact code in your template, though you can search for something similar that says 'Post Titles'. Once you find the above code, you're now on the right place to implement the dynamic author's profile tweak.

The approach?

Now, there are multiple ways through which we can show up the author's image beside post titles. For this tutorial and what we have implemented on the demo blog, we'll be using HTML Tables to wrap up the post titles in a single <td> tag and the author's image in another <td> section.
author photo in titles
The green box indicates first <td> tag while the red box indicates another one. Now that we know what code is responsible for displaying the Post Titles, we can easily place Dynamic author's profile beside it with the help of HTML table.

Step #2 What to do?

Once you have found the above code in Step #1 you now have to mark out the entire code that shows up the post titles as mentioned below.
 

<table>

<tr> <td>

<b:if cond='data:post.author == &quot;Author #1 Exact Name&quot;'> <span style='margin-right:5px;'>

<img src='Author #1 image link' style='border:1px'/>

</span>

</b:if>

<b:if cond='data:post.author == &quot;Author #2 Exact Name&quot;'> <span style='margin-right:5px;'>

<img src='Author #2 image link' style='border:1px'/>

</span>

</b:if>

 </td>

<td style='vertical-align:middle'>    

<b:if cond='data:post.title'>     

 <h2 class='post-title entry-title'>      

<b:if cond='data:post.link'>        

<a expr:href='data:post.link'><data:post.title/></a>      

<b:else/>         <b:if cond='data:post.url'>          

<b:if cond='data:blog.url != data:post.url'>            

<a expr:href='data:post.url'><data:post.title/></a>

<b:else/>             <data:post.title/>           </b:if>         <b:else/>           <data:post.title/>         </b:if>       </b:if>       </h2>     </b:if>

</td> </tr>

</table>

 
The above code can be divided into 2 parts. The first section is packed into first <td> tag as mentioned before. The other one is shown in <td> color. Wrap your Post Titles code that are in your template with in the <table> <tr> <td> tags as shown above with the author's profile image/conditional tags in the first <td>. You can relate in a much better way by having a look at the image below.
blogger author picture in post titles

How does it work?

All that table thing was to make sure that the Author's image and the Post Titles are aligned with each other. Though the actual Dynamic Pictures comes in from the below code:
 <b:if cond='data:post.author == &quot;Author #2 Exact Name&quot;'> <span style='margin-right:5px;'> <img src='Author #2 image link' style='border:1px'/> </span> </b:if>
As you would have noticed, Author #2 Exact Name that is with in the conditional tags is responsible for showing the content with in it only when the post is written by 'Author #2 Exact Name' string. So to make that work, you got to make sure that what ever name you enter, that must be the same as the actual author's Blogger's author's account name. Other wise that wont work.

Was that difficult to implement?

I know it can be tricky to find the exact code responsible for showing the Post titles, though the above explanation would have hopefully helped you out in understanding that what needs to be done. In case of any problem, simply leave out your quires below and I would love to get back to you guys as soon as I can. Salam!

For optimizing post titles don't forget to read:

Move your blog from LiveJournal To Blogger


LiveJournal is a great free resource for people who want to keep a log or a diary of sorts of theirs online, or share their life experiences with their friends and family. It allows people to make posts, and then cross-post and share on their social media profiles. Hence, these journals have all the markings of a blog. But for people who started off with LiveJournal, but aren't satisfied with the limited options it has, Blogger is a great option for them. Blogger is so much more than what LiveJournal is. So if you're not satisfied with LiveJournal, you can just move your blog from LiveJournal over to Blogger and get much more functionality.


We recently published a post about transferring your blog from WordPress to Blogger. And we shall continue this series with this LiveJournal to Blogger conversion. Our dear readers have been demanding a post on conversion from Blogger to WordPress, so we will be doing that soon. Stay tuned :)


And now, back to the topic at hand.In this post, we will walk you through the conversion. We are assuming that you already have a LiveJournal account, with some content published on it, which you want to transfer.


Transferring from LiveJournal to Blogger


First of all, visit this link (liveJournal2Blogger), and log into your LiveJournal account using the form given on the page. Unlike WordPress, LiveJournal doesn't provide you with an option to export your content. So you need a third-party app to do it for you. And this app does just that for you.


You will be prompted to save a file on your computer. This is your LiveJournal in a Blogger-friendly exported format. We will use this to import data into Blogger, so keep it ready at hand. 


Importing data into Blogger


Now you have the exported file, all you need to do is import this file into Blogger. Log into, or sign up for a Blogger account, From there, either Create a new blog, or click on an existing blog where you want to publish your LiveJournal content.


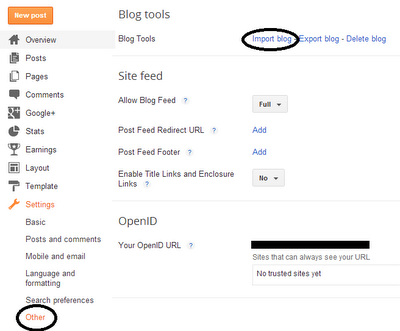
Once you're logged into a blog's dashboard, Click on the Settings at the bottom of the left side-bar. From the options that pop out, click on Others. Then, on the right, you'll see an option to Import Blog.


Now, all you need to do is browse to the file you downloaded, and upload it here. Follow the simple instructions, and you have a set of posts from your LiveJournal account ready to be published!


As with the WordPress to Blogger, this conversion has a limitation of file sizes for up to 1 MB. But LiveJournal blogs are pretty small, so you shouldn't have much of a problem exporting your posts and comments. That's all there is to the conversion. You might also like to know about Blogger2WordPress.

Convert a Wordpress blog To Blogger in easy steps


Blogger is a very widely used publishing platform, mostly because its strength lies in its simplicity and ease of use. It is quite easy to use, and is recommended for beginner bloggers who are looking for a quick and easy way to create a presence for themselves online. For bloggers who have created a WordPress blog, but are at a loss to maintain or modify it, they have a great option in Blogger. They can easily migrate their WordPress blog to Blogger without any hitch. In this post, we will talk about how you can shift from WordPress to free Blogger.


Normally, such a transfer isn't easy. Data needs to be imported from WordPress first, and then imported to Blogger. Since Blogger doesn't allow any data format except its own, there needs to be a conversion process that will convert WordPress exported files. Luckily, there's just such a utility available! Here, we will guide you through the simple steps. Following them, you can convert self-hosted WordPress blogs to Blogger, as well as migrate from free WordPress to Blogspot.


Step 1: Importing from WordPress


  • Log into your WordPress account (for free WordPress users), and then choose the blog you want to convert into Blogger. Alternatively, you can log into your blog's dashboard directly by adding the /wp-login.php suffix to your blog's home URL (eg yourblog.com/wp-login.php or yourblog.wordpress.com/wp-login.php)

  • Navigate through your WordPress menu, and find the Tools option. When you click on it, you'll see further options, among which you will see the Export option. Click on it.


Export


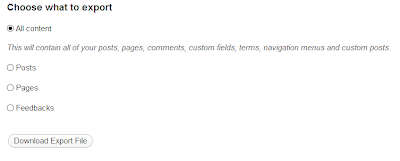
  • Click on the Radio Button next to 'All Content' under the heading 'Choose what to Export'. You can select only posts, or pages, or feedbacks, but it is recommended that you select All content to ensure maximum content is transferred. Then click on Download Export File, which will let you save the exported file to your hard drive. You have completed step 1 at this point.


Download exported file


Step 2: Convert into Blogger format


There is a useful little app that will do this job for you. To convert, visit this app's page, and navigate to the button in the middle of the content that says 'Choose file'. Browse to the file you downloaded from WordPress, and upload it here. Then click Convert. After the conversion, you will need to save the output file. This file is in Blogger-friendly format, and will be used inside Blogger.


Step 3: Import to Blogger


  • The import process into Blogger is pretty straightforward. Simply log into, or sign up for your Blogger account, and click on Create a Blog link. I'm assuming you want to create a new blog for your new content. But if you want to, you can import into an existing blog as well.

  • From the Dashboard, click on Settings >> Other >> Import Blog.


  • Now, all you need to do is follow the simple instructions, and upload the converted file. You will be guided through a wizard that will import data from this file into Blogger. Once done, you will see all your posts from WordPress ready to be published!


Limitations


Although this is a really cool app, it has a serious limitation. You can only upload and convert a WordPress-exported file that is less than 1 MB, which is too inconvenient, especially if you have a large blog, or even a small blog with a size-able number of posts.


If you're disappointed about this, then don't worry! Because Muhammad is working on just such a tool that will allow users to upload a much larger WordPress file to convert into Blogger format. And this tool will be made available soon, so stay tuned!


Also, about the SEO requirements, well they are a bit more technical, so we'll be covering them in more detail in a future post. So try out this cool feature, and if you like it, then stay tuned for more posts and updates on our own tool for converting WordPress blogs into Blogger.


Archive Calendar Widget For Blogger - 2 Themes

archive calendar

You guys needed more tutorials? There we go with yet another unique and interesting hack for blogger Archive Widget. You can see at our sidebar area that the default BlogSpot archive widget is transformed into a Wordpress Type Archive calendar with custom styles and flavors. The easy script and stylesheet today will enable you all to create a calendar archive gadget for your blogs using MBT's custom style sheets for Dark and Light backgrounds. The script is coded by phydeaux3  and redesigned by MBT with custom colors and more easy installation. The plugin has been made compatible and easy to implement. Just follow the basic steps below.

UPDATE: The widget is working perfectly with all blogger templates. For those who are facing errors make sure you are following step#6 correctly. Also don't forget to add CSS styles.

Install Archive calendar on your Blog

  1. Go To Blogger > Layout
  2. Chose Blog Archive widget which is available in Blogger's default widget directory. Switch to next page in the directory to find it.

    blog archive gadget

  3. Choose the following options as shown in the screenshot. Choose style as Flat list. Uncheck "Show Oldest Posts First", choose archive Frequency as Monthly and Date Format can be set to anything.

archive settings

    4.  Click save

    5. Now go to Blogger > Settings > Template. Backup your template and then click Edit HTML > Proceed

     6. Click Jump to widget  and then select BlogArchive1

jump to blogarchive1  

select the entire code as shown below

blog archive

        7.   Next replace the entire code above starting with <b:widget and ending with </b:widget with the code below:


<b:widget id='BlogArchive1' locked='false' title='Blog Archive' type='BlogArchive'>
<b:includable id='main'>
  <b:if cond='data:title'>
    <h2><data:title/></h2>
  </b:if>
  <div class='widget-content'>
  <div id='ArchiveList'>
  <div expr:id='data:widget.instanceId + "_ArchiveList"'>
    <b:if cond='data:style == "HIERARCHY"'>
     <b:include data='data' name='interval'/>
    </b:if>
    <b:if cond='data:style == "FLAT"'>
      <b:include data='data' name='flat'/>
    </b:if>
    <b:if cond='data:style == "MENU"'>
      <b:include data='data' name='menu'/>
    </b:if>
  </div>
  </div>
  <b:include name='quickedit'/>
  </div>
</b:includable>
<b:includable id='toggle' var='interval'>
  <!-- Toggle not needed for Calendar -->
</b:includable>
<b:includable id='flat' var='data'>
<div id='bloggerCalendarList'>
  <ul>
    <b:loop values='data:data' var='i'>
      <li class='archivedate'>
        <a expr:href='data:i.url'><data:i.name/></a> (<data:i.post-count/>)
      </li>
    </b:loop>
  </ul>
</div>
<div id='blogger_calendar' style='display:none'>
<table id='bcalendar'><caption id='bcaption'>
</caption>
<!-- Table Header -->
<thead id='bcHead'></thead>
<!-- Table Footer -->
<!-- Table Body -->
<tbody><tr><td id='cell1'> </td><td id='cell2'> </td><td id='cell3'> </td><td id='cell4'> </td><td id='cell5'> </td><td id='cell6'> </td><td id='cell7'> </td></tr>
<tr><td id='cell8'> </td><td id='cell9'> </td><td id='cell10'> </td><td id='cell11'> </td><td id='cell12'> </td><td id='cell13'> </td><td id='cell14'> </td></tr>
<tr><td id='cell15'> </td><td id='cell16'> </td><td id='cell17'> </td><td id='cell18'> </td><td id='cell19'> </td><td id='cell20'> </td><td id='cell21'> </td></tr>
<tr><td id='cell22'> </td><td id='cell23'> </td><td id='cell24'> </td><td id='cell25'> </td><td id='cell26'> </td><td id='cell27'> </td><td id='cell28'> </td></tr>
<tr><td id='cell29'> </td><td id='cell30'> </td><td id='cell31'> </td><td id='cell32'> </td><td id='cell33'> </td><td id='cell34'> </td><td id='cell35'> </td></tr>
<tr id='lastRow'><td id='cell36'> </td><td id='cell37'> </td></tr>
</tbody>
</table>
<table id='bcNavigation'><tr>
<td id='bcFootPrev'></td>
<td id='bcFootAll'></td>
<td id='bcFootNext'></td>
</tr></table>  
<div id='calLoadingStatus' style='display:none; text-align:center;'>
<script type='text/javascript'>bcLoadStatus();</script>
</div>
<div id='calendarDisplay'/>
</div>
<script  type='text/javascript'> initCal();</script>
</b:includable>
<b:includable id='posts' var='posts'>
<!-- posts not needed for Calendar -->
</b:includable>
<b:includable id='menu' var='data'>
  Configure your calendar archive widget - Edit archive widget - Flat List - Newest first - Choose any Month/Year Format
</b:includable>
<b:includable id='interval' var='intervalData'>
  Configure your calendar archive widget - Edit archive widget - Flat List - Newest first - Choose any Month/Year Format
</b:includable>
</b:widget>


   8.  Now search </head>   and just above it paste the following lines of code:

<!-- Blogger Archive Calendar by  www.MyBloggerTricks.com -->
<script type='text/javascript'>
//<![CDATA[
var bcLoadingImage = "https://blogger.googleusercontent.com/img/b/R29vZ2xl/AVvXsEj_SBNngsVnLkLodIpTzusnBTx-bderGIogw1ZnvNDZWEgy8WzlFdcdh20htN19dyuII5JYtewuMzpkpdHW_DAH22OFOe8v-PrpE7BleTa19XDJjl6yliswtoubpvfXCK5nDNUfJNkSAQo/s400/loading-trans.gif.png";
var bcLoadingMessage = " Loading....";
var bcArchiveNavText = "View Archive";
var bcArchiveNavPrev = '◄';
var bcArchiveNavNext = '►';
var headDays = ["Sunday","Monday","Tuesday","Wednesday","Thursday","Friday","Saturday"];
var headInitial = ["Su","Mo","Tu","We","Th","Fr","Sa"];

// Nothing to configure past this point ----------------------------------
var timeOffset;
var bcBlogID;
var calMonth;
var calDay = 1;
var calYear;
var startIndex;
var callmth;
var bcNav = new Array ();
var bcList = new Array ();
//Initialize Fill Array
var fill = ["","31","28","31","30","31","30","31","31","30","31","30","31"];
function openStatus(){
   document.getElementById('calLoadingStatus').style.display = 'block';
   document.getElementById('calendarDisplay').innerHTML = '';
  }
function closeStatus(){
   document.getElementById('calLoadingStatus').style.display = 'none';
  }
function bcLoadStatus(){
   cls = document.getElementById('calLoadingStatus');
   img = document.createElement('img');
   img.src = bcLoadingImage;
   img.style.verticalAlign = 'middle';
   cls.appendChild(img);
   txt = document.createTextNode(bcLoadingMessage);
   cls.appendChild(txt);
  }
function callArchive(mth,yr,nav){
// Check for Leap Years
  if (((yr % 4 == 0) && (yr % 100 != 0)) || (yr % 400 == 0)) {
      fill[2] = '29';
   }
  else {
      fill[2] = '28';
   }
   calMonth = mth;
   calYear = yr;
   if(mth.charAt(0) == 0){
      calMonth = mth.substring(1);
      }
   callmth = mth;
   bcNavAll = document.getElementById('bcFootAll');
   bcNavPrev = document.getElementById('bcFootPrev');
   bcNavNext = document.getElementById('bcFootNext');
   bcSelect = document.getElementById('bcSelection');
   a = document.createElement('a');
   at = document.createTextNode(bcArchiveNavText);
   a.href = bcNav[nav];
   a.appendChild(at);
   bcNavAll.innerHTML = '';
   bcNavAll.appendChild(a);
   bcNavPrev.innerHTML = '';
   bcNavNext.innerHTML = '';
   if(nav <  bcNav.length -1){
      a = document.createElement('a');
      a.innerHTML = bcArchiveNavPrev;
      bcp = parseInt(nav,10) + 1;
      a.href = bcNav[bcp];
      a.title = 'Previous Archive';
      prevSplit = bcList[bcp].split(',');
      a.onclick = function(){bcSelect.options[bcp].selected = true;openStatus();callArchive(prevSplit[0],prevSplit[1],prevSplit[2]);return false;};
      bcNavPrev.appendChild(a);
      }
   if(nav > 0){
      a = document.createElement('a');
      a.innerHTML = bcArchiveNavNext;
      bcn = parseInt(nav,10) - 1;
      a.href = bcNav[bcn];
      a.title = 'Next Archive';
      nextSplit = bcList[bcn].split(',');
      a.onclick = function(){bcSelect.options[bcn].selected = true;openStatus();callArchive(nextSplit[0],nextSplit[1],nextSplit[2]);return false;};
      bcNavNext.appendChild(a);
     }
   script = document.createElement('script');
   script.src = 'http://www.blogger.com/feeds/'+bcBlogId+'/posts/summary?published-max='+calYear+'-'+callmth+'-'+fill[calMonth]+'T23%3A59%3A59'+timeOffset+'&published-min='+calYear+'-'+callmth+'-01T00%3A00%3A00'+timeOffset+'&max-results=100&orderby=published&alt=json-in-script&callback=cReadArchive';
   document.getElementsByTagName('head')[0].appendChild(script);
}
function cReadArchive(root){
// Check for Leap Years
  if (((calYear % 4 == 0) && (calYear % 100 != 0)) || (calYear % 400 == 0)) {
      fill[2] = '29';
   }
  else {
      fill[2] = '28';
   }
    closeStatus();
    document.getElementById('lastRow').style.display = 'none';
    calDis = document.getElementById('calendarDisplay');
    var feed = root.feed;
    var total = feed.openSearch$totalResults.$t;
    var entries = feed.entry || [];
    var fillDate = new Array();
    var fillTitles = new Array();
    fillTitles.length = 32;
    var ul = document.createElement('ul');
    ul.id = 'calendarUl';
    for (var i = 0; i < feed.entry.length; ++i) {
      var entry = feed.entry[i];
      for (var j = 0; j < entry.link.length; ++j) {
       if (entry.link[j].rel == "alternate") {
       var link = entry.link[j].href;
       }
      }
      var title = entry.title.$t;
      var author = entry.author[0].name.$t;
      var date = entry.published.$t;
      var summary = entry.summary.$t;
      isPublished = date.split('T')[0].split('-')[2];
      if(isPublished.charAt(0) == '0'){
         isPublished = isPublished.substring(1);
         }
      fillDate.push(isPublished);
      if (fillTitles[isPublished]){
          fillTitles[isPublished] = fillTitles[isPublished] + ' | ' + title;
          }
      else {
          fillTitles[isPublished] = title;
          }
      li = document.createElement('li');
      li.style.listType = 'none';
      li.innerHTML = '<a href="'+link+'">'+title+'</a>';
      ul.appendChild(li);
      }
   calDis.appendChild(ul);
   var val1 = parseInt(calDay, 10)
   var valxx = parseInt(calMonth, 10);
   var val2 = valxx - 1;
   var val3 = parseInt(calYear, 10);
   var firstCalDay = new Date(val3,val2,1);
   var val0 = firstCalDay.getDay();
   startIndex = val0 + 1;
  var dayCount = 1;
  for (x =1; x < 38; x++){
      var cell = document.getElementById('cell'+x);
      if( x < startIndex){
          cell.innerHTML = ' ';
          cell.className = 'firstCell';
         }
      if( x >= startIndex){
          cell.innerHTML = dayCount;
          cell.className = 'filledCell';
          for(p = 0; p < fillDate.length; p++){
              if(dayCount == fillDate[p]){
                  if(fillDate[p].length == 1){
                     fillURL = '0'+fillDate[p];
                     }
                  else {
                     fillURL = fillDate[p];
                     }
                  cell.className = 'highlightCell';
                  cell.innerHTML = '<a href="/search?updated-max='+calYear+'-'+callmth+'-'+fillURL+'T23%3A59%3A59'+timeOffset+'&updated-min='+calYear+'-'+callmth+'-'+fillURL+'T00%3A00%3A00'+timeOffset+'" title="'+fillTitles[fillDate[p]].replace(/"/g,'\'')+'">'+dayCount+'</a>';
                 }
              }
          if( dayCount > fill[valxx]){
             cell.innerHTML = ' ';
             cell.className = 'emptyCell';
             }
          dayCount++;
         }
      }
    visTotal = parseInt(startIndex) + parseInt(fill[valxx]) -1;
    if(visTotal >35){
        document.getElementById('lastRow').style.display = '';
       }
  }
function initCal(){
   document.getElementById('blogger_calendar').style.display = 'block';
   var bcInit = document.getElementById('bloggerCalendarList').getElementsByTagName('a');
   var bcCount = document.getElementById('bloggerCalendarList').getElementsByTagName('li');
   document.getElementById('bloggerCalendarList').style.display = 'none';
   calHead = document.getElementById('bcHead');
   tr = document.createElement('tr');
   for(t = 0; t < 7; t++){
       th = document.createElement('th');
       th.abbr = headDays[t];
       scope = 'col';
       th.title = headDays[t];
       th.innerHTML = headInitial[t];
       tr.appendChild(th);
      }
   calHead.appendChild(tr);
  for (x = 0; x <bcInit.length;x++){
     var stripYear= bcInit[x].href.split('_')[0].split('/')[3];
     var stripMonth = bcInit[x].href.split('_')[1];
     bcList.push(stripMonth + ','+ stripYear + ',' + x);
     bcNav.push(bcInit[x].href);
     }
  var sel = document.createElement('select');
  sel.id = 'bcSelection';
  sel.onchange = function(){var cSend = this.options[this.selectedIndex].value.split(',');openStatus();callArchive(cSend[0],cSend[1],cSend[2]);};
  q = 0;
  for (r = 0; r <bcList.length; r++){
       var selText = bcInit[r].innerHTML;
       var selCount = bcCount[r].innerHTML.split('> (')[1];
       var selValue = bcList[r];
       sel.options[q] = new Option(selText + ' ('+selCount,selValue);
       q++
       }                  
   document.getElementById('bcaption').appendChild(sel);
   var m = bcList[0].split(',')[0];
   var y = bcList[0].split(',')[1];
   callArchive(m,y,'0');
}
function timezoneSet(root){
   var feed = root.feed;
   var updated = feed.updated.$t;
   var id = feed.id.$t;
   bcBlogId = id.split('blog-')[1];
   upLength = updated.length;
   if(updated.charAt(upLength-1) == "Z"){timeOffset = "+00:00";}
   else {timeOffset = updated.substring(upLength-6,upLength);}
   timeOffset = encodeURIComponent(timeOffset);
}
//]]>
</script>
<script src='/feeds/posts/summary?max-results=0&amp;alt=json-in-script&amp;callback=timezoneSet'></script>
<!-- End Blogger Archive Calendar by www.MyBloggerTricks.com  -->

Optional: The yellow highlighted region is where you can change the text "View Archive", loading image, ASCII characters for navigation arrows and change the abbreviation for Day names.

   9. Save your template and you are almost done!

Add Styles

The widget will look dull and grey unless you style them by adding colours. Do this:

  1. Search inside the template for ]]></b:skin>   and just above it paste the following css codes respectively:


If you are using a lighter theme with white background then use this code:

Light Archive Calendar

/* Start of Post Navigator by MBT (LIGHT Theme) ------ */
#calendarDisplay {display:none;}
/* div that holds calendar */
#blogger_calendar { margin:0px auto 0px 0px;width:100%;}
/* Table Caption - Holds the Archive Select Menu */
#bcaption {border:1px solid #C7C7C7;padding:2px;margin:10px 0 0;background:#fff;font:bold 100% Tahoma, Arial, Sans-serif}
/* The Archive Select Menu */
#bcaption select {background:#ffff;border:0 solid #C7C7C7;color:#0080ff;font-weight:bold;text-align:center;}
/* The Heading Section */
table#bcalendar thead {}
/* Head Entries */
table#bcalendar thead tr th {width:20px;text-align:center;padding:3px; border:1px solid #C7C7C7; font:bold 100% Tahoma, Arial, Sans-serif;background:#fff;color:#0080ff;}
/* The calendar Table */
table#bcalendar {border:1px solid #C7C7C7;border-top:0; margin:0px 0 0px;width:100%;background:#fff}
/* The Cells in the Calendar */
table#bcalendar tbody tr td {cursor:pointer; text-align:center; border-radius:4px; padding:3px;border:1px solid #C7C7C7; color:#666;font:bold 100% Tahoma, Arial, Sans-serif;}
/* Links in Calendar */
table#bcalendar tbody tr td a:link, table#bcalendar tbody tr td a:visited, table#bcalendar tbody tr td a:active {font-weight:bold;color:#ffffff; text-decoration:none;}
table#bcalendar tbody tr td a:hover {color:#ffffff; text-decoration:none;}
/* First Row Empty Cells */
td.firstCell {visibility:visible;}
/* Cells that have a day in them */
td.filledCell {  background:#fff;}
td.filledCell:hover {  background:#dddddd;}
/* Cells that are empty, after the first row */
td.emptyCell {visibility:hidden;}
/* Cells with a Link Entry in them */
td.highlightCell {background:#53A9FF;border:1px solid #C7C7C7}
td.highlightCell:hover {background:#72B9FF;border:1px solid #C7C7C7}
/* Table Footer Navigation */
table#bcNavigation  {width:100%;background:#fff;border:1px solid #C7C7C7;border-top:0;color:#0080ff;font:bold 100% Tahoma, Arial, Sans-serif;}
table#bcNavigation a:link {text-decoration:none;color:#0080ff}
table#bcNavigation a:hover{text-decoration:underline;}
td#bcFootPrev {width:10px;}
td#bcFootAll{text-align:center;}
td#bcFootNext {width:10px;}
ul#calendarUl {margin:5px auto 0!important;}
ul#calendarUl li a:link {}

/* End of Post Navigator by MBT (LIGHT Theme) ------ */

If you are using a Dark template with black background or similar then use this code instead:
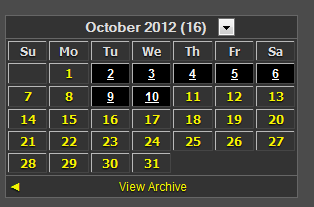
Dark Archive Calendar

/* Start of Post Navigator by MBT (DARK Theme) ------ */

#calendarDisplay {display:none;}
/* div that holds calendar */
#blogger_calendar { margin:5px 0 5px 10px;width:98%;}
/* Table Caption - Holds the Archive Select Menu */
#bcaption {border:1px solid #666666;padding:2px;margin:10px 0 0;background:#333333;font:bold 100% Tahoma, Arial, Sans-serif}
/* The Archive Select Menu */
#bcaption select {background:#333333;border:0 solid #333333;color:#dddddd;font-weight:bold;text-align:center;}
/* The Heading Section */
table#bcalendar thead {}
/* Head Entries */
table#bcalendar thead tr th {width:20px;text-align:center;padding:2px; border:1px outset #666666; font:bold 100% Tahoma, Arial, Sans-serif;background:#333333;color:#dddddd}
/* The calendar Table */
table#bcalendar {border:1px solid #666666;border-top:0; margin:0px 0 0px;width:95%;background:#333333}
/* The Cells in the Calendar */
table#bcalendar tbody tr td {text-align:center;padding:2px;border:1px outset #666666; color:#F5F202;font:bold 100% Tahoma, Arial, Sans-serif;}
/* Links in Calendar */
table#bcalendar tbody tr td a:link, table#bcalendar tbody tr td a:visited, table#bcalendar tbody tr td a:active {font-weight:bold;color:#ffffff; text-decoration:underline;}
table#bcalendar tbody tr td a:hover {color:#ffffff; text-decoration:none;}
/* First Row Empty Cells */
td.firstCell {visibility:visible;}
/* Cells that have a day in them */
td.filledCell {}
/* Cells that are empty, after the first row */
td.emptyCell {visibility:hidden;}
/* Cells with a Link Entry in them */
td.highlightCell {background:#000000;border:1px solid #666666}
/* Table Footer Navigation */
table#bcNavigation  {width:95%;background:#333333;border:1px solid #666666;border-top:0;color:#F5F202;font:bold 100% Tahoma, Arial, Sans-serif;}
table#bcNavigation a:link {text-decoration:none;color:#F5F202}
table#bcNavigation a:hover{text-decoration:underline;}
td#bcFootPrev {width:10px;}
td#bcFootAll{text-align:center;}
td#bcFootNext {width:10px;}
ul#calendarUl {margin:5px auto 0!important;}
ul#calendarUl li a:link {}

/* End of Post Navigator by MBT (DARK Theme) ------ */

Customization for LIGHT theme:

  • To change text color in blue edit  0080ff  Use our Color Generator Tool
  • To change background color of the cell with blue background in active mode edit 53A9FF
  • To change the cell colour in mouse hover mode edit 72B9FF

Customization for DARK theme:

  • To change color of the yellow text edit F5F202 


   2.   Finally save your template and you are all done!

Visit your blogs to see the Archive gadget transformed into a beautiful Calendar. :)

Need help?

The widget can be further customized and is fully editable. If you needed any further help just let me know. I hope this new method may add new spice to your free blogger layouts and give it a more professional Design touch. I hope you find it useful.

Don't you think the widget loads extremely fast and can attract visitors more thus leading to higher page views? Do let us know of your precious views. Peace and blessings buddies! :)