HootSuite For Blogger - Install the App Now!


Connect Blogger to HootSuite


Probably one of the best things about blogging in this age has to be the level of automation you can get nowadays. Long gone are the days when you even had to add html styles in your posts by hand. It is amazing how easy things have become today. You might already be familiar with social media automation, and how you can cross-publish your posts across multiple platforms. HootSuite is one application that's pretty well known in this regard. Well, now there's good news for bloggers! HootSuite has finally been integrated with Blogger! Now, you can automate the whole blog posting process right from where you manage your social media!


HootSuite is a very popular application that connects with all your social media profiles, such as Facebook, Twitter, Google Plus, and so on, and amalgamates them all into a single dashboard from where you can update them easily. It gives you powerful features, such as scheduling your posts, cross-publishing on multiple platforms, and more, all from the convenience of a single browser tab!


HootSuite integrates with Blogger!


This functionality has now come to Blogger! You can now update to Blogger, and more, right from your HootSuite dashboard! I, for one, was really looking forward to a solution that'd allow me to create and manage Blogger posts right from where I manage my social interactions. Now that this feature is finally here, let us look at what you can do with it.


  • View content - You can view all your published content, posts, and even pages right from HootSuite. You can also see the comments on your posts and pages.

  • Create posts - As mentioned already, you can create and edit your posts in the stream. No need to visit Blogger separately for managing your blog posts.

  • Share content - What better way to share your blog posts than on social media right from the number one social media manager? You can use HootSuite to easily share your posts and pages to your connected social media networks.

  • Multiple blogs - Instead of just one, you can monitor multiple blogs that can be affiliated with different accounts. 


Join now!


You can connect blogger simply by signing into the social media management dashboard that is HootSuite, and then adding Blogger easily from the dashboard. Alternatively, you can visit HootSuite's app directory, and click on the "Install App" button right below the Blogger icon.


HootSuite app directory


HootSuite also held a Google+ hangout on the 28th, where they talked about Blogger integration with HootSuite, and also gave a live demo. MBT was especially invited for this event. And it was pretty informative, especially since there was a Q&A session at the end, where people asked some useful questions. Here is the link to the hangout.


So, do you like HootSuite? Try connecting Blogger with it, and let us know what you think of it! Happy blogging :)


Google Strict Penalty on Sites that Sell Links To Pass PageRank


Note: This post is recommended to all readers and must be read word by word for your own benefit.


Were you fortunate enough to achieve a PageRank 3, 4 or higher? If yes then you might be receiving several emails in your inbox from link building companies that wish to pay you up to $100-$200 for a link on your blog post. I am sure its excites you greatly when you find such a great opportunity to make some free bucksBut wait! Google's web spam Head Matt Cutts has just announced on Webmaster Central blog last Friday that a strict action will be taken against websites and blogs that sell links for the sole purpose of manipulating Search engine ranking and passing PageRank juice.


About Google's penalty on selling links


Ever since 2003, when the practise was relatively less rampant, Google has been warning against selling links in its quality guidelines. Now you have to realize, that the whole reason Google controls more than 65% of the search game is that the results returned are fairly accurate. End users want accuracy. And if they don't get it, they'll have no problem migrating to another search engine. So it is only fair that Google doesn't want you to sell links, because doing so would put Google's business in jeopardy.


Google Penalty


When you sell links to pass PageRank, you can hurt the accuracy of search results. False popularity from links that are not based on merit hurt the integrity of search results. Also, gaining an unfair advantage is uncalled for, especially when there are so many other hard workers toiling for their websites. Hence, Google reserves the right to protect its index by 'banishing', or penalizing websites that violate its terms and conditions. This, in fact, isn't a Google related problem. Every major search engine would want to get rid of this practise for the best of its interest.


Does this effect the PR process?


A very frequent question asked in this regard is, whether or not this practise effects the PR of some websites? Well, the answer is, yes it does. If you saw a website getting a low PR, even if it had good content, then more often than not, such websites are selling links, which is not easily observable to the casual observer. But search algorithms can decide within seconds when a link is paid. And hence, such sites get rewarded accordingly.


So, what should you do in such cases?


So what should you do about these paid links? There's a very simple solution. Links like these need to be pointed out via a rel="nofollow" tag. This tag tells the search engines not to follow this link. Usually, link buyers won't buy nofollow links. If they don't, then there's not much you can do about it, unless you want to give them a link, and end up getting penalized in the process.


What to do about paid links?


But what to do if you get penalized? Luckily, Google gives you some wriggle space to get yourself out of sticky situations like this. You can file a reconsideration request to Google. But first, make sure you meet all of Google's quality guidelines, and remove all paid links before applying. Check out more by following the link below, where we have discussed this topic in great length.


How about paid ads?


Google is not against paid advertisments. You can totally use this method of linking to get targeted traffic. In fact, Google itself supports the practise, and even approves of other non-Google advertising programs. All it asks for is that you disclose such links to search engines.


Now bear in mind that Google is not trying to tell people how to run their website, nor are they cracking down on forms of advertisments. Just so long as you follow their quality guidelines, you will be fine, and will stay safe in Google's index.


So do you know any site that you think might be selling or buying links? You can prevent them from getting an unfair advantage by reporting paid links here. You can also find more information on paid links by following this link to Matt Cutt's website, where he answers more frequently asked questions. And as always, you cn ask us too. Cheers :)


Add AdSense right After <!--More--> Tag


Adsense positioning in bloggerThis is a great tutorial which will multiply your current click through rate and add a new boom to your over all Adsense earning. With a big repository of plugins for Wordpress blogs like Quick Adsense, WP users never need to worry while adding Adsense to any part of the blog they wish but in blogger we lack plugins that could do the job automatically. Therefore this week my main focus lies in developing more of such plugins that could provide you great front end experience. Thanks our developer Ahmed Nasir the script developed this time will automatically insert your AdSense Ad right after the opening paragraph (Post summary) or the read more button(Jump Break). The read more link is distinguished by the HTML tag "<!--more-->" , we will use a simple Jquery code to tell the browser to append an Ad zone with a unique div ID, right before the more tag. In  browsers where JavaScript is disabled the Ad zone will instead display at the end of post. You can see the demo on our blog, right after reading this line...


(You will see below a 468X60 Adsense for content Ad).


Update: I have disabled the Ad display for browsers where JavaScript is disabled. 


Installing the Script on Blogger


  1. Go to Blogger > Templates

  2. Backup your template

  3. Tick the "Expand Widget Templates" box

  4. Search for <head>

  5. Just below it paste the following JQuery code only if you are not yet using jQuery script on your blog


<script src='http://ajax.googleapis.com/ajax/libs/jquery/1/jquery.min.js' type='text/javascript'/>

     6.   Next paste the following code below <head>


<script type='text/javascript'>

$(document).ready(function(){


$(&#39;a[name=&quot;more&quot;]&#39;).before($(&#39;#MBT-google-ad&#39;).html());

$(&#39;#MBT-google-ad&#39;).html(&#39;&#39;);


});

</script>

Optional: If you want to display the ad at two places i.e. below read more tag and also at the end of post then delete the highlighted yellow code. Also delete the yellow highlighted code from step#8 given  below

    7.  Now search the following code:


<data:post.body/>

      8.  Just below it paste the following code:


<b:if cond='data:blog.pageType == &quot;item&quot;'>
<div style="display:none;">

<div id='MBT-google-ad'>
<br/>
<center>
ADD ENCODED ADSENSE CODE HERE </center>
<br/>
</div>

</div>  </b:if>

Replace the bolded text above with your Adsense code. Remember that the code that you copy from your Google Adsense Account must be first encoded inorder to work with blogger templates. Simply copy the code and then encode it using the following MBT tool.


Copy the encoded code from MBT HTML encoder and then paste it on the bolded text that says: ADD ENCODED ADSENSE CODE HERE

      9. Save your template and you are all done!

Visit your blog and then visit any post page, you will see an Ad hanging just perfectly right after the first opening Summary paragraph. :)


Need Help?


I am always open to curious and delicious questions so never hesitate asking for help. If your blog has no Read more functionality or you don't know how to add a a jump break then you can try these interesting tutorials:


If you wish to add Adsense just below post title or somewhere else then read:


Installing Zemanta on Blogger - A New Way to create Blog Posts!


Zemanta


Creating quality content is a major concern for bloggers. It is one thing to establish a good-looking and well-optimized website which is SEO friendly, and quite another to update it with fresh, regular content which is of high quality. No matter how well a site is optimized for search engines, content still remains the king, and Google regards content more highly, since it is oriented towards the users more. Creating quality content, and adding value to it isn't an easy job. But don't worry! People who use Google Blogger now have access to an amazing tool, Zemanta, which will help them create quality content, and spice it up with images, links, and more!


UPDATE: If you are not well versed with SEO then we don't recommend that you may use this tool. Please read the following tutorial to know why:


What makes a great blog post?


When people ask me how they can create 'quality blog posts', I usually tell them to first overview their own posts from an outsider's perspective. Forget the person who wrote the post, and become the person who'd love to find anything wrong with the post so that he could fire the guy who wrote it. This kind of self-criticism often proves to be constructive, and makes you see your posts in a better light.


Now the writing part of the blog post itself cannot be imposed on anyone, because not everybody has the knack for writing proficiently, not at the start anyway. So instead, we advise people to focus on the visuals. When you take a glance at a blog post, you generally analyze the structure of the content. One of the most important thing to consider here is visual aids. Adding images can be the key to any post's success, since they add colors and graphics which attract readers.


Besides images, there are a few more things that matter within a blog post, such as authority links, further resources, and so on. In other words, working on building trust. Well, as it turns out, this sort of work is right up Zemanta's alley.


Zemanta?


Zemanta is a free editorial service that will help you build upon your blog post, and add more value to it by helping with images, tags, links, and more. It has just been integrated with Blogger, so Blogger users can easily use this to improve the quality of their blog posts!


Zemanta can help you with;


  • Images - This is a real time-saver! While you are writing your post, you can see image suggestions appear right on your sidebar. You can choose them at any post, and insert them into your post with a single click! Additionally, you can quickly insert your Instagram and Flickr photos too.


Images


  • Tags - With Zemanta, you can easily tag your posts with Labels. Zemanta will make the process much easier, and bring your site closer to search engines as well.

  • In-text links - This is another perk I was really looking forward to. Zemanta will automatically (or to quote Zemanta, "automagically") link keywords to relevant sources. This will hopefully help readers who aren't clear about a term, and want to find out more about it.


  • Related Articles - Here's another potential gold mine. You can use this tool to link to your old articles, as well as to link to articles from the blogosphere. This way, you will relate to posts from other bloggers, and other bloggers will relate to posts from you. Hence, an effective linking scheme that could benefit both parties.


How to get Zemanta?


Zemanta is pretty easy to install. And since it's free, there's no hassle about it. Best of all, it is available for most popular browsers, since it is a browser extension. You can get this plugin from its host website. Simply click on the browser icon that you use, and follow the on-screen instructions.


For example, to install to Chrome, simply follow this download link. Click on the Add to Chrome button at the top, and this extension will be installed in seconds! Similarly, for FireFox, all you need to do is go to the download site, and click on Continue to download. The extension will then take no time to download and install!


Pretty cool, huh? This plugin could really save time, and help with productivity. What do you guys think? Leave your interesting responses below. Peace :)


HostGator's Biggest February Discount - 35% OFF!


It's our third continuous happy year since 2011 when we first hosted all sites of our network under the protection of this blue alligator. The reason what makes HostGator folks special is their great discount offers on special occasions. The coupon code that we received this month will give all MBT readers a straight 35% OFF on all shared hosting, reseller and dedicated server plans. To make it more simple, a 3 year standard registration of a hatchling plan will grant you a discount of over $62, $100 for baby plan and amazingly $163 discount for Business Pan. Registering directly from elsewhere would give you only 20% discount, therefore you still have over a week left to utilize this great opportunity to kick start a new online venture.


Note: Offer Expires on 28 FEB 00.00 US Time

Please first choose a plan that best suits your requirements before using the coupon. Click here 


How to Grab this Coupon?


This EPIC sale starts today and will end by the end of Feb i.e. 28th February. The sale is publically available for both US and non-US citizens. In order to successfully insert the coupon code and get your proper share of concession, Copy the coupon code below and then Click the link "Grab it" to land on the promo discount page directly. Enjoy this best sale!


FEB35


PS: This discount applies to new customers only. If you are already a hostGator customer then this discount wont apply to you. If you have not yet signed up with hostGator then you are fortunate enough to kick start your online business today.


Why HostGator?


I have shared several great stories of our experience with hostGator and I must assure you that HostGator has never embarrassed us or any of our clients so far. More than dozens of our readers are already enjoying running their online business without worrying about any technical troubles thanks to the free 24/7 Live Chat Support and unlimited bandwidth and uptime servers.


To explore why we recommend hostGator with confidence to all our readers each month, please read it for yourself:


In times of great technical trouble, great customer support is what that counts more. They have always helped us with any technical or SEO problem arising in our sites and amazingly their help has always won my heart. Its indeed their great server speed, fair affordable service charges, unlimited bandwidth and excellent customer service that has won HostGator several awards for consecutive 10 years. You can see the long list on their homepage


What can I create with HostGator?


You can create almost anything using the friendly user interface of HostGator's control Panel (Cpanel) with just a click of a mouse.


Some examples include:


  1. Blog Software  eg: Wordpress, LifeType   


  2. Forum Software


  3. Gallery Software


  4. Guestbook Software


  5. Website Builder


  6. Mail Software  eg: xyz@mybloggertricks.com


  7. Social Networking Software   eg: Facebook, mySpace


  8. Wiki Software


  9. Survey Software


  10. Billing Software


  11. Chat Software


  12. Directory Software


  13. eCommerce Software


  14. Our Blog and all its pages is a live example!


  15. So on...


How Will it Effect my Site Ranking?


Please visit and read: Best Hosting Plans if you have the following questions in mind:


  1. I am using Free Blogger, How would it effect me?


  2. I am using Free Wordpress, How would it effect me?


  3. I want to transfer my Domain to Hostgator, Will Domain Migration Effect my Ranking or Traffic? Read tutorial here


There are three webhosting plans that HostGator offers which are:

1. Hatchling Pan


  • Single Domain

  • UNLIMITED Disk Space

  • UNLIMITED Bandwidth

  • Shared SSL Certificate

  • Starting at $3.96/month | With 35% discount it would cost just $1.39/mon


2. Baby Plan  (The plan that we use)


  • UNLIMITED Domains

  • UNLIMITED Disk Space

  • UNLIMITED Bandwidth

  • Shared SSL Certificate

  • Starting at $6.36/month  |  With 35% discount it would cost just $2.23/mon


3. Business Plan  (Obviously Not for bloggers)


  • UNLIMITED Domains

  • UNLIMITED Disk Space

  • UNLIMITED Bandwidth

  • FREE Private SSL & IP FREE Toll Free Number

  • Starting at $10.36/mon    |  With 35% discount it would cost just $3.63/mon


Which plan to use?


Use Hatchling if you want to run just one Domain

Use Baby if you are planning to open more domains in future. We use this plan to host all our websites at hostGator.

Use Business Plan if you want to run several domains on a single account for a corporate firm.


How Many Years Should You Register for?


Small Age domains are treated more as spam webpages and never attract robots to its full potential. Therefore to gain respect in they eyes of search engines like Google/Yahoo/Bing then you must Register your domain for no less than 3 years.


Questions?


If you have any query in mind and need any help related to choosing a plan for your business then feel free to post your queries in the comment box below. I will release the Kitchen recipe for webhosting next week where you will receive 24/7 free technical consultancy related to your webhosting and domain hosting problems. I am sure it would be a great help for all those who want serious help related to DNS settings, servers errors and related issues. 


If in case you are only interested in buying a domain and don't want a storage space then you can do so by reading the following post:


Google Explains How To Use Search Queries in Webmaster Tools


Search Queries


Google Webmaster Tools is a great friend to bloggers and webmasters. It hosts a great many features, and provides a lot of help to both beginner, as well as advanced users. For example, the URL parameter customization tool helps optimize your URLs, you can use Google Webmaster Tools to get advanced index reporting, and so on. The list of features is long and distinguished. Have you ever wondered about what the Search Queries feature under 'Traffic' did in Webmaster Tools? You can use some of the information provided to improve your site. We'll talk about this Search Queries feature in today's post.


In a typical search engine environment, there are three phases. Crawling, Indexing, and Ranking. The ranking includes putting pages on top of search results etc. Search queries have more to do with ranking than anything else. Even though ranking is important, you must keep in mind that it isn't only part of the process. There are a lot of other factors too that contribute towards conversion. With that in mind, let's look at this video from Google, and then talk about Search Queries in Webmaster Tools as discussed by Google.


Search Queries terminology


For beginners, it is important that they know some of the basic terminology so often used in the field. A Query refers to a search word or term that the user enters in the search bar. If your website comes up in the search results visible to the user, then it counts as an Impression. If the user clicks on your site after seeing its impression, then it considered as a Click. Now you must have often heard about CTR, or Click-Through-Rate. This is the ratio of your Clicks versus your Impressions. A low CTR would mean that users see your website, but don't actually open it, since it's not appealing to them.


Another term often used is Qualified Traffic.This refers to the users who clicked on your website, and actually found your content useful. This could be shown by the number of conversions you are getting, such as ad-clicks, sign-ups, subscriptions, and so on.


Investigating Search queries


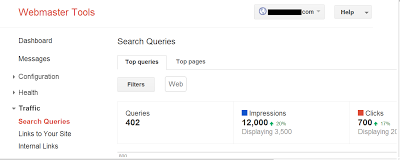
Search Queries


Understanding your audience


This should be the key focus of any business, online or otherwise. You can use Search Queries, and then go to Filter to see the breakdown of your audience. By default, the filter is set to 'the web'. If you click on it, you will see how your audience is divided. You can then use this information to tailor your content for specific audience. For example, if most of your audience is from the U.S, you could do a special feature that applies to people living there.


Common questions you could ask yourself while targeting your audience are; who is your audience? Where are they located? What age group are they? What are their interests? How do they browse the web? Does your content match up with the queries they enter?


Check your Top Queries


When you go to Search Queries, you'll see a tab labelled 'Top Queries'. Open it, and then Sort by Clicks. This is a nice little feature that will let you know what your top queries have been for a defined time period. You could then create more content based on those queries, and introduce new ones like them.


Another good approach for investigating queries would be to take a notice of the changes that occur to your queries over different periods of time. For example, some businesses might see an increase in traffic near holiday seasons. Currently, you can only see history for three months. We'd recommend you download your data every three months to keep track for longer periods of time.


If you sort your queries by CTR, you will be able to see where your website is making an impression on users, and where it isn't. A low CTR would mean you need to work on those specific queries, whereas a high CTR means you need to learn and apply from the better performing queries.


Checking your top pages


You also have a 'Top Pages' tab in Search Queries on your Webmaster Tools dashboard. You can apply sorts over here as well. Sorting by clicks will let you see what pages have gained traction, and which have stalled. A strategy can then be set up to improve upon the pages who have very few clicks.


With the top queries, we used sorting based on clicks and CTR. But with your top pages, sorting with clicks and impressions sounds more relevant. Now impressions might not always bring in clicks, but the user does go through their abstract, or at least looks at its heading. Pages with the most impressions are usually the highest ranked for certain search queries. So once you know what your most valuable pages are, you can pivot their potential, and use them to feature your other pages that re low ranked, but maintain quality and are related to the high-ranked pages.


Sounds reasonable? You can use these simple approaches to take your business out of the middle lane, and onto the fast one, because that is the aim of every business out there. If you liked these tips, then do share them with others. Also tell us what approaches you are using. All the best :)


Display Post Views Count in Blogger - New!

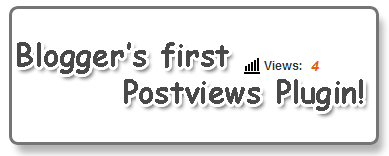
blogger postviews pluginYes you heard it right, all BlogSpot blogs will now be able to display a dynamic count for individual pageviews. We can now easily create this  post view counter without worrying about servers or server code. With a free service like Firebase you can now create dynamic and data-driven plugins for blogger without worrying about backend development. Firebase was launched in April 2012 and since then it had been the hub for developers. Amazingly this free plan gives you 10GB Free bandwidth and 5GB Free storage. Which in our case is more than required! We had been lucky to utilize this free service for blogger platform and create some amazing scripts with the help of our developer Ahmed Nasir. Today's tutorial will help you to install a dynamic script that will automatically increment its initial count value when a visitor views your blog posts. The counter data will be stored on a free database provided by Firebase. Lets first see a demo!


UPDATE: Unfortunately firebase is no more free now, its Hacker free plan allows only 50 Max Connections which means it will work for small blogs with just less than 100 visitors per day


Demo

Note: The postviews count wont change when you refresh the blog homepage but it will change only when you visit individual posts.

1. Create your Firebase Account

In order to gain access to a free database and be able to keep a backup of your postviews counter data, you must sign up for a free account at Firebase.

Fill up the easy steps sensibly and then once your account has been activated, you must create your first Firebase database.

2. Create a Firebase Database

You can create 2 firebases. At present just create one, we will guide you later in coming posts about amazing things you can play with this free service.

  1. Towards the bottom right side of your account, you will find the following submit box.

creating a firebase

  2.   Inside this box input your website name. In my case I inserted mybloggertricks and this generated the following firebase URL: https://mybloggertricks.firebaseio.com

  3.   Finally hit the create button and note down your firebase URL because we would need it later in this tutorial.

3. Installing Postviews Plugin

  1. Go To Blogger > Template
  2. Backup your template
  3. Click Edit HTML
  4. Tick the box "Expand widget Templates"
  5. Search for ]]></b:skin>
  6. Just above it paste the following CSS code:

/*-------- Post Views  ----------*/
#views-container {
width: 85px;
float: right;
}

.mbtloading {
background: url('https://blogger.googleusercontent.com/img/b/R29vZ2xl/AVvXsEiwY7MDl-HIBOjsq4aTkmJxYMiSlpfayYo078yDtHKEIg-TAg1R9NXh7ggSH8Bs070c2exGNbDmOa5TTsXZTmjS1t_LNzF-JoM43GRal4ahVVmyU1Ci6bUoLuWaUiiKe5PpzJQicOIa9AJy/s320/mbtloading.gif') no-repeat left center;
width: 16px;
height: 16px;
}

.viewscount {
float: right;
color: #EE5D06;
font: bold italic 14px arial;
}

.views-text {
float: left;
font: bold 12px arial;
color: #333;
}

.views-icon{
background: url('https://blogger.googleusercontent.com/img/b/R29vZ2xl/AVvXsEitSI3sCa8Z74rRRgpUW2CS9EgcMhQN-tvA9LDcBBuBMjSijTuPWk3ROiF6OEP5T2Bzx0VqoueHr6_1l5XY7GDwaR_dNreIjxkNdOnU2iZNq7SRqE_6ugcgaVb6-zlqevaKeCXMIH3y-fLN/s1600/postviews.png') no-repeat left;
border: 0px;
display: block;
width: 16px;
height: 16px;
float: left;
padding: 0px 2px;
}

    Customizations:

  • To change the text color of the numeric count, edit #EE5D06
  • To change the plugin alignment, change right to left.

   7.  Next search for </body>  and just above it paste the following JavaScript code:

<!-- Post Views Script by MBT -->
<script type='text/javascript'>
    window.setTimeout(function() {
        document.body.className = document.body.className.replace(&#39;loading&#39;, &#39;&#39;);
      }, 10);
  </script>
<script src='https://cdn.firebase.com/v0/firebase.js' type='text/javascript'/>
<script>
$.each($(&#39;a[name]&#39;), function(i, e) {
var elem = $(e).parent().find(&#39;#postviews&#39;).addClass(&#39;mbtloading&#39;);
var blogStats = new Firebase(&quot;https://mybloggertricks.firebaseio.com/pages/id/&quot; + $(e).attr(&#39;name&#39;));
blogStats.once(&#39;value&#39;, function(snapshot) {
var data = snapshot.val();
var isnew = false;
if(data == null) {
data= {};
data.value = 0;
data.url = window.location.href;
data.id = $(e).attr(&#39;name&#39;);
isnew = true;
}
elem.removeClass(&#39;mbtloading&#39;).text(data.value);
data.value++;
if(window.location.pathname!=&#39;/&#39;)
{
if(isnew)
blogStats.set(data);
else
blogStats.child(&#39;value&#39;).set(data.value);
}
});
});
</script>

Make this change:

  • Replace the highlighted brown line with your firebase URL (Step#2). Make sure you replace it correctly by taking care of forward slash (/)

    8.  Now one last step. Find this code:

   <data:post.body/>

Note: If you are finding multi occurrences of the same code then choose the first occurrence.   

   9. Just above it paste the following HTML,

<!-- Post Views Counter by MBT-->
<div id='views-container'><span class='views-icon'/><div class='views-text'>Views:</div> <div class='mbtloading viewscount' id='postviews'/></div>

You can replace views: with any text you like.


    10.  Now the final step, paste the following jquery link just below <head>

<script src='http://ajax.googleapis.com/ajax/libs/jquery/1/jquery.min.js' type='text/javascript'></script>


    11.  Hit save and you are all done!

Visit your blog and press F5 (refresh page) to see the counts dancing just perfectly! :)

Copyrights

Developers and niche bloggers are most welcome to share this  Plugin with their readers and friends. Please attribute the credits back to MBT blog as the only favor in return. It takes hours of efforts to write and debug these scripts. This plugin comes under a Creative Commons Attribution-NonCommercial-NoDerivs 3.0 Unported License.

Need help?

We just hope this plugin adds new fuel to your blogger powered blogs. We tried best to keep it working as efficient as possible. You wont run out of bandwidth as long as you create your own Firebase accounts and not use ours (our firebase url). 

This plugin will display views only once pages are visited. It is not synchronized with your Google analytics stats data, therefore it will only display correct views for the new posts that you publish.

Let me know if you needed any help. We have some more interesting scripts coming up this week. Stay tuned! Peace and blessings buddies :)

Don't forget to try:

Who is a Premium AdSense Publisher?


Google Premium AdSense Publishers


In any business institution or organization, people who bring in good value are usually rewarded. Like many online companies, Google relies upon ads for its business. The more ad-clicks you get on your website, the better it is for Google, because Google ultimately gets a portion of its AdWords share. Just like most companies, Google has an incentive program with which it rewards AdSense publishers who bring in lots of click, and effectively help Google as well. This incentive program is dubbed "Google Premium AdSense Publishers". Many of our readers have had some confusion regarding Premium AdSense Publisher accounts. So that shall be our point of focus in this post today.


How to become a Premium AdSense Publisher?


A Premium AdSense Publisher (PAP) is a special publisher who gets premium services as mentioned above. PAPs have a huge traffic, and a high CTR, which is the reason why they stand out from normal publishers.


To become a PAP, you first have to pass a loyalty test. Not everyone can participate in this program. There's a minimum threshold that needs to be met first. You have to have at least one of the following;


  • A minimum of 1 Million pageviews per month - In other words you must have a daily traffic of at least 10-20 thousand pageviews.

  • At least 100K-150K search queries per month - This approximates to around 5 thousand search queries per day.


As you can see, both these figures are pretty high, which is why it is very difficult to become a PAP. PAPs have a high CTR - more than 100 clicks per day - which is why Google is interested in them.


Google AdSense


You can't apply to become a premium publisher. Google will induct you automatically if it believes you deserve it. AdSense will monitor your traffic for a long time, so you have to be above the threshold consistently. It might take a long time, maybe years, to become a publisher. It took Mohammad 2 years to become a premium publisher. So even if you have met the threshold, you need to wait it out until AdSense finally decides to give you PAP privileges. The wait is long, yes. But the rewards are well worth the effort!


Perks of being a premium publisher


There are many benefits of being a PAP, some of which are;


Extra ad units - You can display more than three ad-units per page! Normal publishers can only add three content ads per page. But premium publishers can add more! These extra ad units have a special ID which differentiates them from normal ads. Check out the following post to learn about this.


Third-party ad-serving - Premium publishers can serve third-party ads using their Doubleclick For Publishers account. Find out more about joining DFP for small businesses.


Special monthly consultations - This is probably one of the most valuable perks PAPs get - they get all the support they need! A special consulting agent contacts PAPs, and sets up a meeting on Google Calendar. You can get the support you want. Mohammad just had his consultation for January, so it's not something Google only advertises. They do contact you personally if you're a PAP.


These agents provide suggestions related to ad-placements, and tips on increasing revenue. PAPs also get invitations for AdSense seminars/webinars and workshops.


Ad-customization - Normal publishers can't change AdSense ad codes to make them look different, because they run the risk of getting their accounts banned. But premium publishers have no such limitation. They can change size, format, text color, background color, theme, and a lot more! They can also remove the 'Ads by Google' label on ads to make them look more professional.


Negotiable terms - Premium AdSense Publishers can also negotiate terms of their contract with AdSense. Normal publishers have to go with the fixed AdSense rates. But premium publishers can negotiate, and adjust their rates with AdSense, which is quite a huge benefit.


Besides all these features (and more), premium publishers also enjoy all the benefits normal publishers have. So what are you waiting for? Start working on your traffic, and start making a full-time passive income from your blog! Wish you all the best :)

How to Host Web Content on Google Drive?


Google Drive


Google Drive, as you might know, is one of the more recent cloud storage services. For starters, it offers some functionality that makes it better than its closest competitors, i.e. SkyDrive and DropBox. One such feature is the seamless integration with other Google products, and the story doesn't end there. Google Drive will also let you host static web content, so that you can run a simple website right on your drive! This sort of functionality was only offered by DropBox before. Now, it's Google's turn to establish its superiority. In this post, we'll talk about hosting your own web content on Google Drive.


Cloud storage is a great way to host web pages. For one, it lets web developers get a feel of how their websites would actually look on the web. Besides, it could be used to share photos, videos, and other information with friends and family, without fear of people from the outside hacking into your system, or spamming your website etc. It is also a great way for freelancers to show their work to their clients.


Hosting web content on Google Drive


Now you can't host dynamic websites on Google Drive. Nothing that requires server-end computing. Technologies like PHP, ASP etc require back-end processing, so they can't run. You can only host simple, static websites that are HTML, CSS, and JavaScript driven.


Now you could use this just like you'd use GooglePages or code.google.com for a similar purpose. But GooglePages has been replaces with Google Sites, and no longer supports direct uploading, which is kind of a let-down, because we need to directly upload webpages in order to test them on Google Drive. Google Code, on the other hand, has bandwidth issues. Hence, Google Drive is the best option you have for hosting your static website.


How to host a website on Google Drive?


To host a website on your Drive, log into your Google Drive account from a web browser, and create a folder. This folder can be inside the main Google Drive folder, or inside another private directory. The path isn't of concern. What's important is the permission you set on that directory. This directory will host your web files, so it needs to be shared with the public, or else, no one will be able to see it.


Now that you've created a folder to hos your files, it's time to put the files in. Upload all your web files in this folder. Now, you need to share it with the public. To do this, right click on the folder, and then click on Share >> Share.....


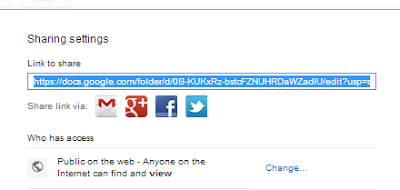
Now, look under the "Who has access" section, and change the setting from Private to "Public on the web". Then, copy the link given on top. You'll need it for the next step.


Share with public


Now, you need to get your hosting link. You can do this manually. The URL you just copied is the link to your shared file, and not to the hosting. There's a slight adjustment you need to make in the URL. The link you copied will go something like this: https://docs.google.com/folder/d/link-to-your-site. You have to change it to https://googledrive.com/host/link-to-your-site. Notice that the 'link-to-your-site' part remains the same.


Now, you can give this link to whoever you like! It'll take them to your hosted website. Cool, right? You can see Google's instructions on hosting a website on Google Drive. And believe it or not, they've hosted the instructions on Google Drive itself! You can view the instructions here. You can use any JavaScript files on your own site.


Hope you enjoyed this post. Try this out with your own Drive, and let us know if you have any problems. Peace :)

Top 10 Google Drive Tips for Advanced Users


Google Drive


Google, as you know is the leader when it comes to web technology. It launched its cloud storage services around two years ago, which is an infant age when compared to other closest competitors from the crowd, such as SkyDrive and DropBox. Some people might have some reservations against Google Drive, but a lost of people, especially avid Google users love it, probably because integrates so well with other Google products such as Docs etc. If you're one of these people, you might like to check out some of the top 10 Google Drive tips for more effective usage.


1. Photo sharing on Google Plus


As I just said, probably one of the best things about Google Drive is its integration with other Google products. You can use Google Drive to share photos on Google Plus. If you have some pictures on Google Drive you want to share on Google Plus, you can easily do that without uploading that photo to Google Plus. To do this, you just need to click on the photo icon on Google Plus, and hover over that little arrow. You'll see an option to upload "From Google Drive".


2. Adding attachments


While adding attachments to Gmail, you can once again rely on Google Drive to have your files ready at hand. Now, you don't need to upload and send people files through email. You can just add files from your Google Drive, and the other party can simply download that file from your public shared link.


3. Add 'Send to Drive' option to your computer


When you right click on a file on your computer (windows), you can see a 'Send To' option, which lists options like Send to Desktop, Documents, Bluetooth device, and so on. You can add Google Drive to these options as well.


To do this, simply copy your Google Drive icon (shortcut). Now, open Windows explorer, and enter the environment variable %appdata% in the path on the top bar. You can write this in the start menu as well. A window will open. Now, navigate to Microsoft >> Windows >> SendTo, and paste the Google Drive shortcut there.


4. Recover deleted files


Usually, when you delete a file from your computer (and the Recycle Bin as well), it's probably the last time you'll see it. Not with Google Drive though. You can recover your deleted files from Google Drive. Just open Google Drive on your browser, and click on the More button on the left. Now, open your Trash, and right-click on our deleted files to restore them back.


5. Add to Library


Some of you might not know this, but you can set your libraries, such as My Documents, My Music etc to fetch content from multiple locations (Windows Vista and higher). You can do the same with Google Drive. Open your Documents from the Start menu, and you’ll see a link saying ‘Includes: 2 locations’ at the top just below the title. If you click on it, you will see what locations that library is fetching content from. To add your Google Drive content into your Documents, simple click on Add, and then browse for the Google Drive folder. Add the folder, and you’ll see all your Google Drive files and folders in your Documents library.


6. Shortcut keys


You can use some shortcut keys for Google Drive on your browser.


  • Shift + A = Select All

  • Shift + N = Deselect All

  • Shift + S = New spreadsheet

  • Shift + D = New drawing

  • Shift + F = New folder

  • Shift + T = New Document

  • Shift + P = New Presentation

  • Ctrl + Alt+ G = Revision history for a file

  • Up/Down arrow key = Select previous/next item in list

  • Shift + Up/Down arrow key = Select multiple previous/next items in list

  • J or K = Go to previous or next item in list without selecting it

  • X = Select/deselect currently highlighted item

  • S = Stat/de-star currently highlighted item


7. File revisions


As mentioned above, you can see a file's revision history (Ctrl + Alt + G). You can restore previous versions of your files you made changes to, such as documents. Simply click on More on the left side, and click on activity. Now, you'll see a list of all the files you made edits to. Right-click on any one, and click on Manage Revisions. Now, you can restore any previous versions stored.


8. Editing Videos


Pixorial Video is a great plug-in for Google Chrome. It allows you to view your Google Drive videos online. And in Google Drive, it will also let you do small bits of video editing, such as cutting clips, adding clips, add music, and so on.


9. Google Drive app for Chrome


While we're on the subject of Chrome extensions, there are a lot of other Chrome extensions that work great with Google Drive. Check out this app collection for find apps that you like.


10. Tags


Previously, in Google Docs, you could tag a file with more than one tag so it could be in multiple collections at the same time. You can do that in Google Drive. Create separate folders for each tag you want to make. Now, select a file, and click on Organize. Hold down Ctrl, and select all the folders you want that file to appear in. This way, you can have one file in multiple folders at the same time.


Liked these tips? Share this post with friends to let them know too! And do share your own best tips with us. Peace :)

Facebook's Location Tracking - Are We Ready For This?


Facebook Places


With a stalling stock, and tough competition from peers, it seems Facebook is now getting a bit more than it bargained for. This probably explains why they're hard at work improving their service, and introducing more features such as Graph Search, video and voice calling, and some brand new marketing features, the list is long, but doesn't end there. Facebook is introducing a new location tracking feature, which will help Facebook friends who are nearby to connect to each other. Additionally, businesses will be able to reach out to customers and promote offers to users based on their location. Apparently, this is a big change. But are we ready for this kind of thing?


The evolution of the social media user


Back in the days Facebook was born, there wasn't really much concept of a social media where people could connect and get together to form private circles, share life events etc. Back then, Facebook was one of the very few social tools for connecting. Fast forward now, and you'll see a plethora of such services waiting to be checked out. The social media user is no longer restricted to a few means of communication. There are so many other tools that directly (Google+, Twitter etc) or indirectly (Skype, WhatsApp, Instagram) compete with Facebook. Hence, the competition may be too much for Facebook to handle in the long run.


Another trend that's been on the rise for the past few years is that of users going mobile. More and more people are now using mobile devices to surf the web. And an even higher percentage of social users use their mobile devices for socialising. According to Facebook's latest 10-K report, about half of its monthly active users are mobile users. This clearly points to the eventuality that Facebook will have to find mobile revenue streams as well, such as mobile ads, since around 85% of its income comes from advertisements. 


Facebook also seems to have lost some of its charm. According to a study, around 21% of its regular users are now too busy to log in as much. 10% think it's a waste of time, whereas another 10% have deleted or deactivated their accounts for long periods in the last year. This goes on to show that users are less and less interested in Facebook with the coming days - all the more reason for Facebook to enhance its features and bring life to itself.


Location tracking


With the world going mobile, it's no wonder Facebook has decided to do the same with its location tracking feature. It bought a location tracking setup in the form of a social media known as Glances last year. And the year before that, Facebook acquired Gowalla, another location-based social media. Now, combining the efforts, Facebook has launched its own location tracking feature that is based on the push technology. Push notifications will tell Facebook when a user is at some place, and when his friends are nearby.


Great mobile feature? Probably. But breach of privacy? Totally! Users were already agitated on the photo tag suggestion feature. So this new feature might just send the paranoid user into a frenzy. People don't want their location to be tracked, and their whereabouts be disclosed to a company that's made up its own little world out there? Besides, this new feature would be a heaven for stalkers, which I am sure none of us sane people want, do we?


What do you think of these new features Facebook is so intent upon introducing? Would you like to be tracked socially? Answer with a yes or no in the comments below, along with a remark to let us know how the majority of you feels about this. Cheers :)

Google Analytics finally introduced Solution Gallery!


Google Analytics Solution Gallery


If you're like me, and like to check up on your blog's Analytics data every so often, then you must have wondered many a times as to what are the best metrics you could use to, say, see your stats from a certain perspective. For beginners, setting up Google Analytics can be a daunting task, since there are so many options, and the availability of the thousands of metrics to choose from doesn't make it any easier. Many people feel that their dashboard is lacking, and perhaps they are missing out on a lot of stuff, which is why they often turn towards online help, and see what other bloggers have in their dashboards. Well, hopefully, there will be no more looking now, as Google just announced a new feature, the Google Analytics Solution Gallery!


A Solutions Gallery?


Now you might be wondering, what could that possibly be? Well, the term is new, but the idea hasn't been unheard of. It features solutions that are focused on generating stats and reports dedicated to branding, email marketing and lead generation, eCommerce, and so on. Hence, the term 'Solution Gallery'. You can think of these solutions as presets in your music player's equalizer. You don't know what the best setting would be for you. So you have some pre-defined presets, such as pop, rock, metal etc to help you out and make life easier.


What it has to offer?


The Gallery has nice features that lets you get the type of reporting you need, or the marketing campaign(s) you want to track. You can look for an Analytics solution, Business objective, or a Marketing Function. Once you are ready to go with the solution(s) you want to try, you can just download them, and apply to your Google Analytics profile.


To access this gallery, simple visit this link to Google Analytics Solution Gallery, and then choose the kind of solution you want.


Gallery solution


The Solutions Gallery offers you Custom Advanced Segments, that you can use to see the effectiveness of your various ad-spots, such as the top (header) ads as compared to the right sidebar ads. This let's you know what sort of ads are better suited for what ad spots.


Another great feature is the Advanced Custom Filters. You can add Advanced Custom Filters for long-tail words ranging from 3 to 6 words, and so on. You can then generate reports on those keywords, and create a separate dashboard to allow you to analyze your long-tail traffic.


For novices, these features can be a great help. A lot of people use Google Analytics as it came, without any (or maybe very small) modifications. Many don't know about all the advanced features, and how to use custom reporting. But with this tool, it has never been easier. Even beginners can make use of it and get advanced reports on their websites, and they can then use that data to improve their website.


Give this new feature a try, and tell us what you think about it in the comments below. Peace :)

4 Best ways to Contact Blogger for a Deleted Blog

contact blogger teamHas Google just sent an email that mentions that your BlogSpot blog has been deleted due to spam complaint or copyright violation or for being flagged several times? If yes then you are not alone because several blogs are deleted on monthly basis, sometimes for genuine reasons and sometimes mistakenly. If you feel that your blog was mistakenly removed due to a DMCA request filed against you, or you have taken the necessary steps to remove the infringing content, as per Google they can surely reinstate the blog upon receipt of a counter notification pursuant to sections 512(g)(2) and (3) of the DMCA.

We just reported around 15 sites that were illegally distributing our template layout without our permission to DMCA and it took less than 24 hours for around 7 of them to be permanently deleted. Most of them will also have their AdSense accounts disabled because DMCA does take into account the AdSense Publication ID also. Now for those of you who are spending hours of hard work to produce rich quality content, you should keep patience because there are several effective ways to get your blog back even if it was deleted by a manual action by blogger team itself.

First and Foremost

Before anything make sure you backup all your comments, posts and categories before taking any step. If you are able to access your blog account or blogger dashboard then kindly backup your blogger XML file by following these easy steps:

  1. Go to Settings > Other
  2. Click on Export blog
  3. Click Download blog
  4. Save the file in a safe zone
  5. Done!

This xml file could be converted into a Database friendly format of SQL if in case you wished to restore it through a different platform like wordpress.

1. Contact Blogger Team Immediately

Fill up a counter notice to Blogger Team and mention everything clearly but in precise detail format. You will need to submit your name, phone number, website address and signature (your name). Make sure you fill up the clarification portion carefully.

The link above is a simplified version of the directory on this page: Remove Content From Google

2. Sending Spam Appeal

If you have send an appeal and received no response within 24 hours then you may submit the URL of your blog again using this secret door:

3. Create a thread at Blogger Help Forum

Create a well written precise post with attractive title at Google Groups that provides Support help for BlogSpot blogs. You can create a post by following this link:

Note: Most of the top moderators are Blogger employees.  So posting here does not mean talking to walls!

4. Visit Google Customer Service Center

You can reach out Google's functioning offices in your town or city. If you are one of those fortunates where Google operates at public level then you will surely love paying a visit to the nearest customer care center. All locations are given in the following page:

Following are some important locations for our readers who visit us daily. More details are given on the locations page.

Egypt

47 Office Building
Section 1
City Centre
New Cairo
Egypt

Malaysia

Kuala Lumpur
Level 36 Menara Citibank
165 Jalan Ampang
50450 Kuala Lumpur Centre
Malaysia

United Kingdom

London
Google UK Ltd
Belgrave House
76 Buckingham Palace Road
London SW1W 9TQ
United Kingdom
Phone: +44 (0)20-7031-3000
Fax: +44 (0)20-7031-3001

India

Mumbai
Google India Pvt Ltd
1st Floor
3 North Avenue
Maker Maxity
Bandra Kurla Complex
Bandra East
Mumbai, 400 015 India
Phone: +91-22-6611-7150

Greece

Athens
7 Fragoklissias St, 2nd floor
Marousai
Athens 151 25, Greece

Nigeria

Nigeria
3rd Floor, Mulliner Towers
39 Kingsway Road, Ikoyi
Lagos, Nigeria


Need help?

For those of you who may have lost their blogs, my sympathies are with you but if you were really not violating any of the terms of service then relax and sit back. You will surely receive just treatment. Many people have contact blogger this way and they have successfully retrieved their lost blogs with all posts and comments restored, with no harm to SERP ranking. You can surely have your little baby back. Just follow each of the above applicable method and give Google at least 24 hours to get back to you. This entire reinstating process could take up to a week or more so a lot of patience is required on your half. For any more advice or help, I am always here. Feel free to post your comments and stories. Peace and blessings buddies. :>

URL Redirection for Demo and Download Links in Blogger

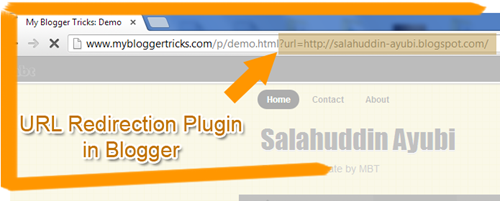
url redirection in bloggerLooks like every time we get a new project from university, we get a new idea to implement it on BlogSpot blogs. Last year we were given the task of developing a twitter clone social media network. We made extensive use of HTML Data-[content] attributes and this led us to create custom Iframes to redirect demo and download links in blogger. Most of twitter's user-interface objects are controlled using this parameter and jQuery built-in functions. We will use the exact same approach to control link redirection in blogger without the need for any web hosting account or complex web scripts. This Blogger plugin is indeed the first of its kind. We just hope this small effort proves useful for all Blogger users especially those who share download resources with their readers.

Update: Links will now also open in new tab. Problem fixed.


A special thanks to my classmate "Ahmed Nasir" who is a genius programmer without any doubts.

DEMO: Click the Demo and Download links and observe the URL in address bar.
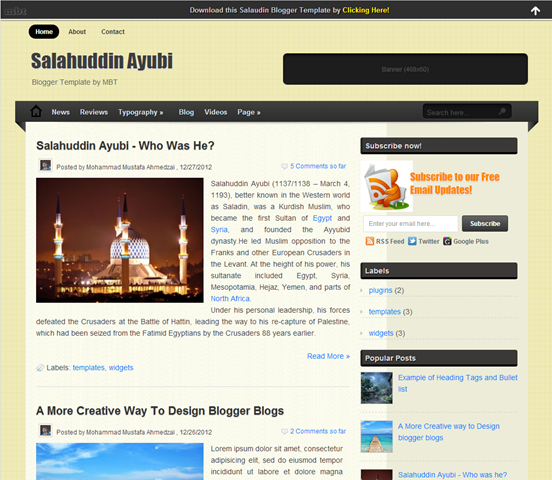
Salahuddin Ayubi

Demo | Download

How it works?

Today's tutorial will help you to append all specified outgoing links next to your domain address by using dynamic string concatenation technique. The visitor would feel like he is visiting a new website but your domain URL will remain stick in the address bar.

This plugin will enclose the body layout of your blog with a custom stylesheet specified by the ID "MBT-REDIRECTION". We will then create two static pages. One for Demo page and one for download. Both these pages will contain an iframe tag with vacant source location. Using JavaScript we will inject a custom stylesheet that will cover the entire space between the two body tags. The JavaScript will also make sure no scroll bar appears in the window.

For the concatenation to work the link or button you create must include a Data-[content] attribute. Using Jquery we would pick the href location as string and then concatenate it next to the link of your Demo or download page.

With all that said, lets get to work. Kindly follow the easy steps below:

1. Create Demo and Download Pages

  1. Go To Blogger > Pages
  2. Create a Static Page with title Demo or any name you prefer
  3. Switch to its HTML view mode
  4. Replace the code inside it if any with the following code:

<div height="100%" id="iframe-container" width="100%">

<style>

body { padding: 0!important; background: none!important; }

#iframe-container { overflow: hidden; background: none!important; }

#frame { border: 0; }

</style>

<iframe frameborder="0" id="frame" src="" width="100%"> </iframe>

</div>

<script>
document.documentElement.style.overflow = 'hidden';  // firefox, chrome
document.body.scroll = "no"; // ie only
var query = window.location.search.substring(1);
query = query.replace("url=", "");
$('#frame').attr('src', query);
var str = $('#iframe-container').html();
$('#MBT-REDIRECTION').html(str);
$('iframe').height($(window).height());
</script>

  5.  Now setup up your blogger post editor settings. Click options and then under Line Breaks, choose "Use <br> tag" Hit Done.
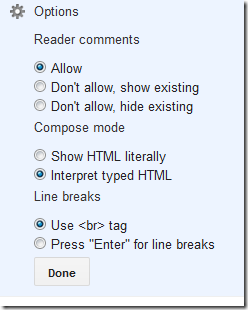
post editor options

    6.  Save your page

   7. Now create another page with the title "Download". Repeat the exact same steps from Step#3 - Step#6

Note down the URL address of both these pages. We will use them later.

2. String Concatenation

Now we need to enclose the body tags and add an extra piece of jquery code inside the template that will do remaining half of the magic.

  1. Go To Blogger > Template
  2. Backup your template
  3. Click Edit HTML
  4. Search for <body>  or a similar by searching just <body
  5. Paste the following code just below it:

<div id='MBT-REDIRECTION'>

   6. Next find </body>

   7. Paste the following code just above it:


</div><!--MBT-REDIRECTION ENDS-->

    8. Now search for ]]></b:skin>

    9. Paste the following Jquery code just below it:

Update: Script updated

<script>

//<![CDATA[

$(document).ready(function () {
    $('[data-MBTdemo]').click(function (e) {
        e.preventDefault();
        var target = e.target || e.srcElement;
        if ($(target).attr('target') == "_blank") {
            window.open("http://www.mybloggertricks.com/p/demo.html?url=" + $(target).attr('href'), '_blank');
        } else {
            window.location = "http://www.mybloggertricks.com/p/demo.html?url=" + $(target).attr('href');
        }

    });


    $('[data-MBTdownload]').click(function (e) {
        e.preventDefault();
        var target = e.target || e.srcElement;
        if ($(target).attr('target') == "_blank") {
            window.open("http://www.mybloggertricks.com/p/download.html?url=" + $(target).attr('href'), '_blank');
        } else {
            window.location = "http://www.mybloggertricks.com/p/download.html?url=" + $(target).attr('href');
        }

    });

});

//]]>

</script>


  • Replace the orange highlighted code with the URL address of your Demo page.
  • Replace the green highlighted code with the URL address of your Download page.

      10.  Save your template and you are all done!


Now if you try visiting your demo and download pages you will find out a blank page with no content inside it. That's what our code does, injecting custom stylesheet by over riding the default template styles.

3. How to create Links?

Now when you have done all the development part of the tutorial, we come to a stage where we will learn to implement the functionality.

You will create links as you normally do and the only extra piece of information that you need to insert in them are the Data-Content attributes. This is how you need to do.

For Demo Link or Demo Button:

<a href="#" rel="nofollow" data-MBTdemo="true">DEMO</a>


For Download Link or Download Button:

<a href="#" rel="nofollow" data-MBTdownload="true">DOWNLOAD</a>

  • Replace the hash symbol (#) with your demo or download link


Update For Links opening in new tab

I have modified the code by using a conditional if statement that will open links in new tab if target="_blank" attribute is found else it will open the page in same window.

<a href="#" target="_blank"  rel="nofollow" data-MBTdownload="true">DOWNLOAD</a>

You can use redirect as many links per page as you want. The code is efficient enough to pick even an array of data-content attributes.  That simple!

You may now redirect any link inside your blog back to your domain address by giving a pro touch!  

Copyrights

The HTML code and all scripts in this tutorial are the sole property of STC Network. You may not sell the plugin nor affiliate the work to your brand. Developers are requested to link back to this page as the only favor in return if they wish to share the plugin with their audience.

Need help?

If you face any trouble while installing the plugin then please let us know. I just hope that this method of redirecting external links in blogger back to the root domain would help all those webmasters who share resources such as, ebooks, wallpapers, templates,. icons etc. You can even use it to redirect affiliate links! Please let us know if you would like further improvements in the code. Wish you a great blogging experience. Peace and blessings buddies :)