Showing posts with label Facebook. Show all posts

Share Blogger Post Automatically to Facebook using IFTTT

Automatically posting a blog post to Facebook used to be a challenge. The idea was simple, which is to notify Facebook that you have a blog you want posted on your wall, and the social media will do as you command. The implementation, however, was more complicated than that.

Even with Facebook's post-by-email feature, only the blog name and title will appear on the wall, leaving behind the content or link. There are other plugins available, but they don't work as straightforward as they're supposed to be. There is always something missing.
How to Share Blogger post automatically to Facebook using IFTTT

Here is an online utility IFTTT (If This, Then That), which is capable of moving social postings between sites. Setting it up is fairly easy, and just as easy to use. So, let's see how we can share Blogger posts automatically to Facebook using IFTTT.

Step 1. Sign up for a free IFTTT account

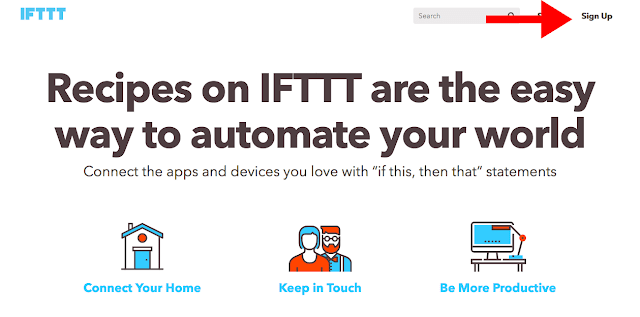
Visit IFTTT.com and set up an account by creating a username and password.

sign up IFTTT to connect Blogger with Facebook

Now, IFTTT will take you through a mini-tutorial - click on the word 'this', 'that' and 'Continue' button several times. Finally, select 3 channels that interest you and click 'Continue' to finish with the registration.

Step 2. Create a new recipe

Once registered, we need to 'Create a Recipe'. A recipe is basically the process of combining two platforms together - in our case, we will combine Blogger with Facebook. This shouldn't take more than five minutes.

To get started, click the 'My Recipes' link and then click the 'Create a Recipe' button, as shown below:
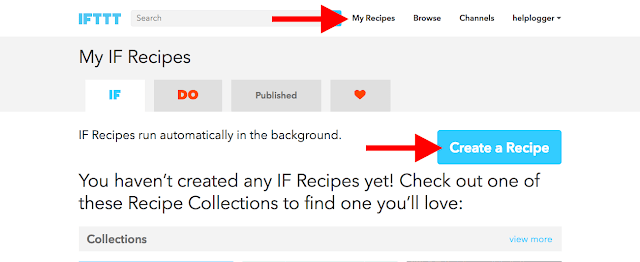
create IFTTT Blooger to Facebook recipe

Start creating the recipe by clicking the blue 'this' word and select a "trigger channel". The trigger you need to choose is Blogger - search for it in the box, as illustrated below:
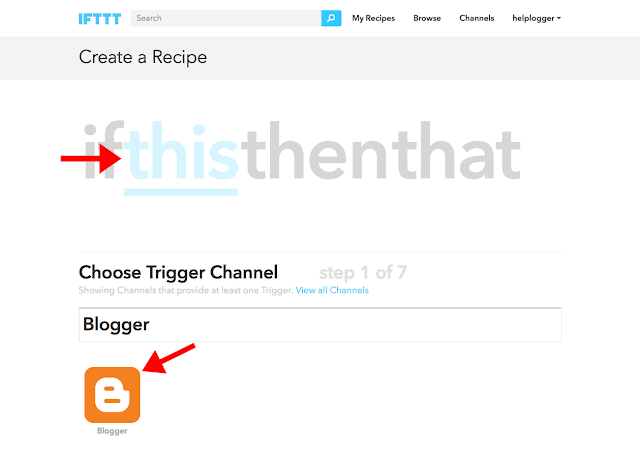
create Blogger recipe using IFTTT


Step 3. Connect Blogger blog with IFTTT

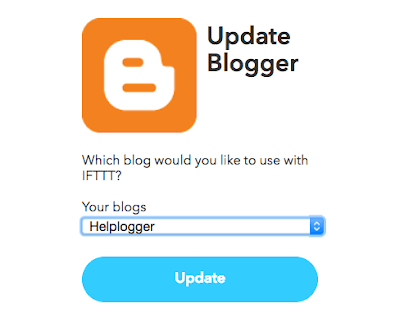
Connect your Blogger account in order to tie it with your IFTTT account. A 'Request for Permission' pop-up will appear > click the 'Allow' button and choose which blog you want to use with IFTTT from the drop-down menu, then click the 'Update' button.

add Blogger blog to IFTTT for automatic posting

After our Blogger blog has been connected, 'Choose a Trigger' that allows you to specify what kind of posts will be published to Facebook. You can choose 'Any new post' or 'New posts labeled'.
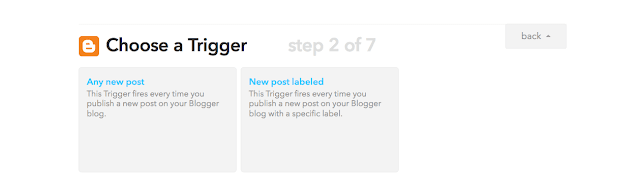
automatically publish new Blogger post using IFTTT

Finally, press the blue 'Create Trigger' button to proceed to the next step.
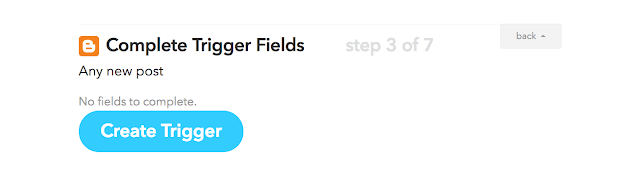
connect Facebook to Blogger to post automatically

Step 4. Creating the 'That' trigger

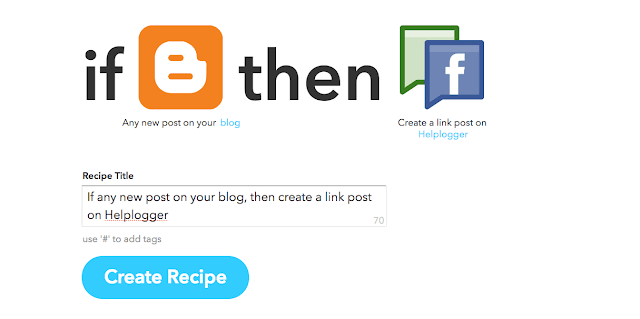
After registration, Create a Recipe that will specify the direction with which your blog posting will take. Since you want to link Blogger to Facebook, then the Recipe will be - if Blogger, then Facebook. What you're doing is replacing 'this' to Blogger, which is the source, and 'that' to Facebook, which is the target destination.

if Blogger then Facebook IFTTT

To set up 'that', click on the blue-colored 'that'. This will bring up a window that contains a list of social media sites. Search for 'Facebook' in the box and select the 'Facebook Pages' option (select the plain 'Facebook' option if you want to post to your personal profile).
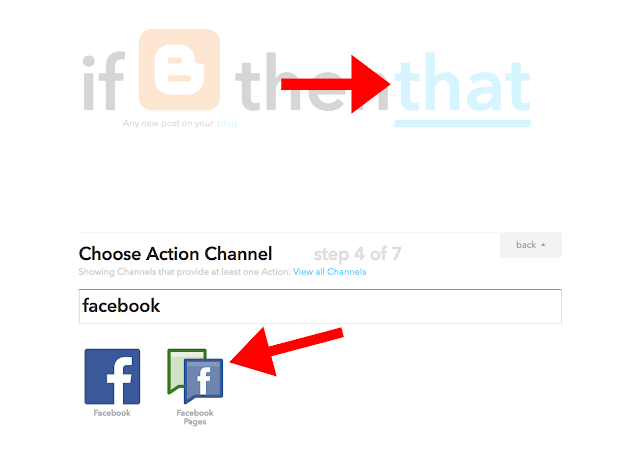
choose action channel IFTTT facebook

Step 5. Connect Facebook page with IFTTT

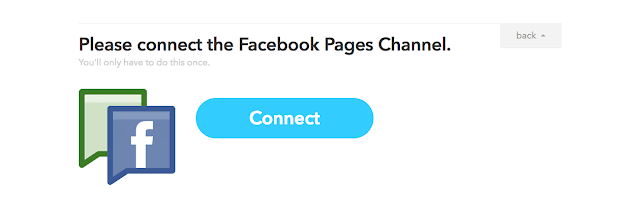
Connect your Facebook account. Make sure you are logged into your Facebook account, before you connect. Pressing the 'Connect' button will open a pop-up window to allow IFTTT post on your Facebook page, then select your Facebook page.

connect facebook pages channel on IFTTT

Hit the 'Done' and 'Continue to the next step' buttons and we're almost done...

You will be prompted to 'Choose an Action', where you get to specify if you only want to 'Create a status message', 'Create a link post', or 'Update a photo from URL'. Choose 'Create a link post' as shown below:
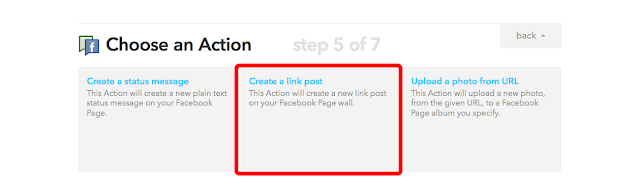
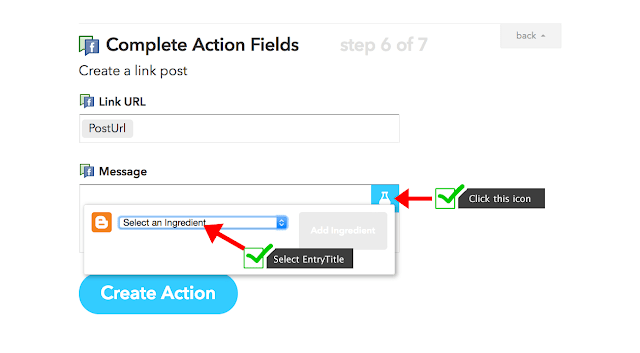
post Blogger automatically to facebook

Step 6. Choosing the ingredients

Once you choose an action, a 'Complete Action Fields' window will appear with 'Link URL' and 'Message' box. To add an ingredient, click on the 'Message' field and you'll see a test tube icon on the right hand side. If you click it, a drop-down menu will appear which will let you choose a field to include - select 'PostTitle' and click 'Add Ingredient' blue button on the right side.

IFTTT Blogger recipe ingredients for Facebook

If you are unsure of what each ingredient does, please visit this page.
Step 7. Finish creating the recipe

Finally, click the blue 'Create Action' button and your recipe should look something like this:

share blogger post automatically to facebook

To complete your recipe, hit the 'Create Recipe' button.

And that's it! This is how IFTTT recipes are created. Next time you publish a Blogger post, it will be automatically shared to Facebook.

Why Should You Start Building A Facebook Group?


Why build a Facebook Group?


For many individuals and businesses, Facebook has been the go-to place for creating hype and marketing content on social media. And because of its sheer user base and because audience likes to associate with a brand socially before engaging, it is safe to say that Facebook Pages became the de-facto standard for businesses operating in the social playground. But over the past couple years, some businesses have slowed down their Facebook operation thanks to a plummeting organic reach after many Facebook news feed algorithm updates. Facebook Pages are old and bulky. Facebook Groups are now hot in fashion.


This is a two-part post. In the first post, we will discuss why we need Facebook Groups now. And in the second, we will look into ways of building a strong group on Facebook.


Why build a Facebook Group?


Facebook Groups are nothing new. They have been around for many years now, and people have been using them for various purposes. For the most part though, they have only rarely been used to drive organic traffic. But more recently, they have started appearing again and businesses who had given up on Facebook marketing are turning to a new ray of hope once again.


1. Facebook is still relevant


The advent of social apps such as Instagram and Snapchat has meant that quite a lot of people who are mostly only interested in connecting with friends (such as youngsters) are not as active on Facebook. Individuals aside, some businesses have given up on Facebook marketing too because of the hopeless newsfeed algorithm updates. This means that there's a lot less clutter out there, and a lot more competing ground.


Around the end of year 2015, Mark Zuckerberg announced that for the first time in history, Facebook has seen over 1 billion active users in a single day. This means that Facebook has become more relevant than ever, despite the sheer number of users. Facebook marketing isn't going anywhere. And it is time for you to fight for new ground which might otherwise soon be lost.


2. Groups notifications are more effective


The major problem with Facebook marketing used to be the Newsfeed algorithm, which Facebook pages rely upon for organic exposure. For any given page, only a fraction of its followers will see its update, wasting a huge amount of organic reach in its wake. In comparison, Facebook Groups send users a notification when someone posts, thus making more people check it out and more organic traffic to flow.


Users may silence these notifications if your group isn't adding value. So be careful about adding content that is really valuable to your followers.


3. Improved credentials


With an active Facebook group, you have a the ability to drive quality traffic with a single post. And that gives you a very good and powerful value proposition. With a Facebook Page, you're an unknown page owner. But within groups, you share ideas and exchange value with your actively engaged followers. And you can leverage this ability of yours to get solid links for yourself.


4. Free content


Facebook Pages are an amazing marketing resource even though they lack as much organic reach. But maintaining a Facebook Page is a job in itself and you have to spend time creating content. You need a dedicated resource to manage it.


Facebook Groups have the edge here, however, because they are crowd-sourced and practically run themselves. They're relatively low-maintenance and free. All you need to do is keep a check on spam.


Although Facebook Groups are nothing new, they're being rediscovered as a far more useful resource than a Facebook Page, and could potentially prove to be a the new trend for this year in social marketing.

Now Choose Who Manages Your Facebook Profile After You Die


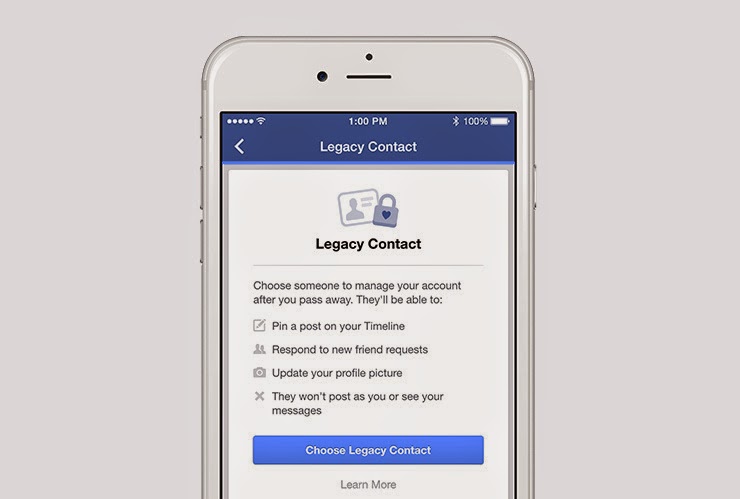
Facebook Legacy Contact feature


Have you ever put some thought into what will happen to your online accounts once you're dead? Death is inevitable, and a lot of people tend to not think about it too much. But have you ever wondered what will become of your accounts then? Will they stay locked forever, because no one knows the passwords you took into the grave? Facebook has the answer - now you can decide who will manage your Facebook account once you're gone!


If you come to think about it, the whole idea is pretty comical. While I am sure there are many geeks out there who write down their passwords in encrypted files, the keys to which are contained within their wills (guilty as charged!), a large number of people don't give it much thought, and hence their accounts get locked forever.


With the new Legacy Contact feature, Facebook now wants you to think about who you'd trust enough to have access to your account once you're gone. And with Valentine's day right around the corner, I can take a wild guess as to the topic of conversation between many couples tonight - just saying (:


Facebook Legacy Contact


You can select a trusted contact - a friend or family member - to be your Legacy Contact. Once Facebook is notified that someone has died, it will memorialize their account, and the word 'Remembering' will appear behind their profile names. The Legacy Contact (if chosen) will then be able to access the deceased's account.


The legacy contact will be able to;


  • Make a post on the memorialized account's behalf (for example to make an announcement)

  • Respond to new friend requests from family members and friends who were not yet connected

  • Update the profile picture and cover photo


The legacy contact will NOT have access to;


  • Account login information

  • Account settings

  • Personal messages (inbox) of the deceased person


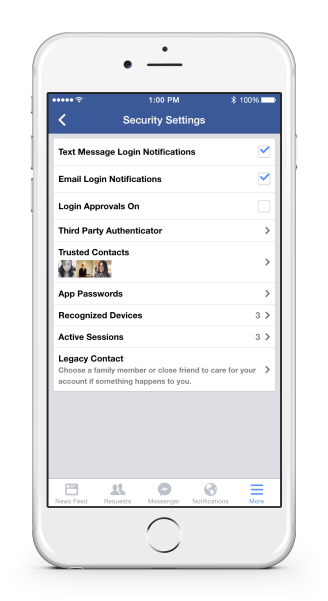
You can view or add a legacy by going to account Settings >> Security >> Legacy Contact. From here, you can choose whether you want that contact to be able to download and archive of your profile pictures, photos, posts etc.


(If you don't yet see this option, don't worry. The feature has been introduced in the US, and is being rolled out slowly to other users around the world)


Legacy Contact


Alternatively, you can choose to have your account permanently deleted upon your death.


Let the eventuality sink in for a while! Have a long, happy and blessed life, y'all! Good luck (:

Facebook Introduces 'Work': A New Social Tool For Businesses


Facebook Work

If you get bored sitting around the office all day without being able to socialize, Facebook has a new hobby for you. Facebook has just announced a new social tool called "Work" (we called it 'Facebook for Work' before), which will revolve around your professional life, and how employees in a Business communicate with each other.


Now, you won't have to go through the hassle of getting around a firewall in order to access Facebook, or hiding it from your boss for that matter.


Simply titled ‘Work’ (as opposed to 'Facebook for Work' as was rumored before), the new product will reportedly allow businesses to create self-contained social networks exclusively for employees. Sounds kind of like an Intranet, with the exception that it would be accessible outside of work.


How is it different from normal Facebook?


The social networks created in Work would mirror Facebook in design and user experience. Users can join using their existing Facebook account, or can create their own ID just for use in Work.


So, why use Work when everyone you work with is already on Facebook? For starters there are no advertisements or data tracking. So you won’t be inundated with ads or have to worry about lack of confidentiality.


Secondly, the company is touting the usefulness of its Groups feature and how it is being integrated in Work. It’s apparently so useful, in fact, that Facebook believes it could replace workplace email the way that other companies like Slack and Yammer have set out to do.


Lars Rasmussen, the engineering director at Facebook, says that the company is currently using Work for its communication, and is using feedback gained by its employees over the years to refine the product before releasing it in an already crowded marketplace.


It sounds like Facebook has recognized the significant growth of workplace communication apps as of late, and is now in reaction mode trying to produce a solution of its own. Perhaps Facebook is banking on the fact that the users’ familiarity with the network will keep them from seeking the services offered by competitive apps.


How Work compares to similar offerings already on the market will remain to be seen as Work is still in the testing phase, having only been released to a select group of partners.


Facebook Popup Like Box Widget For Blogger

Facebook has become the leading social media service on the Internet playing host to over 1.3 billion users; of those, 800 million login to their dashboard feeds at least once a day. Thanks to the vast number of active users on services like Facebook, acquiring new readers as a blogger or content provider has become easier than ever.

In order to produce an effective digital campaign, you absolutely must take advantage of social media by doing things like integrating Facebook on Blogger. Email marketing can be useful, but it comes with restrictions that could limit your blog's potential. Perhaps the most significant problem is that emails don't come with a face or personality like Facebook does.

Think of a time when you received an email in you inbox from someone you didn't know. Where you inclined to open it or did you send it right to the junk folder? If it's your first introduction to new consumer, they simply don't know who you are, what you want, and how you got their email. This sets off an initial breakdown of any type of trust that might have developed. The reputation of email marketing is further deteriorated with a study done by Kaspersky Lab, an Internet research firm. They estimate that around 70% of all the emails sent in the world are spam.

Sharing site content using a Facebook Like Box is just one of many strategies that can generate a regular flow of traffic from a diverse demographic that might have been previously inaccessible. Adding a Facebook Like Box to your site helps to reduces your individual workload, and instead distributes that ability equally among your readers.

When someone reads your content and appreciates the kind of work that you produce, they'll be willing to share that information to their followers and fans, setting off a viral reaction. The first step necessary to making this a reality is to make this change to your site. These next few steps will provide you with a quick and easy guide on how to add a 'Like Box' to your Blogger site so that you can began taking advantage of these great opportunities.


Click here for a DEMO


How to Add the Facebook Popup Like Box Widget

1. Log into your Blogger account and select your blog > go to 'Layout' & click the 'Add a Gadget' link on the right side.
2. Once the popup window is open, select the HTML/JavaScript gadget from the list:


3. Copy and paste the following code inside the empty box:
<script src='http://ajax.googleapis.com/ajax/libs/jquery/1.7.2/jquery.min.js' type='text/javascript'></script>
<style type="text/css">
#fbox-background{display:none;background:rgba(0,0,0,0.8);width:100%;height:100%;position:fixed;top:0;left:0;z-index:99999}#fbox-close{width:100%;height:100%}#fbox-display{background:#eaeaea;border:5px solid #828282;width:340px;height:230px;position:absolute;top:32%;left:37%;-webkit-border-radius:5px;-moz-border-radius:5px;border-radius:5px}#fbox-button{float:right;cursor:pointer;position:absolute;right:0;top:0}#fbox-button:before{content:"CLOSE";padding:5px 8px;background:#828282;color:#eaeaea;font-weight:700;font-size:10px;font-family:Tahoma}#fbox-link,#fbox-link a.visited,#fbox-link a,#fbox-link a:hover{color:#aaa;font-size:9px;text-decoration:none;text-align:center;padding:5px}
</style>
<script type='text/javascript'>
//<![CDATA[
jQuery.cookie=function(a,b,c){if(arguments.length>1&&"[object Object]"!==String(b)){if(c=jQuery.extend({},c),null!==b&&void 0!==b||(c.expires=-1),"number"==typeof c.expires){var d=c.expires,e=c.expires=new Date;e.setDate(e.getDate()+d)}return b=String(b),document.cookie=[encodeURIComponent(a),"=",c.raw?b:encodeURIComponent(b),c.expires?"; expires="+c.expires.toUTCString():"",c.path?"; path="+c.path:"",c.domain?"; domain="+c.domain:"",c.secure?"; secure":""].join("")}c=b||{};var f,g=c.raw?function(a){return a}:decodeURIComponent;return(f=new RegExp("(?:^|; )"+encodeURIComponent(a)+"=([^;]*)").exec(document.cookie))?g(f[1]):null};
//]]>
</script>
<script type='text/javascript'>
jQuery(document).ready(function($){
if($.cookie('popup_facebook_box') != 'yes'){
$('#fbox-background').delay(5000).fadeIn('medium');
$('#fbox-button, #fbox-close').click(function(){
$('#fbox-background').stop().fadeOut('medium');
});
}
$.cookie('popup_facebook_box', 'yes', { path: '/', expires: 7 });
});
</script>
<div id='fbox-background'>
<div id='fbox-close'>
</div>
<div id='fbox-display'>
<div id='fbox-button'>
</div>
<iframe allowtransparency='true' frameborder='0' scrolling='no' src='//www.facebook.com/plugins/likebox.php?
href=https://www.facebook.com/pages/Helplogger/120574614736021&width=339&height=255&colorscheme=light&show_faces=true&show_border=false&stream=false&header=false'
style='border: none; overflow: hidden; background: #fff; width: 339px; height: 200px;'></iframe>
<div id="fbox-link">Powered by <a style="padding-left: 0px;" href="https://allbloggertrick4u.blogspot.com/2014/12/facebook-popup-like-box-blogger-widget.html" rel="nofollow">Helplogger</a></div>
</div>
</div>
4. Press the 'Save' button to add the widget to your blog. That's it!

Facebook Popup Like Box Customization

After adding the code, replace the address in blue https://www.facebook.com/pages/Helplogger/120574614736021 with your site's facebook page URL.

The widget will appear 5 seconds after the page finishes loading. If you want to change this delay, change the number 5000 to a greater or lesser number in this part:
.delay(5000)
By default, the like box only shows up the first time the user visits your page.  If you would like the Facebook box to popup every time the page loads, then remove this line of code:
$.cookie('popup_facebook_box', 'yes', { path: '/', expires: 7 });
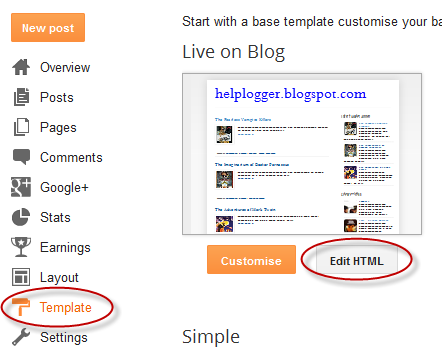
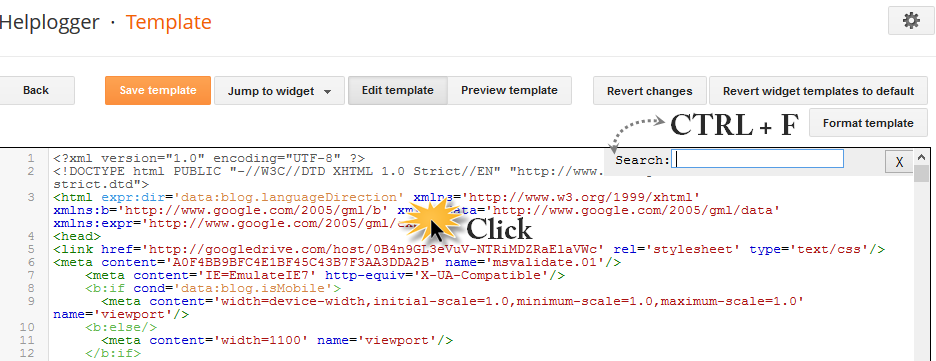
If you want to display only when user visits your homepage, go to 'Template' > hit the 'Edit HTML' button on the right side and search by clicking anywhere inside the code area and pressing the CTRL + F keys for this tag:
</body>
Paste the facebook popup widget right above the body tag and make sure to include the conditional tags below:
<b:if cond='data:page.type == "index"'>ADD THE FACEBOOK WIDGET CODE HERE </b:if>
After saving this widget, you can test it out by returning to one of your old posts which should bring up a little popup widget asking if you'd like to join the site's Facebook page.

If you don't see the Facebook Like Box on the page, you may need to delete your cookies or check out the 'Customization' section above in order to display the widget every time a user visits your site. Once this widget is added to your site, all your hard work should start to translate into an increase in web traffic and number of Facebook fans.

Add floating social media sharing buttons below Blogger post titles

It is becoming increasingly important to make our posts appreciated and shared on social networks and one of the best ways to get traffic to our blog or site and boost sharing stats is to add social sharing buttons.

In this tutorial we will see how to add a floating social media sharing bar below the title of Blogger posts, so when a reader scrolls down the page, he will still be able to see the sharing buttons without having to scroll back to the top.

Adding the below jQuery script will make the buttons float in a fixed position as soon as they reach "the top" of the page. By scrolling back, the buttons will return to their initial position.

The social sharing bar includes buttons for Facebook, Twitter, Google+, and Pinterest.

Social Media Sharing Buttons below Blogger Post Title

Step 1. From the Blogger Dashboard, go to "Template" and click on the "Edit HTML" button:


Step 2. Click anywhere inside the code area and press the CTRL + F keys to open the search box. Once you see the search box, type the </head> tag inside the search box and hit Enter to find it.

blogger search box, ctrl + f

Step 3. Just above </head> add this script:
<script src='http://ajax.googleapis.com/ajax/libs/jquery/1.7.1/jquery.min.js' type='text/javascript'/>

<script type='text/javascript'>
//<![CDATA[
$(function() {
var $movesbuttons = $("#floating-social-buttons"),
$window = $(window),
offset = $movesbuttons.offset();
$window.scroll(function() {
if ($window.scrollTop() > offset.top) {
$movesbuttons.css({'position' : 'fixed', 'width' : '550px', 'top' : '0px'});
} else {
$movesbuttons.css({'position' : 'absolute', 'top' : 'auto'});
}
});
});
//]]>
</script>
Step 4. Now before the ]]></b:skin> tag (press CTRL + F to find it) add the following CSS styles:
#floating-social-buttons {
padding: 6px 0px 12px;
position: absolute;
background: #F6F6F6;
border-bottom: 1px solid #DEDEDE;
width: 550px;
height: 18px;
z-index: 99;
}
.floating-social-buttons {
margin-left: 5px !important;
}
.floating-social-buttons li {
float: left;
margin-left: 5px;
list-style:none;
}
To change the width of the bar, modify the 550px values in red. Note that this value also appears in the script which also needs to be modified.

Step 5. Finally, just below the second <div class='post-header'> (press CTRL + F and hit Enter twice to find the second one) add the following code:
<b:if cond='data:blog.pageType == &quot;item&quot;'>
<div style='padding:5px 0 35px 0;clear:both;'>
<div id='floating-social-buttons'>
<ul class='floating-social-buttons'>

<li><iframe allowTransparency='true' expr:src='&quot;http://www.facebook.com/plugins/like.php?href=&quot; + data:post.url+ &quot;&amp;layout=button_count&amp;show_faces=false&amp;width=100&amp;height=25&amp;action=like&amp;font=tahoma&amp;colorscheme=light&quot;' frameborder='0' scrolling='no' style='border:none; overflow:hidden; width:100px; height:25px;'/></li>

<li><a class='twitter-share-button' data-lang='en' href='https://twitter.com/share'>Tweet</a><script src='//platform.twitter.com/widgets.js' type='text/javascript'/></li>

<li><script src='http://apis.google.com/js/plusone.js' type='text/javascript'/><g:plusone expr:href='data:post.url' size='medium'/></li>

<li><a class='pin-it-button' count-layout='horizontal' expr:href='&quot;http://pinterest.com/pin/create/button/?url=&quot; + data:post.url + &quot;&amp;media=&quot; + data:post.thumbnailUrl + &quot;&amp;description=&quot; + data:post.snippet' style='margin:0 10px 5px 0;'>Pin It</a> <script src='http://assets.pinterest.com/js/pinit.js' type='text/javascript'/></li>

</ul>
</div>
</div>
</b:if>

Customizing the Floating Social Media Sharing buttons

If you want the buttons to appear at the end of the post, paste this code before or after <div class='post-footer'>
If the bar overlaps with the post content, then change 35px to a higher value.

Step 6. Click on the "Save template" button and you're done!

So these were the steps for adding the horizontal social buttons bar on Blogger. Using this bar it is also useful as it could help you to get more social traffic for your blog.

How To Add Social Media Icons to Blogger Header

social media icons, facebook icons, social media icons for bloggerThis tutorial will help you to add social media icons in the top right corner of the page which could increases the likelihood that readers can follow through the various social networks. There are several ways to do this, like adding a new widget section to the blog header but now, we'll do it using an unordered list that uses icons of Facebook, Twitter, Google+ and blog feed, and as a bonus, the icons will rotate when you hover over them.

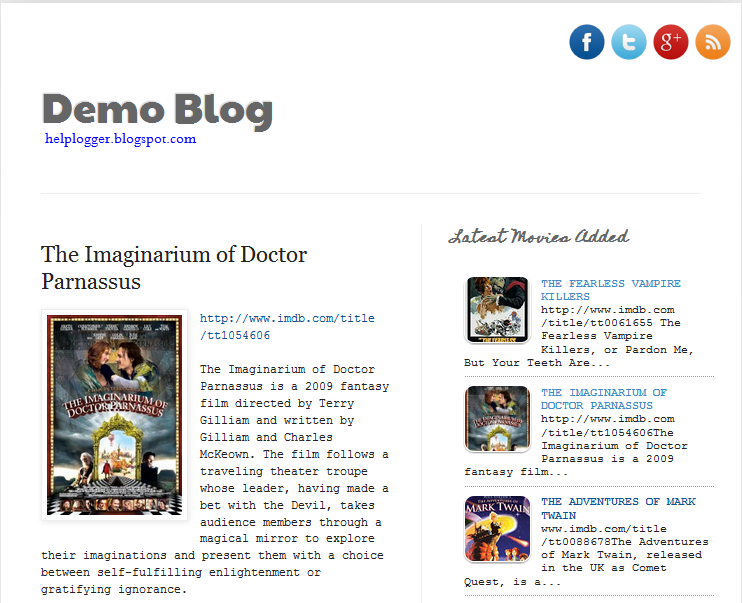
You can see a demo in this test blog.


Adding Social Media Icons to Blogger Header

Step 1. From your Blogger dashboard, go to Template and click on the Edit HTML button:

blogger blogspot, blogger template, blogger gadgets

Step 2. To expand the style, click on the small arrow on the left of <b:skin>...</b:skin> (screenshot 1), then click anywhere inside the code area to search (using CTRL + F) for the ]]></b:skin> tag (screenshot 2) and add this code just above it:

 /* Social icons for Blogger
----------------------------------------------- */

#social-icons {
margin-bottom:-30px;
height:50px;
width:100%;
clear:both;
z-index: 2;
position: relative;
}
.social-media-icons {
display:table
}
.social-media-icons ul {
text-align:right;
padding:5px 5px 0 0
list-style-image:none;
list-style-position:outside;
list-style-type:none;
}
.social-media-icons ul {
margin-bottom:0;
padding:0;
float:right;
}
.social-media-icons li.media_icon {
margin-left:6px;
padding-left:0 !important;
background:none !important;
display:inline;
float:left;
}
.social-media-icons li:hover {
-moz-transform: rotate(360deg);
-webkit-transform: rotate(360deg);
-o-transform: rotate(360deg);
transform: rotate(-360deg);
-moz-transition: all 0.5s ease-in-out;
-webkit-transition: all 0.5s ease-in-out;
-o-transition: all 0.5s ease-in-out;
-ms-transition: all 0.5s ease-in-out;
transition: all 0.5s ease-in-out;
}

Screenshot 1:


Screenshot 2:


Step 3. Now search for this line

<b:section class='header' id='header' maxwidgets='1' showaddelement='no'>

Step 4. And just above it, add this code:

<div class='social-media-icons' id='social-icons'>
<ul>

<li class='media_icon'><a href='http://facebook.com/username'><img border='0' src='https://blogger.googleusercontent.com/img/b/R29vZ2xl/AVvXsEi4XS-EaSUcvLiTuwBYVW2ApB7d05mtXUwBs3MhkDdGz7YEUTtt1Y-qn5KC-Meua8lLYeIhAr0PN0_dgXXXgFzjhRRfEtSVQmBhTqOrZ-49SwA317v1gUi0aBUcX8jGKx4aAzLf7l-pWJ0/s1600/Facebook.png'/></a></li>

<li class='media_icon'><a href='http://twitter.com/#!/username'><img border='0' src='https://blogger.googleusercontent.com/img/b/R29vZ2xl/AVvXsEg5rSwUYBKqel31uAUqCBXJy_aaipSMD2rqTrbi8Iw5Mn-4fKs_1PenF9XtD4Nnos0yEaahdP29v0Lj7KNrhj1nhB6tnRRy0qlBwI04i3JAAYdBu3K4ixJmOObg_SGo67AZb-3prd7Bt6I/s1600/Twitter.png'/></a></li>

<li class='media_icon'><a href='https://plus.google.com/XXXXXXXXXXXXXXXXXX/about'><img border='0' src='https://blogger.googleusercontent.com/img/b/R29vZ2xl/AVvXsEhnHEEux0tx6DrTTfmuRmrCxMDy_rN2VMLUo6wZIziYFQDP0m-0AiHZ0XZSBLG8A6lCmxLrcnFMj_n_v0RMPq7GcKN7lH6sGYRuUue27RiRHH1K-7t04La1g7Wb369sFdHJw-iHkxMiaAk/s1600/googleplus.png'/></a></li>

<li class='media_icon'><a href='http://name-of-your-blog.com/feeds/posts/default'><img border='0' src='https://blogger.googleusercontent.com/img/b/R29vZ2xl/AVvXsEjL1r-iXf6mZ3pSWiydBRc4ilpHjVrMOGFscKS5JbUH1QQ9jfATs0wDYl0uYaoPBu7s6-RVAh9df4zs9hLcSeCzB3WhAtgkSvX9ZXYavyvDp5GQaEtxVDCuAKERkQKeuJ-gAOnidUWT794/s1600/RSS.png'/></a></li>

</ul></div>

Customization

- Change what's in red with your usernames and id: the first is your Facebook username, the second is that of Twitter, in the third you should change the X by the ID of your Google+ profile and in the fourth you will put the name of your blog.
- To change the icons, just replace the urls in blue with the ones of your images.
- You can add more icons if you want, you just have to add before </ul></div> a line like this for each extra icon you want:

<li class='media_icon'><a href='Link URL'><img border='0' src='Image URL'/></a></li>

Step 5. Finally, Save the Template to apply the changes.
The effect is done with CSS3, so this effect will not work in older browsers.

Facebook's Location Tracking - Are We Ready For This?


Facebook Places


With a stalling stock, and tough competition from peers, it seems Facebook is now getting a bit more than it bargained for. This probably explains why they're hard at work improving their service, and introducing more features such as Graph Search, video and voice calling, and some brand new marketing features, the list is long, but doesn't end there. Facebook is introducing a new location tracking feature, which will help Facebook friends who are nearby to connect to each other. Additionally, businesses will be able to reach out to customers and promote offers to users based on their location. Apparently, this is a big change. But are we ready for this kind of thing?


The evolution of the social media user


Back in the days Facebook was born, there wasn't really much concept of a social media where people could connect and get together to form private circles, share life events etc. Back then, Facebook was one of the very few social tools for connecting. Fast forward now, and you'll see a plethora of such services waiting to be checked out. The social media user is no longer restricted to a few means of communication. There are so many other tools that directly (Google+, Twitter etc) or indirectly (Skype, WhatsApp, Instagram) compete with Facebook. Hence, the competition may be too much for Facebook to handle in the long run.


Another trend that's been on the rise for the past few years is that of users going mobile. More and more people are now using mobile devices to surf the web. And an even higher percentage of social users use their mobile devices for socialising. According to Facebook's latest 10-K report, about half of its monthly active users are mobile users. This clearly points to the eventuality that Facebook will have to find mobile revenue streams as well, such as mobile ads, since around 85% of its income comes from advertisements. 


Facebook also seems to have lost some of its charm. According to a study, around 21% of its regular users are now too busy to log in as much. 10% think it's a waste of time, whereas another 10% have deleted or deactivated their accounts for long periods in the last year. This goes on to show that users are less and less interested in Facebook with the coming days - all the more reason for Facebook to enhance its features and bring life to itself.


Location tracking


With the world going mobile, it's no wonder Facebook has decided to do the same with its location tracking feature. It bought a location tracking setup in the form of a social media known as Glances last year. And the year before that, Facebook acquired Gowalla, another location-based social media. Now, combining the efforts, Facebook has launched its own location tracking feature that is based on the push technology. Push notifications will tell Facebook when a user is at some place, and when his friends are nearby.


Great mobile feature? Probably. But breach of privacy? Totally! Users were already agitated on the photo tag suggestion feature. So this new feature might just send the paranoid user into a frenzy. People don't want their location to be tracked, and their whereabouts be disclosed to a company that's made up its own little world out there? Besides, this new feature would be a heaven for stalkers, which I am sure none of us sane people want, do we?


What do you think of these new features Facebook is so intent upon introducing? Would you like to be tracked socially? Answer with a yes or no in the comments below, along with a remark to let us know how the majority of you feels about this. Cheers :)

Designing a Successful Facebook Offer for your Brand


Previously, we have talked about a new feature released by Facebook recently called Facebook Offers. This feature lets you promote your brand by offering people rewards for visiting your website or your brand's physical location. Simple creating an offer, however, is just a start. To make it work, you have to utilize the maximum potential of your audience by designing a successful offer, and keeping the basic Facebook marketing tips in mind. And since you're spending money on creating offers, you have to be extra careful, as a slight mistake might result in a loss for your business. Here, we'll discuss some tips for designing a successful Facebook Offer.


Offers can be a game-changer, but only if placed correctly. Every business has different type of customers. So it's always a good idea to experiment with what offers work best for your customers. If they do not understand your offer, or if they think it's a scam, they might unlike your page. So to keep things smooth, here are a few tips you should keep in mind.


Make it easy to understand


The most important part about an offer is its simplicity. If it's easy to understand, then a lot of people will do it, just for the sake of participating. But if the process is complicated, and makes users go through an unusual activity (such as signing up for something), then that will substantially reduce the number of people who participate. So make the process simple, and explain your Terms of Service in simple words as best as you can.


Discount offers


Make your discounts substantial. No one is gonna bother if you're giving 5 or 10% off on a t-shirt. Generally, discounts become notable and intriguing at 20%. You can also offer free items, as in 'Buy one, get one free'. But at the same time, make your discount believable. If I see an offer on my Facebook home saying 'Click here and get a free iPhone 5', I'll probably flag that story as scam. Make no mistake, business do hand out such lavish gifts. But you've gotta have some reputation before you make such a bold step. For example, everyone seemed to believe in it when Redmondpie decided to give away two free copies of the latest Windows 8.


Discount offers


Use a good image


Most of the time, products sell better if other people see a customer using it. So it'd be a good idea to use an image that shows your product in action, rather than just a logo image or an image with just your product on it.


Pay attention to your headline


Your headline is one of the most important things. Make it engaging, and yet keep it natural. Caption it as if you're talking in the real world, and as naturally as possible. Don't excessively capitalize, and don't use extravagant words. Keep it simple, and easily understandable, while at the same time making the purpose crystal clear.


Expiration date


Set up a reasonable expiration date. Don't make it end so soon that most people would miss it. And don't set it too far away, or it'll lose a sense of urgency. It depends from offer to offer, but around a week or two sounds realistic.


Promote!


Spread the word! Share your offer with the world. Re-share your offer as much as possible, and encourage others to do so too. Share on other social networks such as Pinterest as well, so maximum number of people might access it. Usually, word-of-mouth-marketing works like a charm in such situations.


Promote


Those were of the basic tips you should keep in mind while creating a Facebook offer. Such offers can mean a lot to your business, but only if done correctly. Hope you understand these points. See you soon in the next post. Peace :)

How To Add Barcode and Redemption Code For Facebook Offers?


Yesterday, we talked about a latest marketing and advertising feature introduced by Facebook called Facebook Offers. Facebook Offers let you promote your brand or products by giving out rewards to people who visit your website or your brand's physical location (office, store etc). These rewards can be anything, from an ebook to a small gift hamper to an entry into a lucky draw for a larger prize. It is the next step in Facebook marketing, and you can be one of the first ones to make use of this feature. We have already talked about what Facebook Offers. Today, we'll talk about the different types of offers, and how to add Redeem codes or Barcodes for people to be able to redeem your offers.


Types of offers


There are three basic types of offers.


  • In Store Only - Can only be redeemed by visiting your brand's physical location (store, shop, office etc)

  • Online Only - Can only be redeemed by visiting your website

  • In Store and online - Can be redeemed both ways


For Online redemption, you will need a redeem code, which can't be used In Store Only. Similarly, barcode can only be used for In Store, and not online.


Adding a barcode to your offer


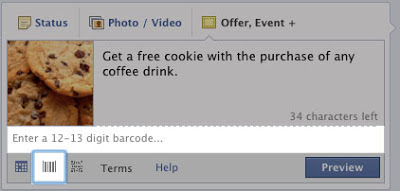
Barcodes can be added when you create an In Store offer. They can be scanned easily, and then used to redeem your promotion or discount offers. To add a barcode, click on the barcode icon () once you've entered a headline for your offer.


Barcodes


Add a barcode here. You can enter a 12-digit Universal Product Code (UPC-A) barcode, or a 13-digit EAB barcode (click here for the Wikipedia article on barcodes). Make sure you format the number properly. Preview the barcode to see how it looks, and make sure it is readable. Most smartphones nowadays can scan barcodes through the use of an app if they have a camera with focus. People will be able to scan this barcodes right from their smartphones.


Adding an online redemption code


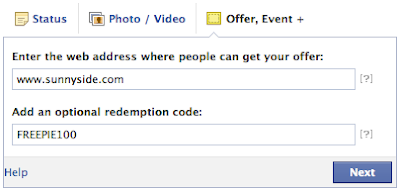
Adding an online redemption code is easy, If you want people to enter a code on your website to receive a discount, then choose an Online option. Create your offer as discussed in the previous post.


Redemption Code


Enter the web address where people can get your offer, and add a redemption code (max 50 characters). Click Next, and you're done.


How does it work?


When someone claims your offer, they get an email with detailed instructions on how to redeem the offer, along with barcodes and/or redemption codes. They will also get your terms and conditions with the expiration date included.


(Please note that these barcodes and redeem codes aren't designed to prevent people from redeeming your offer multiple times)


Have any questions in mind? feel free to ask. We'll be obliged to help :)

Facebook Offers: How to Create an Offer for your Fan Page?


Facebook Offers


Facebook has just recently launched a new feature for brand pages: Page offers. Page offers are basically rewards for your audience or customers who can claim them by visiting your store or online website, and also share with their friends. Not only does this engage your current customers or audience on a new level, it also extends the reach of your service or brand. Offers require a budget to run, but could worth be the investment your brand has been in need of. So let's take a look at how you can create offers, and what you can do with them.


There are basically three types of offers. In Store Only, Online Only, and In Store and Online. In Store Only can only be redeemed by customers visiting your brand's physical location. Online Only can only be redeemed by visiting your website, and In Store and Online can be redeemed in both places.


Getting started


Go to your Facebook page, and look at the sharing tool (from where you publish new posts). Click on  Offer, Event +, and then click on Offer. You will now get to choose from among the three types of offers we just discussed. For online offers, you can set a redeem code, and for In Store offers, you can set a bar code. We will be talking in detail about the bar codes and redeem codes in our next post.


Now its time to fill out the details. Think of a strong headline for your offer, such as "Buy one get one free" (or something of the sort). Also upload a photo for your offer. And select a limit for the number of offers. You can either restrict it to a limit, or make it unlimited.


Next come the Terms and Conditions. Every offer has its terms and conditions, right? You can set your own by clicking on Terms, and typing them out. You can also set an expiration date by clicking on Today and clicking on a future date.


Now you're almost done. Just click on Preview, and see if it looks all right. If so, then move on to the next step.


Cost and budget?


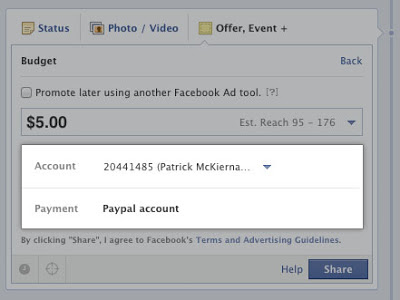
Running offers require a budget. Generally, the more you pay, the more reach you have, and the more people can access your offer. While creating an offer and adding a budget, you can click on More Options to see what payment methods and advertising account you are using.


More Budget Options


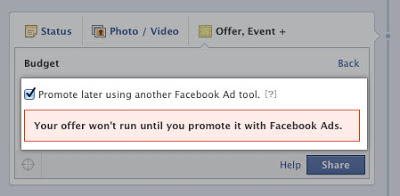
While creating an offer, you can choose from among some suggested budgets, or set a custom budget from the Ads Manager by checking the option Promote Later Using Another Facebook Ad Tool.


As mentioned, your reach will depend on your budget. This is the number of people who see your offers in their news-feed. More budget means more people will be able to see it. You can see your reach automatically when setting a budget.


How does it work?


Well, offers are pretty simple. People get rewards for visiting your website, or your brand's physical location. When someone claims your offer, they get an email with detailed instructions on how to redeem the reward. The email will also include a Redeem code or a Barcode, and the Terms and Conditions of that offer along with its expiration date.


What products can be promoted


As far as Facebook is concerned, you can post offers for promotions of any products. But be mindful of the law in your area, and whether you are legally allowed to promote them. Keeping that in mind, you can promote anything, even alcoholic products and pharmaceutical drugs etc.


Any problems?


Are you having any problems with creating offers? There's one thing you should know. You can't post an offer if your page has less than 400 likes. And if you change your mind, or if there's a problem with your offer, and you want to stop it, you can simply do that by deleting the offer post from your Page's timeline! Simple!


If you have more questions, feel free to ask. We'll be covering bar codes and redeem codes in the next post, so stay tuned. Also, make your comments below and tell us what you thing of this latest Facebook Marketing feature? Peace :)