Twitter Button adds a horizontal scrollbar to the page - [FIX]

twitter follow button causing horizontal scrollingRecently more and more people are experiencing problems with poor social media plugin UI. Twitter Follow button despite being mobile responsive messes up the site design by adding a long Horizontal Scrollbar to the bottom of the page temporarily for a few seconds and then it disappears. The Follow button is forcing the entire webpage to scroll horizontally. You might have seen a long green scrollbar at the bottom of our blog too. Upon debugging the site I found that the scrollbar was actually caused by the Twitter hub.html frame that renders within our site.

According to its developer benward the positioning of the hub frame is purely vertical (negatively positioned above the top of the page) however for some reasons we found that the webpage is forced to change its width dimensions. I have a simple fix for this bug that will prevent the Hub Iframe from exceeding a specified Parent container width size.

Prevent Hub Iframe From Causing a Horizontal Scrollbar

I am sharing the steps for blogspot blogs. The method described below is a standard procedure that applies to all platforms.

1 Go To Blogger > Template > Backup your Template

2 Click Edit HTML

3 Paste the following Style just above ]]></b:skin>

Simple Enclose your twitter Follow button Code inside the following Parent container

.twitterButtonFixmbt {position:absolute; overflow:hidden; max-width:300px;}

4 Save your template


Now enclose your twitter button code inside these Div tags

<div class="twitterButtonFixmbt ">

ADD Twitter Follow button code or Tweet button code here

</div>

That's it!

How it works?

I have enforced a maximum width of 300px and you can surely change it as per your container width. The position absolute and overflow properties along with max-width will make sure the Iframe doesn't exceed the prescribed Parent Dimensions.

Let me know if you needed any help. Peace and blessings buddies :)

How To Add Fanciest Author Box Below Posts In Blogger


Author box is among the trending widgets now a days because people who have blogs or websites want to get more followers and stay in touch with their fans. My recent post was also about "Author boxes with different styles for blogger" and once again I am about to share a new author box which will be added below every post in your blog. It is called fancy author box. It is designed with javascript and css and doesn't effect your blog's load time.


If you liked this gadget and want to add it in your blog below every post then follow below mentioned steps:

Step 1: Go to blogger dashboard and navigate to template.


Step 2: Click inside the code and search for below code by using Ctrl+F on your keyboard:


<div class='post-footer'>

how-to-find-code-in-blogger-template

Step 3: You will find the above code two times if you are using simple template but if you are using a custom or other template then you will find it many times. Now copy the below code and paste it after the second code in simple template and in other template paste it after third code.

<b:if cond='data:blog.pageType == &quot;item&quot;'>

<script src="//code.jquery.com/jquery-1.12.4.js"></script>
  <script src="//code.jquery.com/ui/1.12.0/jquery-ui.js"></script>
<link rel="stylesheet" href="http://rawgit.com/FortAwesome/Font-Awesome/master/css/font-awesome.css">
<link rel="stylesheet" href="https://rawgit.com/101Helper/docs/master/fanciest.css">
<div id="tabs">
<ul>
<li><a href='#fragment-1'><i class="fa fa-user" aria-hidden="true"></i> Bio</a></li>
<li><a href='#fragment-2'><i class="fa fa-facebook-square" aria-hidden="true"></i> Facebook</a></li>
<li><a href='#fragment-3'><i class="fa fa-twitter-square" aria-hidden="true"></i> Twitter</a></li>
<li><a href='#fragment-4'><i class="fa fa-instagram" aria-hidden="true"></i> Instagram</a></li>
<li><a href='#fragment-5'><i class="fa fa-google-plus-square" aria-hidden="true"></i> Google+</a></li>
</ul>
  <div id="fragment-1">
<img src='https://lh3.googleusercontent.com/-p4_CJcGp4AM/AAAAAAAAAAI/AAAAAAAAABM/vdNgm0VFg70/s120-c/photo.jpg' style='width: 90px;'/>
<h4>Fahim Raza</h4>
<p>I am fahim Raza and this fancy author box is designed by me. Its free for blogger. Do not Remove copyright tag. </p>
<a id="bout" href="https://101helper.blogspot.com/2015/06/how-to-add-fanciest-author-box-below-post-blogger.html">101Helper</a>
  </div>
  <div id="fragment-2">
<iframe src="https://www.facebook.com/plugins/follow.php?href=https%3A%2F%2Fwww.facebook.com%2F101helperblogspot&width=64&height=65&layout=box_count&size=small&show_faces=false&appId" width="64" height="65" style="border:none;overflow:hidden" scrolling="no" frameborder="0" allowTransparency="true"></iframe>
  </div>
  <div id="fragment-3">
<a href="https://twitter.com/the101helper" class="twitter-follow-button" data-show-count="false">Follow @the101helper</a><script async src="//platform.twitter.com/widgets.js" charset="utf-8"></script>
  </div>
  <div id="fragment-4">
<span class="ig-follow" data-id="5479dee" data-handle="USERNAME" data-count="true" data-size="medium" data-username="false"></span>
<script>(function(d,t){var g=d.createElement(t),s=d.getElementsByTagName(t)[0];g.src="//rawgit.com/101Helper/docs/master/instagram.js";s.parentNode.insertBefore(g,s);}(document,"script"));</script>
  </div>
  <div id="fragment-5">
<script src="https://apis.google.com/js/platform.js" async defer></script>
<div class="g-follow" data-annotation="vertical-bubble" data-height="20" data-href="//plus.google.com/u/0/109303537659462705427" data-rel="publisher"></div>
  </div>
</div>
<script>
$( "#tabs" ).tabs();
</script>
</b:if>


how-to-add-fancy-author-box-in-blogger

Step 4: Make changes in the above code according to your choices. I have highlighted my name and links all you have to do is to replace them with your name and social profile links.


Step 5: Click on save template and you are done.


how-to-save-template-in-blogger

Replace links and usernames with your own usernames. 

Note: Don't remove the 101Helper tag from widget, it will be our copyright violation and you will be reported to Google if tag removed widget was found on your site.

I hope you like this gadget and its working in your blog, if not please let me know by leaving a comment below. 

Try more blogger gadgets and widgets here.

Follow and subscribe below to get latest blogger gadgets news.

Share this post with other bloggers around you!


Search tags: How To Add Fanciest Author Box Below Posts In Blogger, Fancy author box for blogger, Fancy author box blogger, Author boxes for blogger with different styles, all in one author box blogger,101Helper gadgets for blogger.

Horizontal Divider Line With Back-To-Top Button - [Shortcode]

Horizontal Divider ShortcodeYou are quite aware with HTML hr tag that defines a thematic break in a HTML page that can be a shift of topic or a section division.  The hr element is used to separate content in an HTML page. While writing blog posts, it makes a lot of sense to format your content well and present long lengthy content in sections rather in a single plain text, in such case CSS3 Dividers help a lot and to make it even more effective, we have included a smooth scrolling back-to-top link in the horizontal divider that takes a user back to the top of the page content. The BacktoTop button will display only when the content is long enough else it will auto hide itself. It will appear when a user scrolls down but would disappear as a user scrolls up. We have created around 5 Color Skins in two different themes, one with Solid color and one with Fading effect. The Hr Tag is created using Blogger Shortcode Plugin, the complete Toolkit For blogspot blogs.

Since Blogspot blogs are coded with XHTML therefore the <hr> tag must be properly closed, like this: <hr /> however in HTML, the <hr> tag has no end tag. So we have taken care of the same standards.

The Five color themes are

  1. black, fblack
  2. red, fred
  3. green, fgreen
  4. pink, fpink
  5. yelow, fyellow

PS: where the f versions are faded themes. As you would see in the demo below.

1. Install Blogger Shortcode Plugin

In order to use Divider shortcode you must first install the shortcode plugin for your blogspot blog by following 7 easy steps shared in the link below:

Skip installing it if you have already added it in your blogger template

2. Add Styles and Script

1. Go To Blogger > Template > Backup your Template
2. Click "Edit HTML"
3. Search for this code ]]></b:skin>
4.  Paste the following Code just above it

/*------- Shortcode Divider -------*/

    .sc-divider{margin:10px 0;height:20px;padding:0}.sc-divider hr{margin:0;position:relative;height:2px;border-bottom:2px solid;border-top:0;border-right:none;border-left:0}hr.fgreen{border:0;height:1px;background-image:-webkit-linear-gradient(left,rgba(112,207,10,0),rgba(112,207,10,0.75),rgba(112,207,10,0));background-image:-moz-linear-gradient(left,rgba(112,207,10,0),rgba(112,207,10,0.75),rgba(112,207,10,0));background-image:-ms-linear-gradient(left,rgba(112,207,10,0),rgba(112,207,10,0.75),rgba(112,207,10,0));background-image:-o-linear-gradient(left,rgba(112,207,10,0),rgba(112,207,10,0.75),rgba(112,207,10,0))}.sc-divider a.fgreen{border-color:#70CF0A;color:#70CF0A}hr.green,.sc-divider a.green{border-color:#70CF0A;color:#70CF0A}hr.fred{border:0;height:1px;background-image:-webkit-linear-gradient(left,rgba(252,64,44,0),rgba(252,64,44,0.75),rgba(252,64,44,0));background-image:-moz-linear-gradient(left,rgba(252,64,44,0),rgba(252,64,44,0.75),rgba(252,64,44,0));background-image:-ms-linear-gradient(left,rgba(252,64,44,0),rgba(252,64,44,0.75),rgba(252,64,44,0));background-image:-o-linear-gradient(left,rgba(252,64,44,0),rgba(252,64,44,0.75),rgba(252,64,44,0))}.sc-divider a.fred{border-color:#fc402c;color:#fc402c}hr.red,.sc-divider a.red{border-color:#fc402c;color:#fc402c}hr.fblue{border:0;height:1px;background-image:-webkit-linear-gradient(left,rgba(41,183,255,0),rgba(41,183,255,0.75),rgba(41,183,255,0));background-image:-moz-linear-gradient(left,rgba(41,183,255,0),rgba(41,183,255,0.75),rgba(41,183,255,0));background-image:-ms-linear-gradient(left,rgba(41,183,255,0),rgba(41,183,255,0.75),rgba(41,183,255,0));background-image:-o-linear-gradient(left,rgba(41,183,255,0),rgba(41,183,255,0.75),rgba(41,183,255,0))}.sc-divider a.fblue{border-color:#29b7ff;color:#29b7ff}hr.blue,.sc-divider a.blue{border-color:#29b7ff;color:#29b7ff}hr.fpink{border:0;height:1px;background-image:-webkit-linear-gradient(left,rgba(255,131,119,0),rgba(255,131,119,0.75),rgba(255,131,119,0));background-image:-moz-linear-gradient(left,rgba(255,131,119,0),rgba(255,131,119,0.75),rgba(255,131,119,0));background-image:-ms-linear-gradient(left,rgba(255,131,119,0),rgba(255,131,119,0.75),rgba(255,131,119,0));background-image:-o-linear-gradient(left,rgba(255,131,119,0),rgba(255,131,119,0.75),rgba(255,131,119,0))}.sc-divider a.fpink{border-color:#FF8377;color:#FF8377}hr.pink,.sc-divider a.pink{border-color:#FF8377;color:#FF8377}hr.fblack{border:0;height:1px;background-image:-webkit-linear-gradient(left,rgba(0,0,0,0),rgba(0,0,0,0.75),rgba(0,0,0,0));background-image:-moz-linear-gradient(left,rgba(0,0,0,0),rgba(0,0,0,0.75),rgba(0,0,0,0));background-image:-ms-linear-gradient(left,rgba(0,0,0,0),rgba(0,0,0,0.75),rgba(0,0,0,0));background-image:-o-linear-gradient(left,rgba(0,0,0,0),rgba(0,0,0,0.75),rgba(0,0,0,0))}.sc-divider a.fblack{border-color:#000;color:#000}hr.black,.sc-divider a.black{border-color:#000;color:#000}hr.fyellow{border:0;height:1px;background-image:-webkit-linear-gradient(left,rgba(253,206,9,0),rgba(253,206,9,0.75),rgba(253,206,9,0));background-image:-moz-linear-gradient(left,rgba(253,206,9,0),rgba(253,206,9,0.75),rgba(253,206,9,0));background-image:-ms-linear-gradient(left,rgba(253,206,9,0),rgba(253,206,9,0.75),rgba(253,206,9,0));background-image:-o-linear-gradient(left,rgba(253,206,9,0),rgba(253,206,9,0.75),rgba(253,206,9,0))}.sc-divider a.fyellow{border-color:#fdce09;color:#fdce09}hr.yellow,.sc-divider a.yellow{border-color:#fdce09;color:#fdce09}

/*------- Shortcode Back To Top----------*/   
.sc-top,.sc-top:visited{text-align:right;padding-top:6px;text-decoration:none;display:block;font-weight:400;font-family:oswald,arial;font-size:11px!important}.sc-top:hover{color:#666}a.sc-top:after{font-family:FontAwesome;content:'\f077';padding-left:5px}


5. Save your template and you are all done!

Add Colorful Horizontal Content Dividers in your Blogspot Posts

Now you can easily insert a colorful divider anywhere inside your blog post by using the shortcode below

[divider/]

The above shortcode will create a default black faded i.e. fblack horizontal line with a Top Link having the same color as your template links.

To create a colorful divider you can mention skin color in this format

[divider color="yellow"/]

To create a faded color use this,

[divider color="fyellow"/]

You can also add a headline above the line in this format

[divider color="fyellow"] Add Headline Title Here [/divider]

That easy!

Need Help?

Let me know if you need any help or assistance. Wishing you all a bless Happy ramadan! :)

How To Add Youtube And Dailymotion Videos In Blogger Posts

add-video-dailymotion-youtube-in-blogger

Video tutorials are the best way to help users how to do something. For instance a blog about doing something like blogging or a tutorial blog becomes best one when it has step by step text tutorials as well as video tutorials. Now a days tutorial blogs are trending so every blogger is trying his best to make his blog better than other by improving its user experience. User experience improves when users are satisfied and video tutorials are the best tutorials to help and satisfy users because users can see how to do something. So if you have a blog and you have already setup a Youtube or Dailymotion channel and you want to embedded your videos in your blogger blog posts in order to get more views or to improve your visitors experience then you have reached to right place. In this post I will show you how to embedded videos in blogger posts. In the end of this post you can watch video tutorial also. Hope you like it.

How To Add Youtube Videos In Blogger Posts:

Step 1: Create a video and upload it.

Step 2: Open your video and below it click on share, make sure to allow embedding while uploading your video.


how-to-share-yoututbe-video-in-blogger

Step 3: Click on Embed and copy the code shown, The default code is for 560X315 size but if you want to change the size of the video and make other customizations then click on Show more.


youtube-videos-blogger

Choose desired size for your video or click on custom size to set your own size


how-to-share-yoututbe-video-in-blogger-101helper

After size make other changes like show suggested videos, show player settings etc.  


Step 4: Copy the final code and go to blogger and edit post in which you want to add video.


Step 5: Switch to Html compose box and paste the code where you want the video to show up.


how-to-add-code-in-Html-composer-in-blogger

Step 6: Now click on publish and you are done.

If you want to add a video to your blog from a link(youtube) or computer then follow below steps:

Step 1: Go to blogger and edit your post or create a new one.

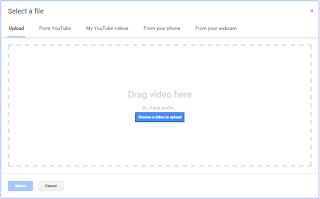
Step 2: Click on the video icon beside image adding tool.


add-a-video-in-blogger-post

Step 3: Now if you want to add video from your computer then just click on "Choose a video to upload" select the video and wait for upload.


upload-video-blogger

but if you want to add video from a youtube link then click on from youtube and paste the link of the video.

Step 4: Click on "select" and you are done. 

How To Add Dailymotion Videos In Blogger:

Step 1: Open the video which you want to add in your blog post.

Step 2: Click on "Export" below the video.

Step 3: Customize your video.


add-dailymotion-video-in-blogger

You can re-size your video and turn on "auto-play". A preview of your video player is shown below the code. 

Step 4: Copy the code of your video and go to your blog.

Step 5: Edit or create a post and switch to Html compose box.

Step 6: Paste the copied code and you are done.

I hope you like this post and you found it helpful.

Try more posts if you liked this post. Follow and subscribe for more blogging tutorials.


Search tags: Dailymotion videos blogger,Youtube videos in blogger,How to add videos in blogger posts,Increase youtube views,Video tutorials blogger,101helper blogging tutorials.

Infolinks - The Best Ad Network For Bloggers

How-to-Add-infolinks-to-your-Blogger-blog

Most of the blogs are created to monetize them by ads and earn money but it is a confusing step to choose a good ad network for a blog. Everybody wish to monetize his blog with a network which pays the highest rates. But most of the ad networks becomes a reason of disappointment because even if you have a high traffic and unique visitors they don't pay enough rates. Now a days the most popular and highest paying ad network is Google Adsense but Google Adsense is not approved easily so you can use alternative ad network of Google Adsense which is Infolinks. Infolinks could also be called all in one and the best ad network for bloggers because it has following features:

(1). In-Text Ads:

In-text ads for blogger

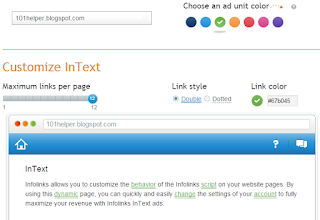
If you are desired to monetize your blog by in-text ads then infolinks is the best ad network for you because it lets you to enable in-text ads for your content, you can choose colors for your ads as well as choose a custom color for them, moreover you can choose whether the ads should be of double border style of dotted and also quantity of in text ads. 


(2). Infold Ads:

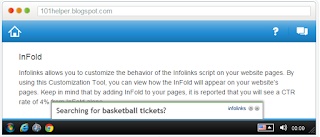
Infold ads are the slide-up ads which slides up when the page is loaded. You can choose the color for your infold ad.

Infold  ads for blogger

(3). Intag Ads:

Infolinks provides two types of intag ads. 
  • Ads below posts.
  • Revenue booster.
(1). Ads below posts:

These are the text ads below posts you can change their color, location as well as number of rows.

Intag  ads for blogger

You can also position ads by pasting the provided code where ever you want to display the codes on your blog. 

(2). Revenue Booster:

This option is allowed for those users only who enable the intag ads by choosing automatic option. If manual option is chosen then revenue booster can not be enabled. How revenue booster looks? see it in below image:


revenue booster ads for blogger

Revenue booster is like sponsored content, it displays the content from other websites which are very interesting. Revenue booster is displayed below every page.


(4). InFrame Ads:

inframe ads for blogger

Inframe ads are the ads which slides out from left and right sides of blog/webpage. But it works only in those blogs which have small width as well as there is no rendering javascript code in the blog.

(5). Inscreen Ads:


in-screen ads for blogger

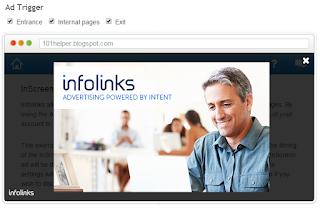
In-screen ads are those ads which appear as a pop-up but in light box. Infolinks in-screen ads have some special qualities like it appears only once to a user in a day and also you can add triggers for these ads which are added in links so whenever a user clicks on links or some text the in-screen ad will open. It doesn't affects your blog's navigation and your users won't be troubled of these ads because it opens only once.


(6). Inarticle Ads:


This is a new ad type introduced by infolinks. It is a smart ad. You are given a code which is to be paste it an article. Once the code is pasted, the users will see an ad when they scroll down your page to the position where you have pasted the given code. If you want to see a live example play the above video!

(7). Referral Program:

Infolinks has now started a referral program so now you can double your earnings through your referrals. You can use banners as well as direct links to referral others. 


Hope you like this post and it helped you in taking decision to choose a good ad network for monetizing your blog. Please use my referral link to sign-up. It won't affect your earnings but it would be a reward for me by infolinks for becoming a referral.

Follow and subscribe for more blogging reviews and blogging tutorial. 

Search tags: Infolinks - The Best Ad Network For Bloggers,Revenue booster,Increase website earnings,Earn money by blog,best ad networks for blogger.

Overused H2 & Missing H1 Tags in Blogger Posts Titles

Optimize Headline Tags h1 and h2 in BloggerMost Blogger blogs are poorly optimized when it comes to Headline tags which includes H1, H2 and H3 either because newbie publishers are implementing wrong SEO techniques by reading unauthentic articles across the web or may be because they are using a custom template which may look quite attractive when it comes to User interface (UI) but they are the worst when it comes to Optimized XHTML Structure. In our previous tutorial we share how you can assign H1 Tag to Blog Title on homepage, search pages and Archives, in todays tutorial we will discuss how to correctly optimize Post titles and Static Page titles in blogspot by assigning H1 Tag to a title on Item Page and H2 tags on Index and Archive pages. We will also empower the title Structure with the correct Schema Markup.
I have used the word 'Overused' because rarely do people understand that keeping a logical hierarchy of Headline tags on a HTML DOM is not only SEO friendly but also sensible thing to do. Bloggers today rarely understand that and as a result they often use Multiple H1 tags on a single page or they assign H2 to Post titles on item pages which is a terrible SEO mistake. H2 is overdosed to post tiles on every single Page may it be index, item or archive pages.

For The Record: This tutorial is the first tutorial of its kind shared online which focuses on adding H1 Tag to Post titles and optimizing the Headline tags with Microdata tags

Just like the headlines in a newspaper attract a reader's attention, similarly the Headline tags in a blog article attracts the attention of a search robot. H1 is given the most importance followed by H2, H3 and so on till H6. In web typography we normally use H1,H2 and H3 a lot and it is important that you may optimize the layout of your template such that these tags may be correctly placed on the basis of Importance. To make it worst Post Titles are even Self-Hyperlinked or Self-Linked when Post is viewed. Why would you link a page to the page itself? Makes no logic.

Note: Please first read Part 1 of this tutorial series so that you may understand the default hierarchy for Headline Titles in Blogger

What's The Plan?

Be default Blogger blogs have the following Heading Settings:

Before:

Heading Tag Assigned to
h1 Assigned to Blog Title. Not assigned at all when Logo Image is used
h2 Assigned to Sidebar Titles.
h3 Assigned to Post Titles and Subheadings! Weird!

I called it weird because your Sidebar tiles are given more importance than your Post titles! By default blogger assigns <H3> tag to Post titles on all pages which makes them even less important than the sidebar headlines which have a H2 tag. Fixing this is really important to better rank your titles.

In case where a logo image is used, no H1 tag is used at all! Which means there is almost no presence of <h1> tag on any page of your blog which is really not recommended in SEO.

After:

Heading Tag Assigned to
h1 Assigned To Blog Title only on Index Pages and archives and assigned to Post Title on the Item Page only. This way every page on your blog will have a H1 tag assigned to your most important Title.
h2 Assigned to Post Titles on Index Pages and archives. Assigned to Sidebar Titles on all pages. Due to widget XHTML structure configuration, the sidebar headlines tags can not be edited. H2 is fixed for sidebar Headlines
h3 Assigned to Subheadings only

This way you will assign <H2> tag to Posts titles on Index and Archive Pages

  • Index Pages: These pages are your Homepage and Label Pages

and you will assign <H1> Tag to Post Tiles on Item Pages only

  • Item Pages: These are your Post or Static Pages When viewed

Lets get to work!

Optimizing Post Title Headline Tags

Remember that we are not just optimizing titles, we will also be adding schema microdata tags to better help search bots to recognize the structure of your entire site. This will also help eliminating Data structured errors on your webmaster account.

Follow these sequential steps:

1 Go To Blogger > Template > Backup your template

2 Click Edit HTML

3 Search for this code or its alike

class='post hentry'

Which will be contained inside a div section as shown below

<div class='post hentry'>
 

4 Replace it with this

<div class='post hentry' itemprop='blogPost' itemscope='itemscope' itemtype='http://schema.org/BlogPosting'>
<meta expr:content='data:post.firstImageUrl' itemprop='image_url'/>
 

info: The above highlighted parameters are microdata tags that help describe your content.

5 Next find this code or one similar to it:

<b:if cond='data:post.title'>
    <h3 class='post-title entry-title'>
    <b:if cond='data:post.link'>
      <a expr:href='data:post.link'><data:post.title/></a>
    <b:else/>
      <data:post.title/>
    </b:if>
   </h3>
  </b:if>

or in new blogger templates the code will look like this

<b:if cond='data:post.title'>
<h3 class='post-title entry-title' itemprop='name'>
<b:if cond='data:post.link or (data:post.url and data:blog.url != data:post.url)'>
<a expr:href='data:post.link ? data:post.link : data:post.url'><data:post.title/></a>
<b:else/>
<data:post.title/>
</b:if>
</h3>
</b:if>

Replace the code you just found with this optimized version of the code

<b:if cond='data:post.title'>
                     <b:if cond='data:blog.pageType == &quot;index&quot;'>
    <h2 class='post-title entry-title' itemprop='name'>
     <b:if cond='data:post.link'>
       <a expr:href='data:post.link' itemprop='url'><data:post.title/></a>
     <b:else/>
        <b:if cond='data:post.url'>
<a expr:href='data:post.url' itemprop='url'><data:post.title/></a>
<b:else/>
          <data:post.title/>
        </b:if>
     </b:if>
     </h2>

                       <b:elseif cond='data:blog.pageType == &quot;archive&quot;'/>
<h2 class='post-title entry-title' itemprop='name'>
     <b:if cond='data:post.link'>
       <a expr:href='data:post.link' itemprop='url'><data:post.title/></a>
     <b:else/>
        <b:if cond='data:post.url'>
<a expr:href='data:post.url' itemprop='url'><data:post.title/></a>
<b:else/>
          <data:post.title/>
        </b:if>
     </b:if>
      </h2>

<b:else/>
<h1 class='post-title entry-title' itemprop='name'>
     <b:if cond='data:post.link'>
       <data:post.title/>
     <b:else/>
        <b:if cond='data:post.url'>
         <data:post.title/>
<b:else/>
          <data:post.title/>
        </b:if>
     </b:if>
      </h1>
</b:if>
                    </b:if>


6 Save your template and you are done!

Customize the Titles!

Since we have changed the tag for post titles therefore you will see a change in your title colors and appearance. You need to style the new tags using the following css code.

Paste the code below just above ]]></b:skin>

.post h2 a,.post h2 a:visited, .post h1{
display:block;
text-decoration:none;
color:#242729;
font-family:arial;
font-size:27px;
line-height:36px}

.post h2 a:hover{
color:#828282;
text-decoration:none}


  • Replace 242729 with Title color
  • Replace 828282 with Title Color when mouse is hovered on it

Save your template and all done!

Need Help?

We have implemented the same method on MBT and we have seen amazing results so far. I hope to see your blogs rank well on SERPs and it benefit you as much as possible. Please let me know if you need any help in understanding any part of this tutorial. Wish you all a happy blogging experience, full of fun and free of bugs.

Peace and blessings buddies! =)

Grabable Responsive Promotion Bubble Gadget For Blogger

Promotion Bubble Gadget For Blogger - 101helper

After creating a blog the most important thing is to promote it. A blog can be promoted by two means one is promotion though social networks while other is to promote it by making efforts in right way. By right way I mean to use some gadgets and internal linking. Everybody is aware of off-page seo so if you read about it then you must know the importance of internal linking and gadgets like related posts, popular post etc. Internal linking is also beneficial in promoting a specific post because it helps your visitors to reach to that post. Similarly now you can promote a specific post or page of your blog is an advance way by using "Promotion bubble gadget" you can see a live demo of this gadget on this page(Seo tools bubble).

Features:
  • Its free!
  • Easy to install.
  • Good look!
  • Visitors can grab and move this bubble.
  • It grabs the interest of visitors so it increases your chances to get more traffic to that post or page. 
  • Clean coding, it isn't made to slow down your blog.
  • It doesn't effect your blog's navigation.

How to add "promotion bubble gadget" in blogger:

You can add this gadget in your blog by following some simple steps mentioned below:

Step 1: Go to your blog and navigate to template.

Step 2: Click inside the code and search </header> by using Ctrl+F.

Step 3: Just below the </header> paste the below code.


If you don't paste the code below </header> then it will not be grabable.


Step 4: Click on save template and you are done.


Customization:


You can change the icon(bubble) as I used seo tools bubble because I wanted to tell visitors that they can use seo tools in my blog similarly you can use other bubbles but try to use transparent images only. To change the icon replace the highlighted image link in the above code.


https://blogger.googleusercontent.com/img/b/R29vZ2xl/AVvXsEgwcXsIVhqlLadVYtZRogtIHYimBPfqOGicgzwOgTEs9b28aX945F5Sn0fhJAEDr0VcHWdHhkH16zb6PwO7iT9hY_GMwsxS4h0-YDRE74oyMGb1XHyn8vE1Qd1-aBhNO9ENuJu-SAkOYmc/s320/seo-icon-101helper.png


Further you can change the position of your bubble Just make changes in the below line of code:


<div class='flip-container' ontouchstart='this.classList.toggle(&apos;hover&apos;);' style='position: fixed; top: 80%; left: 57%;'>


To add link in the text(click here) replace it with my page link:


<a href='http://101helper.blogspot.com/p/seo-tools-for-blogger.html' rel='dofollow' target='_blank'>Click Here</a>


You can also change the text(click here) with your own text, just type your text and save it. You can also replace To Use Seo Tools with your own text.


<a style="position: absolute;top: 37px;left: 0px;text-align: center;color: #444;font-size: 14px;">To Use Seo Tools</a>

I have designed the above text as a link because if you are using infolinks it will grab the bubble text and change it to ad.


You can Use below icons:


I have brought you some icons you can see them at below links:


(1). https://blogger.googleusercontent.com/img/b/R29vZ2xl/AVvXsEj0Y-_6xglOmEfmsX4h8IwX78LCGyhUob6ulRPwoXA7_EKeymJoLTICaJ-1a2gco5Hpr8BZXPvOMi6ZLj8I_0YMlXrWchp5-BeqG_SECY_1THZyRv5ziYABQ_m9GYLqDADsOJUOS4BqVVc/s1600/0B-3SIKm-BBF_bGZzNkFGV09BazQ.png
 

(2). https://blogger.googleusercontent.com/img/b/R29vZ2xl/AVvXsEjoU_h0coAdeYdQvkzvTLh7bjy8wl5ps40bI5gL9OS0EpgxGm-95K0k-BCXB53IikFpJQsf-HjFip1yXr98DO63dTne0pb61royFCozizQAYBkhlXdPAivTdnPXwXjI58krUhZvdlK7Js8/s1600/0B-3SIKm-BBF_M0xheUVjOFRUZVU.png


(3). https://blogger.googleusercontent.com/img/b/R29vZ2xl/AVvXsEhDXQGBX7oWoLHvGNgjhiwZT5Bkndd31V5dMA4mERoVfXqYeLhI4ybE2KaENSgZzHw0aPsUjI2SGruxDOiFSX6IJ4xrQWEbloQzp_R4wRSIsETV27_t2FWfg_PvcH_fj96te78_GbCFlxM/s1600/0B-3SIKm-BBF_NHgyQkZMMk9UcVU.png


(4). https://blogger.googleusercontent.com/img/b/R29vZ2xl/AVvXsEgaNHrMGXenH6gzErGWPrRwT_1RYVDkp__QzsDkHUn8NndbgDuPnR8BrR76w4FaBoQDigeUmd6LoQLzQTdIlQe6NIFkJRjTpxtCHC_32EJAT46J9Zo5odnfrGH1WaSJzWePlgeTB0MmqIE/s1600/0B-3SIKm-BBF_RWRGYzY2WXVRQzg.png


(5). https://blogger.googleusercontent.com/img/b/R29vZ2xl/AVvXsEi0riQMnmaaXCNsKX29ZvhL-IHjebNpJoeyh1lP6-_w4_6YclqMyHK-0JxBTLJbv2CYiPUYru826A1pbnteLDqQrZYzzXpLUBOVXDDVaduhMIbiSCbamM5PtpjVqoCbJU0IcZRjpUHQm2M/s1600/analytics_img_a.png

Hope you like this post and this gadget is working properly in your blog. Follow and subscribe for more blogger gadgets. If this gadget is not working in your blog or you need any help please help me know by leaving a comment below.


videostutorials

Search tags: How to promote blogger blog,How to promote blog articles,How to increase blog page-views,How to Promote blog posts,Blog promotion gadget for blogger,Promotion Bubble Gadget For Blogger

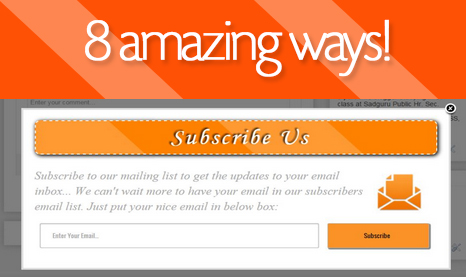
8 Creative Ways To Show Email Subscription Form in Blogger


8 Ways to create a Subscribe form


Do you know what a Email subscribe box or Subscription Form is? A box which brings high traffic to your blog. People just put their email address in an ordinary box and then click on the "Subscribe" button and then, they would get all your blog's new material right on their email's Inbox and if you have feedburner's summary feature enabled, they will come to your blog by reading an interesting heading on the reached email.


So today, I am going to tell you 8 ways to show a subscribe box on a blogger blog. These different eight ways will force your blog's visitor to put their email on that ordinary box. Let's see what are the 8 ways!:


8 ways to show a subscribe box:


  1. Subscribe box from a hyperlinked text.

  2. Subscribe box from a hyperlinked and floating image.

  3. Subscribe box on a pop-up box after few second a visitor reach at the page.

  4. Subscribe box when a visitors goes to exit from a page (Lightbox Popup).

  5. Subscribe box on sidebar as a widget.

  6. Subscribe box below every post.

  7. Subscribe box on a floating hidden frame.

  8. Subscribe box when a visitor reach at the end of the page.


Let?s describe these 8 ways and also, how to add them in your blogger blog one by one!


#1. Subscribe box from a hyperlinked text


Its like hyperlinking a text but instead of a url, we'll put a subscribe box's link on it that will show a nice subscribe box when clicked. When your blog's visitors will click the hyperlinked text, a small beautiful and light weight subscribe box will appear with a subscription teaser and of course! with a subscribe box and a subscribe button. You can use this on your blog's header and hyperlink a text like 'Subscribe Us' so that, when a blog's visitor click the 'Subscribe Us' text, a small box will appear and ask the email of the visitor.


DEMO: See live demo here.


When a Visitor Clicks a Text


Let?s know, how to add it on your blogger blog:


  • Go to Blogger Dashboard > Template > Edit HTML


Now, you have to add some CSS (Cascade Styling Script) to make the subscribe box beautiful.


  • Search for ']]></b:skin>' on your template.

  • Paste the following CSS above ']]></b:skin>':


.newsletter-sm {

background:#fff;

width: 100%;height: 253px;

margin: 0;

padding: 20px;

}

.newsletter-sm form {

padding: 10px;

margin-top: -37px;

}

.newsletter-sm h3 {

color: #FFF;

font-family: algerian;

font-size: 24px;

font-weight: normal;

text-align: center;

padding: 10px;

text-shadow: 2px 2px 2px #000;

margin-top: -18px;

box-shadow: 0px 0px 5px 2px #000;

margin-right: -20px;

position: static;

margin-left: -20px;

margin-bottom: 10px;

background: #009EFF;

}

.text {

  font-size: 14px;

  color: #FFF;

  margin-left: -20px;

  padding-bottom: 28px;

  margin-right: -20px;

  background: #009EFF;

  font-family: cursive;

  line-height: 20px;

}

.newsletter-sm .fa {

  float: left;

  padding-left: 16px;

  padding-right: 16px;

  padding-bottom: 16px;

  padding-top: 7px;

  font-size: 140px;

}

.newsletter-sm .newsletter-input-sm {border: 0;

  padding: 5px 10px;

  width: 69%;

  float: left;

  height: 40px;

  font-family: oswald;

  color: #555;border-radius: 3px; -webkit-border-radius: 3px; -moz-border-radius: 3px;}

.newsletter-sm .newsletter-sm-bot{  background: #009EFF url(https://blogger.googleusercontent.com/img/b/R29vZ2xl/AVvXsEgBFV89FGOAyrKuk8RH-URNQ7F7O41AJXaFG-CKuaow5a6FjjBnQtcsBzvJa1Zu05ivCCLiC0EdY_MALKEHIqST5vUrL1Ax_srZJYzWttnyGU_Sd_AePVVsXBG6qUrG_exA71X5Hr-JQqE/s1600/bg.png) no-repeat;

  margin: 27px -30px 0px;

  height: 64px;

  padding-left: 16px;

  padding-top: 16px;

}

.newsletter-sm .newsletter-button-sm {

  float: right;

  height: 50px;width:23%

  display: inline-block;

  text-shadow: 2px 2px 1px #000;

  font-size: 16px;

  font-family: oswald;

  padding: 10px 22px;

  position: relative;

  color: #fff;

  text-align: center;

  margin-right: 16px;

  background: #009EFF;

  border: 1px solid #fff;

  cursor: pointer;

  border-radius: 3px;

-webkit-border-radius: 3px;

-moz-border-radius: 3px;

}

.modalDialog {

position: fixed;

font-family: Arial, Helvetica, sans-serif;

top: 0;

right: 0;

bottom: 0;

left: 0;

background: rgba(0,0,0,0.6);

z-index: 99999;

opacity:0;

-webkit-transition: opacity 200ms ease-in;

-moz-transition: opacity 200ms ease-in;

transition: opacity 200ms ease-in;

pointer-events: none;

}

.modalDialog:target {

opacity:1;

pointer-events: auto;

}

.modalDialog:target > div {

margin: 8% auto;

}

.modalDialog > div {

-webkit-transition: all 100ms ease-in;

-moz-transition: all 100ms ease-in;

transition: all 100ms ease-in;

width: 500px;

position: relative;

margin: 5% auto;

background: #fff;

min-height: 200px;

}

h2.signup {

background:#00aa9f;

border-bottom: 1px solid #008d84;

font-weight: normal;

text-align:center;

padding: 10px;

color:#fff;

font-size: 18px;

}

.close {

color: #888!important;

position: absolute;

top: 1px;

right: -40px;

width: 30px;

height: 30px;

line-height: 30px;

text-align: center;

font-size: 16px;

}

.close:hover { text-decoration:none; }

.close:hover { color:#555; }

Now, this is the time to add the main html that is required for this subscribe box.


  • Search for '</body>' and above it, paste following code:


<div class="modalDialog" id="signup">

<div>

<a class="close" href="#close" title="Close"><i class="fa fa-times"></i></a>

<div class="signup-container">

<div class="newsletter-sm">

<h3>Subscribe to Newsletter</h3>

<div class="text"><i class="fa fa-envelope"></i><br><div class="texts">Subscribe us to get all our juicy article fastly. You know how and where? Directly on your inbox! Just enter your nice and good looking email id below and click on subscribe button! After that, verify it through the verification email and start learning more!</div></div>

<form action="http://feedburner.google.com/fb/a/mailverify" method="post" onsubmit="window.open('http://feedburner.google.com/fb/a/mailverify?uri=tntbystc', 'popupwindow', 'scrollbars=yes,width=550,height=520');return true" target="popupwindow">

<div class="newsletter-sm-bot">

<input class="newsletter-input-sm" name="email" placeholder="Enter Your Email" type="text">

<button class="newsletter-button-sm" type="submit">Subscribe</button>

</div>

<input name="uri" type="hidden" value="tntbystc">

</form>

</div>

</div>

</div>

</div>


  • Now, save your template.


Customization:


  • Replace tntbystc with your feedburner username.

  • You can replace text by editing the highlighted code.


How to hyperlink a text to show the subscribe box?


Now, almost everything is done. Whenever you wish to hyperlink a text, so that, the text will show a subscribe box when clicked, you have to use following piece of code:


<a href='#sign-up'>YOUR TEXT HERE</a>

Do you know? You can use this to hyperlink on an image too! Just use below piece of code:


<a href='#signup'><img src='IMAGE URL GOES HERE' alt='IMAGE DESCRIPTION' title='IMAGE DESCRIPTION'/></a>

Done! You can check it by going on your blog and clicking the text or image for which you have used the above code.


Note: This hyperlink can be added multiple times on texts on same page.


#2. Subscribe box from a hyperlinked and floating image


Instead of hyperlinking a text, why not we hyperlink a floating image? This will attract your visitor's eyes too! This time, an floating image will appear at the left-bottom or right-bottom or left-top or right-top of the page. When a visitor click on that image, a nice subscribe box will appear teasing them to put their email in the box!


DEMO: See Live Demo


Subscribe Box When Image Clicked


Let?s know how to add it on your blogger blog:


  • Same, Go to Blogger Dashboard > Template > Edit HTML

  • To make this subscribe box good looking, you have to add some CSS codes. Search for "]]></b:skin>"

  • Paste the following code above "]]></b:skin>"


#subscribe-button {

    float: left;

    position: fixed;

    bottom: 5%;

    left: 0;

    z-index: 999;

}


#subscribe-widget {

    display: none;

}

    /* Overlay */

#mbt-overlay {

    background-color: #000;

}

    /* Container */

#mbt-container {

    height: 350px!important;

    width: 63%!important;

    min-height: 350px;

    min-width: 500px;

    color: #222;

    background-color: #fff;

    border: 4px solid #ddd;

}


#mbt-container .mbt-data {

    padding: 8px;

}


#mbt-container a.mbtCloseImg {

    background: url(https://blogger.googleusercontent.com/img/b/R29vZ2xl/AVvXsEidSjsGj515PuOUplZ5mF3xunkfwW3Py_j24h0YG8_b6g9FBaycD5BbMoe2LpqCmnMbXo0aPN9VZZU5172cEDWU_2BN3uOPinhTSd5OgndHhdsP0MfmPDC0EDcYp9ooTyUR68q3di0XIRE3/s1600/mbt-close-button.png) no-repeat;

    width: 25px;

    height: 29px;

    display: inline;

    z-index: 3200;

    position: absolute;

    top: -15px;

    right: -16px;

    cursor: pointer;

}

.subscribeheader {

  padding: 5px;

  padding-left: 21px;

  text-shadow: -3px -2px 5px #000;

  box-shadow: 2px 2px 11px 1px #000000;

  background: #FF8100;

  color: rgba(255, 255, 255, 1);

  padding-top: 11px;

  border-radius: 11px;

  text-rendering: optimizeSpeed;

  background-image: -webkit-linear-gradient(45deg, rgba(255, 255, 255, .2) 25%, transparent 25%, transparent 50%, rgba(255, 255, 255, .2) 50%, rgba(255, 255, 255, .2) 75%, transparent 75%, transparent);

  margin-bottom: 30px;

  letter-spacing: 4px;

  text-align: center;

  font-family: monotype corsiva;

  border: 2px dashed #FFF;

  font-size: 50px;

}

#description {

  color: #AAAAAA;

  font-family: times New Roman;

  font-size: 25px;

  font-style: italic;

  float:left;

  line-height: 34px;

}


#description img {

    float: right;

    height: 100px;

    padding: 0 25px 0 10px;

    width: 100px;

}


#mbtfollowForm {

    padding: 15px;

}


#mbtfollowForm p {

    margin: 0 0 10px;

}

input[type="submit"] {

  background: #FA9227;

  box-shadow: 2px 2px 1px 1px #838383!important;

  width: 25%!important;

  padding-left: 0px!important;

  margin-left: 17px;

}

#mbtfollowForm input:not([type=&quot;checkbox&quot;]) {

  width: 67%;

    margin-top: 20px;

    margin-bottom: 20px;

    font-family:oswald;

    height:33px;

    float:left;

    padding: 10px 5px 10px 25px;

    border: 1px solid rgb(178, 178, 178);

    -webkit-appearance: textfield;

    -webkit-box-sizing: content-box;

    -moz-box-sizing: content-box;

    box-sizing: content-box;

    -webkit-border-radius: 3px;

    -moz-border-radius: 3px;

    border-radius: 3px;

    -webkit-box-shadow: 0px 1px 4px 0px rgba(168, 168, 168, 0.6) inset;

    -moz-box-shadow: 0px 1px 4px 0px rgba(168, 168, 168, 0.6) inset;

    box-shadow: 0px 1px 4px 0px rgba(168, 168, 168, 0.6) inset;

    -webkit-transition: all 0.2s linear;

    -moz-transition: all 0.2s linear;

    -o-transition: all 0.2s linear;

    transition: all 0.2s linear;

}


#mbtfollowForm input:not([type=&quot;checkbox&quot;]):active, #mbtfollowForm input:not([type=&quot;checkbox&quot;]):focus {

    border: 1px solid rgba(91, 90, 90, 0.7);

    background: rgba(238, 236, 240, 0.2);

    -webkit-box-shadow: 0px 1px 4px 0px rgba(168, 168, 168, 0.9) inset;

    -moz-box-shadow: 0px 1px 4px 0px rgba(168, 168, 168, 0.9) inset;

    box-shadow: 0px 1px 4px 0px rgba(168, 168, 168, 0.9) inset;

}

    <!--[if lt IE 7]> #mbt-container a.mbtCloseImg {

    background: none;

    right: -14px;

    width: 22px;

    height: 26px;

    filter: progid:DXImageTransform.Microsoft.AlphaImageLoader(src='https://blogger.googleusercontent.com/img/b/R29vZ2xl/AVvXsEidSjsGj515PuOUplZ5mF3xunkfwW3Py_j24h0YG8_b6g9FBaycD5BbMoe2LpqCmnMbXo0aPN9VZZU5172cEDWU_2BN3uOPinhTSd5OgndHhdsP0MfmPDC0EDcYp9ooTyUR68q3di0XIRE3/s1600/hb-close-button.png', sizingMethod='scale');

}


#mbtfollowForm input {

    padding: 10px 5px 10px 32px;

    width: 93%;

}


#mbtfollowForm input[type=checkbox] {

    width: 10px;

    padding: 0;

}

    <![endif]-->


  • Now, to make the floating image appear, search for ?</body>?

  • Paste the following chunk of code above ?</body>?


<div id="subscribe-button">

    <a class="subscribe" href="#"><img src="https://blogger.googleusercontent.com/img/b/R29vZ2xl/AVvXsEgLAuhVJICWxZvRJV5o8T3AYhJgT0LPmjRFyFq8FLz4E6qinS3S8BBLWVdpcPvENCw7-j112H9VdmjsLoXBSjrA8N2TICDCgdCg6COHTHbeBtBE7WwOH8FbSxqrbrkdvWeibE_vD4Lxki-H/s1600/hb-email-icon.png" alt="subscribe" /></a>

</div>

<div id="subscribe-widget">

    <div id="mbtfollowForm">

<div class="subscribeheader">Subscribe Us</div>

<div id="description">

<img alt="email" border="0" src="https://blogger.googleusercontent.com/img/b/R29vZ2xl/AVvXsEhYWsW4nIjZe5JRFDFtaAiRCwGyOBVV8GpP-FDAE_AG_NOZFuZ9hdqKIiLgUNd4thux7xIYrlHJtj69myzDQuO8WtiALh3jaS76IWSlwr8k7Lucs4OQ2Z98krpgitYL8lZb7MQKN6n1JW3h/s1600/hb-email-icon1.PNG">Subscribe to our mailing list to get the updates to your email inbox... We can't wait more to have your email in our subscribers email list. Just put your nice email in below box:</div>

        <form

        action="http://feedburner.google.com/fb/a/mailverify" method="post" onsubmit="window.open('http://feedburner.google.com/fb/a/mailverify?uri=tntbystc', 'popupwindow', 'scrollbars=yes,width=550,height=520');return true"

        target="popupwindow">

            <input name="email" placeholder="Enter Your Email..." required="required"

            type="text" />

            <input name="uri" type="hidden" value="tntbystc" />

            <input name="loc" type="hidden" value="en_US" />

            <div class="button">

                <input type="submit" value="Subscribe" />

            </div>

            </form>

    </div>

</div>

<script src="https://googledrive.com/host/0B8acxOz46qBZckxsanR6Rm1KTms" type="text/javascript"></script>

<script type="text/javascript">

    jQuery(function (a) {

        a("#subscribe-button .subscribe").click(function (b) {

            a("#subscribe-widget").modal();

            return false

        })

    })

</script>


  • Save your template and you?re done!


Customization:


Yeah! Customization on the above code as following:


  • If you want that image to be displayed in left, then change right to left in above code.

  • If you want that image to be displayed in the top of the page, then change bottom with top.

  • If you want to change the text or subscription teaser, then just replace the highlighted code.


Important Customization:


  • Change tntbystc with your feedburner username in above code.


#3. Subscribe box on a pop-up box after few second a visitor reach at the page


Nowadays, this one of the most common way to show a subscription box in a blogger blog. Many third party tools are providing this widget for free. One of the best tool that provide the pop up email subscription tool is GetSiteControl. Let's know how to add it:


  • Go to GetSiteControl sign up page

  • Sign up by filling the fields (email, passwords and website) and click on red 'Sign up for free' button.

  • On next page, click on that green 'Create Widget' button and choose 'Subscribe' from the dropdown.


Click on Create Widget


  • Choose and modify your settings while creating the Subscribe Widget and at last, click on 'OK' button.


Creating 'Subscribe Box'


  • On the next page, click on 'Activate Now' button, So that, it will activate the subscribe widget.

  • Now, are you able to see a red colored bar? (as shown in below picture).


Click on black install button


  • Click on that black ?Install? button.

  • On the next page, four or five line JavaScript would be given. Copy that and place in on your blog's template before '</body>'


Copy the code and place it above </body>


  • Now, just look at the top bar. Their, click on 'Site Settings':


Site Settings


  • After clicking on 'Site Setting', you will see a Mail Chimp option on the screen. On the given box, put your Mail Chimp's API key, click on Connect button.

  • You are done!


#4. Subscribe box when a visitors goes to exit from a page


Yes! If visitor has enjoyed your articles, he/she will surely subscribe to your blog if he get a nice subscribe box in front of him. So, its a good idea to show a subscribe box when your blog's visitor goes to exit from a page. This can be done by following all steps of way #2. The only thing you have to do different is-


  • After modifying your settings, go to 'Behavior' tab from the widget creator.

  • Choose & tick ?when the user is leaving the website?


Click on when the user is leaving the website


  • Click on OK button and you're done!


#5. Subscribe box on sidebar as a widget


Yeah! this is also a most common way to show a subscribe box in blogger. Not only common, but the easiest way to add a nice subscribe box on blogger blogs. MBT has published many subscription boxes that can be installed on your blogger blog. Here's a list of some:


#6. Subscribe box below every post


This is also a good way to get some more subscribers. This way increases your chances to get some new subscribers. Your visitors will surely subscribe to your blog if they found an enjoyable post and a subscription box below post, together. Here are some articles that were published by MBT before some time by which you can add a subscription box below every post on your blogger blog:


#7. Subscribe box on a floating hidden frame


Did you ever seen floating Facebook like box near scroll bar?. Yeah! why not. floating Facebook like box is today one of the most famous & lovable widget of bloggers. Today, we are going to tell you a widget which works same as that Facebook like box but the difference is, this time, it is floating subscribe box.


DEMO: See live demo here.


Floating Subscribe Box


DEMO: Live Demo


Let?s know how to add it:


  • Go to Blogger Dashboard > Layout > Add a Gadget > HTML/JavaScript

  • Now, leave the title box empty and move on content field.

  • Paste below code on content field:


<script type="text/javascript"> /*<![CDATA[*/ jQuery(document).ready(function() {jQuery(".mbt").hover(function() {jQuery(this).stop().animate({right: "0"}, "medium");}, function() {jQuery(this).stop().animate({right: "-250"}, "medium");}, 500);}); /*]]>*/ </script> <style type="text/css"> .mbt{background: url("http://s12.postimg.org/gjpszngzx/Untitled_1_copy.png)" no-repeat scroll left center transparent !important; float: right;height: 270px;padding: 0 5px 0 46px;width: 245px;z-index: 99999;position:fixed;right:-250px;top:20%;} .mbt span{bottom: 4px;font: 8px "lucida grande",tahoma,verdana,arial,sans-serif;position: absolute;right: 6px;text-align: right;z-index: 99999;} .mbt span a{color: gray;text-decoration:none;} .mbt span a:hover{text-decoration:underline;} } </style>

<div class="mbt">

<div class="mbt-floating">

<div class="subscribe-mbt">Subscribe Us&gt;</div><br /><i class="fa fa-envelope"></i><br /><form action="http://feedburner.google.com/fb/a/mailverify" method="post" onsubmit="window.open('http://feedburner.google.com/fb/a/mailverify?uri=tntbystc', 'popupwindow', 'scrollbars=yes,width=550,height=520');return true" target="popupwindow">

<div class="newsletter-sm-bot">

<input class="newsletter-input-sm" name="email" placeholder="Enter Your Email" type="text" />

<button class="newsletter-button-sm" type="submit">Subscribe</button>

</div>

<input name="uri" type="hidden" value="tntbystc" />

</form></div></div>

<style>.mbt-floating {

  background: #F2F2F2;

  height: 285px;

  padding: 7px;

  border: #444444 2px solid;

}

.subscribe-mbt {

  background: #444444!important;

  padding: 8px!important;

  text-shadow: -1px 0px 2px #000000;

  color: #FFFFFF;

  box-shadow: 0px 0px 7px -2px #000;

  border: 2px dashed;

  font-size: 20px;

  font-family: algerian;

}

.mbt-floating .fa {

  font-size: 115px;

  padding-left: 54px;

  padding-bottom: 17px;

  margin-top: -18px;

}form {

  padding: 10px;

  margin-top: -16px;

}

input.newsletter-input-sm {

  padding: 17px;

  padding-top: 15px;

  padding-bottom: 15px;

  box-shadow: 0px 3px 4px 0px #000;

  padding-left: 10px;

  width: 84%;

  margin-bottom: 15px;

  border: 0;

}

button.newsletter-button-sm {

  background: #444444;

  color: #FFF;

  border: 0;

  padding: 15px;

  font-size: 14px;

  text-shadow: 2px 2px 2px #000;

  border-bottom: 2px solid #000;

  border-radius: 6px;

  width: 100%;

  box-shadow: 0px 3px 2px 1px #000;

}

</style>

Customization:- Replace 'tntbystc' with your Feedburner username.


#8. Subscribe box when a visitor reach at the end of the post


This way of showing a subscribe box on blogger blog when a visitor reach at the end of the page can also help you in collecting some good subscribers. You can add this to your blogger blog by simply doing one step after doing all steps from way #3. Look at way #3's image and you will see an option-  'when the user reach at the bottom of the page? (option three); tick that option and click on OK button and done! When your visitor reach at the bottom of the page, a nice subscribe box will show up on your blogger blog.


Guest Author:


Shivansh Verma Skv is a 13 years old young blogger and a ninja member of "Blogger Help Forum". He loves to write about technology and web development. He has his own blog- Blogger Guiders  You can connect with him on Google+ and Facebook . Thanks!