Showing posts with label Facebook tricks. Show all posts

Facebook New API for Monitoring comment Replies


Facebook Comments API

As you might have noticed, Facebook introduced threaded comments to posts on Fan Pages. And I must say, it was a long-awaited and much-needed feature indeed. It made conversations much more organized, and readable. But what if you wanted to integrate this functionality, and fetch & deliver comments and their replies from your page onto your website? If you're a developer, you'd know that you need an API for this sort of work. Fortunately, you are in luck, because Facebook just rolled out  a new update for its API for comments and replies on Facebook pages. Using this, you can monitor and respond to comments and replies on your Page.


Updates to the API


This update comments API now provides developers with different 'views' of the comments on your page. There are three basic views; Top Level Comments, Replies and Comment Streams. These views can be accessed by the Graph API as well as through Facebook's FQL table.


Threaded Comments


Top Level comments - These are individual comments to the post itself, and not replied to any comment. This view is called "top level". The comments in this view might be ranked on the basis of their quality, replies, and some other factors.


Replies - This view, called "replies" fetches replies to an individual comment of a post.


Comment Streams - "stream" will return all top level comments and their replies in a chronological order, so the top level comments here won't be ranked.


FQL Commands


You can get data using both FQL ad Graph API. If you're using existing API, you need to keep in mind that the 'comments' column in the 'stream' FQL table has been depreciated. Instead, use 'comment_info' field to fetch data from 'can_comments' and 'comment_count' fields. Here are the FQL queries for the three views.


Top Level comments


SELECT id, fromid, time, text, likes

FROM comment

WHERE object_id={object_id} AND parent_id='0'


Replies


SELECT id, fromid, time, text, likes

FROM comment

WHERE parent_id={comment_id}


Comment streams


SELECT id, fromid, time, text, likes

FROM comment

WHERE object_id={object_id}

ORDER BY time

(almost exactly the same as Top level Comments query, but ordered by time, and no check for parent_id being 0;


Missing out on something?


If you're wondering why you don't see threaded comments on your Facebook Fan Page, then that's because Threaded comments have only been enabled for popular pages with a lot of fans (1,000+). If you're not quite there yet, then don't worry. This option will be turned on by default for all pages by June 10.


Do you like the new changes? You can read the Facebook Developers Blog for more information, or check out the documentation for this API for detailed instructions. You can also ask us questions in the comments below. Stay tuned :)

Add Facebook Activity Feed Plugin To Blogger

facebook activity feed for blogger

Aren't all BlogSpot blogs still missing this extra ordinary traffic boosting plugin? We just added Facebook activity feed plugin to our sidebar because nothing plays well in increasing a website's pageviews then Facebook's massive number of over 1 Billion registered users. This plugin displays posts and also recommends new stories which are liked by your visitor's friends. Thus it builds social engagement and attracts readers to dig into your website more to find out what their friends liked. If you are using Facebook recommendations bar in your sites then you will be pleased to know that this plugin also displays recommendations along with recent likes based on social activity made on your pages. Indeed a must to-add-widget from us to all of you who have not yet utilized this widget!

Lets add it to your blogger blogs in just few simple steps. The demo can be seen on our sidebar under the title "Hottest Now!"


Add it to blogger

The installation guide is kept extremely simple so just follow these easy steps:

  1. Go To Blogger > Template
  2. Backup your template
  3. click Edit HTML
  4. Optional step: If you have a Facebook comments plugin or Recommendations bar installed on your blog then you may skip to step#5 instead.

Search for the following tag inside your template:

<body>


or simply search for

<body

  Just below this body tag paste the following JavaScript SDK code:


<div id="fb-root"></div>

<script>(function(d, s, id) {


  var js, fjs = d.getElementsByTagName(s)[0];


  if (d.getElementById(id)) return;


  js = d.createElement(s); js.id = id;


  js.src = "//connect.facebook.net/en_US/all.js#xfbml=1";


  fjs.parentNode.insertBefore(js, fjs);


}(document, 'script', 'facebook-jssdk'));</script>


  Save your template.


      5.  Next go to Blogger > Layout


      6. Click add a gadget and choose HTML/JavaScript widget


      7. Inside your HTML/JavaScript widget paste the following HTML5 code:


<div class="fb-activity" data-site="http://www.MyBloggerTricks.com" data-width="300" data-height="450" data-border-color="#ffffff" data-header="false" data-recommendations="true"></div>


Make these changes:


  • Replace http://www.MyBloggerTricks.com  with your website URL. For BlogSpot blogs it should have the following structure: http://your-blog-domain.blogspot.com


  • I have set width to 300 pixels (300)and height to 450 pixels (450). Adjust them according to your blog layouts only if alignment changes are required. Increase height if you want to display more stories inside the plugin.


  • In order to hide the blue border across the plugin, I have set the border to white. If your sidebar has a different colored background then adjust the background color by editing: #ffffff    Tip: Use our color generator tool


  • Friends likes appear above and recommended posts appear below that as bolded titles. If in case you don't want the plugin to display recommended stories then you can turn off recommendations by replacing true with false 


      8.  Save your widget and all done!


    Visit your blogs to see it working just fine. :)


Need help?


Adding this widget is surely easy but still if you encountered any troubles just post your query below and I would love to reply back.


The widget can also be controlled via your Facebook account by adding an application ID inside the JavaScript SDK code but we avoided making things complex.


I just hope this plugins adds some more traffic spice to your current growth and improves current page impressions. Wish you more success and tons of valuable traffic. Peace and blessings buddies! :)

Facebook Messenger App Updated-Supports More Languages


facebook messenger updated

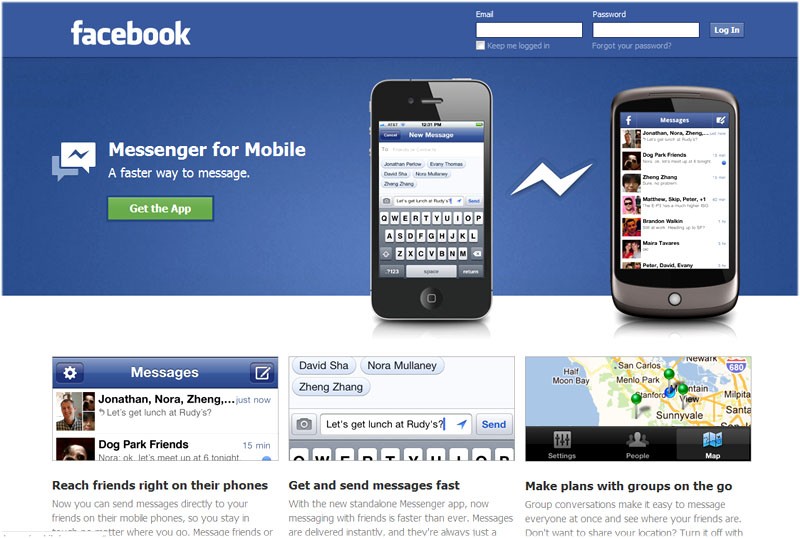
Hello folkes. You would have heard about the Facebook Messenger that has been released lately. Facebook Messenger application covers the live chatting part, plus it supports normal messages too. Whats the reason behind an individual chat application when we already could chat from the native Facebook for mobile app?


Facebook Messenger chat


Still blank on that part, personally. Facebook messenger was available for iOS and Android before they launched it for BlackBerry too, recently. The application now supports many new languages. In an all 22 new for Android and 12 new languages for iOS version.


The native Facebook app had the chat feature but it was pretty laggy. I could often get the message of a particular chat faster than the chat window updated itself. At least now with Facebook Messenger we are able to get the chat updates in real time.


Facebook has really done hard work on improving the overall Facebook experience, specially after the launch of Google + and its various popular features. First the Facebook for mobile app got an overall with huge changes to the app. Finding stuff is now a whole lot easier and notifications, friend request etc are all easily accessible. Good Work Facebook.


And yea one thing more, in the Messenger app, you can add the location too. :)


Download Facebook Messenger :


For iOS | For Android | For BlackBerry


Guest Post by Hassam Ahmad Awan. MBT's Gold Star Guest Author.

Facebook For iPad Launched World Wide—Get Your Copy Now


Facebook for iPad app


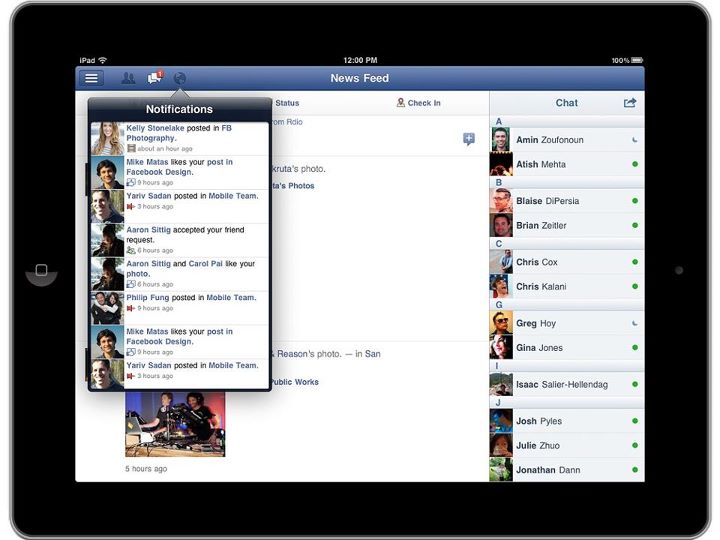
Does this sound weird. Like what? Facebook app was not on an iPad? Well..it was not until now. Facebook recently launched the new application that could be installed on the iPad easily. Due to the devices massive screen, the Facebook app really shines high as compared to on iPhone. There are few differences in the iPad version where we get to have a more wider work space.


As shown in the picture above, the notification menu lays over the page, as a separate window which was not possible in iPhone due to the screen size. Scrolling through pictures is really easy and fun in Facebook for iPad. Simply scroll (wipe) across the page to change the pictures.


Facebook for iPad


Navigate Anywhere, fast


With Facebook for iPad, now you dont need to look up for your notes, games, pages etc. Every thing is nicely lined up in the menu over left that is initiated with the blue button over top left of the app.


Other settings like friends requests, notifications and news feeds are right in front over the top blue tab. Every thing is accessable pretty easily with the new Facebook for iPad version.


 Facebook says:


The app comes with a bunch of other new features: You can chat with friends right from your iPad, for example, or play games and use apps in full-screen mode. You can also watch high-res videos inline, record HD video and stream to Airplay devices.


So what to wait for. Download Facebook for iPad now. Do you guys really use Facebook or other social media apps on your cellphones? Or you prefer the text based updates option?


Guest Post by Hassam Ahmad Awan. MBT's Gold Star Guest Author.

Disable Facebook Timeline App


disable Timeline layoutFacebook timeline is a great way of displaying your old photos, memorable posts and apps with your friends and family. This feature changes your entire Facebook Profile layout into a more attractive look. I previously wrote a tutorial on how to Enable Facebook Timeline Feature and today I am sharing the tutorial on how to completely remove the timeline app from your profile and revert to older Facebook profile layout. Since this time-based story telling did receive mixed feedback therefore it would be really helpful for most of you to learn how to undo/delete this application.


 UPDATE: Facebook Timeline has been officially activated on all old layouts. Know why you can't undo Facebook Timeline?


How To Disable Facebook Timeline Layout?


  1. Log in to your Facebook account


  2. Then visit this page Developers


  3. Towards your left you will see apps. Choose the app you created for timeline. In my case I named it Timeline Feature.


timeline settings


    4.     Click the Edit Settings link,


edit timeline settings


     5.   Then on the settings page towards bottom-left you will see many options under related links, Choose Delete App. Which will delete the timeline app.


delete timeline


       6.   Confirm to delete the app and Bingo you have successfully shifted back to the older Profile view.


older Facebook layout


Visit your profile to see it in its exact previous look and layout. Do let me know if you needed any help pals. Hope you find this helpful. :>

Enable Facebook Timeline For your Profile Now!

facebook timeline

Facebook new and amazing development just to arrive and this amazing Profile layout change method is called "Timeline" This new feature displays a hierarchy of all your experiences  date-wise like post updates, comments, photo and video uploads.  Timeline is your collection of photos, posts and apps that tell your story. You can see what you did in last year or last month. All Facebook status updates that you made or the fun you had so far can be reviewed by rolling back to the old days using this brilliant new feature. At present this feature can be enabled only through the developers page and will be visible to only those people who have enabled Facebook developers App. However very soon Facebook will publically enable the Profile Timeline for all. So why wait when you can try it now!


How To Enable Time Line Feature?

The steps are extremely simple and needs no expert skills. Carefully follow these,

  1. In your Facebook Search book write " Developer" and hit enter
  2. Activate the App if you have previously not activated the Developer App
  3. Click on the Create new app button towards your top-right-corner side
  4. Give your app a name and name space. You can keep any name you want for example I kept "Timeline" as the app name  and "Ahmedzai" as the name space.
  5. Follow the easy instructions and submit the security captcha code. Hit continue and you have successfully created the app and almost done
  6. Now you can see your App name on your app page. Towards the left side Look for the "Open Graph" Link, and click the "Get Started using open graph" link. Fill the blanks as shown below,

time line settings

Fill the first blank with anything say for example Read and the second with Book.  Hit Get Started and You will see three Edit Settings Page. Go through all of them if you wish to change something but you can leave them as default if you wish. I only changed the layout look on the second page.

    Now visit your Facebook Homepage and you will see an invitation at the top saying:

"Introducing Timeline - a New Kind of Profile"

timeline invitation

   7.  Hit the Get it Now button and start exploring this brilliant new feature! Enjoy! :)

How To Link Like button To Facebook Like Page

linking like button to facebook like pageThis tutorial may sound nothing new for those who know the correct way of linking a Facebook like page to your like button but for those who are still thinking how this is done then kindly carry on reading. You may have seen almost every well established blog with a Facebook like button on the homepage but this button doesn't just shares the blog URL on user profile but it automatically likes the Facebook page of the author thereby increasing the number of his Facebook followers. This helps greatly in increasing your social media following and of course traffic to your site. Lets do it,


Linking Like page To Like Button

Facebook provides two different codes that is the iframe code and XFBML code. We generally prefer using the iframe code when pasting the  FB code inside the template but if you wish to paste the code inside a HTML/JavaScript widget then you can use both versions. In this tutorial I will be using the iframe version of code to keep things simple.

  1. And make the following changes as shown in the screenshot also,
  • Paste your Like Page URL inside "URL to like"
  • Keep width size equal to 80px
  • Uncheck send button and show faces
  • Change layout Style to button-count

like button settings

      3.    Hit the Get code button and copy the iframe code.

Next do this:

  1. Go To Blogger > Design
  2. Select HTML/JavaScript widget
  3. Paste the iframe code inside this widget
  4. Save it and you are all done!

Test it

image

Kindly do a favour and click at the like button near the header of this blog and see how the count on like page increases automatically.

Now enjoy receiving valuable likes and not just temporary FB likes. This integration of Facebook like button with like page was recently introduced and it wasn't working before. If you have any questions then feel free to ask. Peace and blessings. :)

You may also like:

Facebook Webcam settings For Quality Video & Audio Calling

Facebook video settingsFacebook video calling is a great functionality added to FB and it is still under development. Zukerberg joined hands with Skype network to avail its users with not just a chat option anymore but real face-to-face video chat. I already mentioned in a post how to set up a video chat in Facebook and today we will be focusing more on how to improve the video and audio quality. If you are a user of Skype then you will find the tips extremely easy.

Install a Webcam

Facebook webcam settingsFirst you need a quality webcam which is a must. Choose a webcam that may make video calls in Hi-Definition i.e.  1280 x 720 pixel resolution at up to 30 frames per second. Put up some money and get a high resolution camera. It would cost less than $50. I would recommend that you buy one from Skype itself. See the varieties by clicking here. A good webcam will have a built-in microphone so you wont need to wear a bulky headphone to talk.

After you have purchased a camera simply do this:

  1. Run the webcam software CD before plugging the webcam into USB cord..
  2. Plug in webcam when prompted.
  3. Now follow the easy instructions provided by software
  4. Right click on webcam icon in system tray.
  5. Click on "Check for updates".
  6. Download and install updates.
  7. Reboot computer.
  8. You are done!

Your webcam is now installed and you can now take pictures with it and make videos on your computer but first we will need to download and install Skype video calling application for things to work. Now jump to next step

Facebook Settings For Best HD Display and Audio Quality

The video settings are the same as that for Skype. We will adjust our webcam to give best results in Skype. If it gives quality result on a Skype video call so will it on Facebook because both platforms use the same software.

  1. Install Skype. If you already have it then skip this step.
  2. In the upper right of the Skype window, click on Tools > Options > Video Settings. Click "Enable Skype video" and "Start my video automatically when I call". Use the dropdown box to select your specific webcam model.
  3. Click "Save".

Now to make a Skype video call do this:

  1. Click on a contact.
  2. Turn on your speakers. 
  3. Click on green button to initiate a call. Both ends will hear a ringing.
  4. Accept the call and start the conversation
  5. During the call ask your friend if your video is clear and voice sounds clear. If you he says yes then Bingo and if he said that the results are not so good then adjust your webcam audio volume and brightness control option. Play around the webcam options like contrast, zoom, brightness until and unless you hear a YES from your buddy.
  6. Finally you are now all ready to make a clear, quality video call on Facebook.

You have successfully purchased and installed a camera and you also adjusted the best HD video settings. Now you must log into your Facebook account and confidently make a video call by following the easy steps mentioned on this tutorial:

I just hope this little help proves useful for most of you and you may enjoy the new FB fun. Stay safe and take care. Peace! :>

Facebook Games: Drive a Car anywhere On Google Maps

Facebook mini mapsFacebook Gaming app Mini maps uses a Google Maps format to let you drive a car anywhere in the world. You can have fun racing a car on any road or motorway in the world. The app uses flash technology to create a virtual car on Google Maps to improve your navigation skills for a selected area. Using simple arrow keys you can push on the accelerator to get your car going. The game lets you choose your destination point and also supports night vision mode if the area you selected is too dark. The game graphics are plausible if the location you selected is a developed country like USA or UK but if you choose a developing country like Somalia then satellite imagery for it is really poor. The zoom range would be minimum and roads will look fade.

To play this game on Facebook simply click the link below and allow the app to access your account. Once given the permission then you can choose a country and specific place and start choosing a car and track to get going! See the video below to get an idea,

google maps game

Play Mini Maps Now!

Disable The New Facebook Chat Sidebar & Recover Old FB Chat

disable facebook chat sidebarSometimes changes in the layout of Facebook often gets a thumbs down by the users. Just like how much people hated the new Facebook layout with photo streams above, similarly do people found the new social chat window appearing on the right sidebar as equal irritation. In order to disable this chat sidebar that shows photo thumbnails of friends available for chat and recover the older chat view then lets play with some workarounds.

Disable New and Recover Old Facebook Chat

There are two apps for Mozilla, Opera and for Chrome that does the magic. I will recommend that you try both of them and see which one you like the most.

Recover Old FaceBook Chat:

This add-on will replace the new social chat window with the older one. You can download the Chrome extension by clicking here 

new facebook chat sidebar


Facebook Chat Sidebar Disabler:

This add-on performs the exact same operation but with a different style. This one works for smart phones like IPhone or android because it has an Opera version. After installing the add-on in order to toggle between old-style chat and new-style chat, use the Options menu in the buddy list.

Count Number Of Comments on Facebook Comments Box

fb-comments-countFinally presenting the Facebook Comment Count plugin for blogger blogs.  With the successful integration of Facebook comments Plugin , now its time that you show the total number of comments posted on your homepages.  The steps are kept as simple as possible. This add-on uses a simple code snippet that automatically tracks FB comments posted and displays the total number of comments posted by visitors. Again this is a unique trick shared by MBT Blog only. Kindly view a demo first,


Live Demo

How To Add Facebook Comment Count To Blogger?

I assume that you have already installed the FB box on your blog if not then kindly first apply this tutorial:

  1. Go To Blogger > Design > Edit HTML
  2. Backup your template
  3. Click the Expand Widget Templates box at the top right corner
  4. Search for this


<div class='post-header-line-1'/>


    5.   Just below it paste the following code,

<b:if cond='data:blog.url == data:blog.homepageUrl'>
<span style='float:right'><img class='comments-tab-icon' src='https://blogger.googleusercontent.com/img/b/R29vZ2xl/AVvXsEiGxDhNOR_tN0NdRTiz-I0hj1R5qucMPO2f3wwjmPiISz2M0NH5Jf1KNrSsq0WhEBK_6D3n6Xe_Sy7QiQg5s90umPbF3pPhIN9k8t9xeTwqw3ZuyrpJckCdk679h3IUpJsiS8EbRB0qVKk/s400/fb.png'/>
<a class='comment-link' expr:href='data:post.addCommentUrl'><fb:comments-count expr:href='data:post.url'/> Comments</a></span>
</b:if>


   You can replace Comments with any text you like.

     6.   Save your template and you are all done!

Visit your blog to see it in action. Feel free to ask for any help if needed. I will publish new and more interesting variations of this code so make sure you subscribe and do not loose any update. Peace out! :>

You will also enjoy these posts:

How To Save and View Facebook Chat History?

save facebook-chat-historyI came across an excellent Firefox add-on that saves your online Facebook conversation and also allows you to share your chatted text with friends and family. Sometimes you wish to save important chat memories on your desktop computer and wish to read them when you want to revive old memories. Sometimes you want to keep the chat history as an evidence for business deals and claims. It is always useful to save and record whatever is discussed and said between two beings in a digital record folder.


Download Facebook Chat History manager by clicking here

Save and View Facebook Chat History with Friends

chat history manager

Simply download this Mozilla add-on and start playing with the tool your self. After installing the plugin kindly follow these steps:

1.Create your account.(Required!)
After you have installed the extension, from Firefox menu bar, select Tools > find Facebook Chat History Manager menu > and select Create Account. Then Log in to Facebook. The chat history manager will save your chat message automatically while you chat.

2.View chat history.
From Firefox menu bar, select Tools > Manager menu > View History


3.Delete chat history.
To delete saved chat history, you can select the messages to be deleted then click delete button on the top of view history messages page.

4.Export chat history.
If you wish to save the chat history on your desktop hard drive then from the Firefox menu bar choose Tools > find Facebook Chat History Manager menu, and select Export History

That’s all! Now you are all set to keep a record of all messages as safety on your hard drive track. Now your friends can not argue that they didn’t broke a promise! :p

How To Delete/Moderate Comments in Facebook Comments Box?

Moderate Facebook commentsA month ago we share the Facebook comments box plugin for blogger which was an alternative to blogger comments box but most of you had problems in understanding the moderating and deletion process of the comments. For this tutorial to work you must first have a Facebook comments plugin on your blogger blogs then you may try the tutorial today.


How To Moderate and Delete Comments?

  1. First sign in your Facebook account
  2. Now visit your Blog post page
  3. Now you will find a Moderate Link below each comment.
  4. Click the moderate link and you will have three options which are
  • Hide Comments
  • Ban Ban user
  • Boost comment

moderate facebook comments

Choosing the Hide comment option will in short delete or remove the comment and it will not be visible to your readers except the friends of that person.

Note: At present a user can only remove their comment by clicking the cross sign that appears next to their comment.

removing facebook comments

Choosing Ban user will permanently block the user from commenting on any of your posts.

Choosing Boost comment will bring the comment at top so that everyone could read it.


How to organize Comment order?

To arrange the order of comments that is New first and old comments later, we set the chronological order. To do this click the comment count and choose an option as shown below,

arrange comments order

By default comments are organized by social ranking which means that only those user comments' will be displayed at top who has good reputation on Facebook.

If you want the newest comments to be displayed at top and oldest at bottom then choose Reverse Chronological

I just hope this little info helps most of you. I will introduce Facebook comment count very soon. So keep in touch and subscribe now so that you may not miss any update as we update the blog several times per day.

Add Facebook Comments Plugin To IFRAME TABS

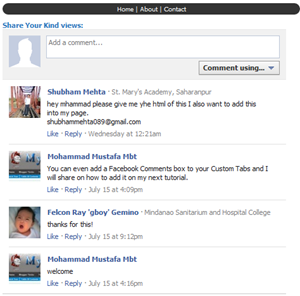
facebook comments plugin in tabsWe shared detailed tutorials on how to create a custom Facebook Tab and how to design a Facebook Template. We added navigation and drop down menus to the tabs giving it a website look and the only thing it lacked was a commenting system so that your Fans may post you questions directly on your Like Page Custom Tabs. Success of any business lies in its brand presentation. Almost every web owner has a Fan Page but very few have Custom Welcome Landing Pages which may showcase your brand. See the demo below and see the different tabs on my Facebook profile to get an idea


Live Demo

How TO Add Facebook Comments Box To Custom Tabs?

I assume that you have already set up a custom tab with a custom design if not please read these posts first:

Go to your Custom tab and click settings linkimage


Just below all the codes that you see inside the editor paste the following code,

<div style="margin-top: 10px;">
<p><span style="color: #3177bc;"><b>Share Your Kind views:</b></span></p>
<div id="fb-root"></div>
<script src="http://connect.facebook.net/en_US/all.js#xfbml=1" type="text/javascript"></script>
<fb:comments href="https://www.facebook.com/mybloggertricks" num_posts="4" width="450"></fb:comments></div>

Replace the bolded black text with your Facebook Profile link.

Save your work and you are done! Visit your tab to see the comment box appearing just below your landing welcome page. I hope you find it useful. Let me know if you needed any help. Peace out! :)

Download Facebook Template Design For Custom Tabs


Facebook IFRAME TabsUPDATE: Facebook Template Custom Tab2 now available. 


Releasing yet another design template for Facebook Static IFRAME Custom Tabs. This new design includes one additional feature i.e. the Navigation menu. You can now add your most important links to the menu and if you wish you can even convert it into a drop down menu by reading our previous tutorials on drop down menus. The coding is kept simple so that you may easily customize the colors and fonts styles and sizes. You will need to edit the template in the Editor mode and paste this new design template code inside the source page of your woobox's HTML Editor. I will be here to help you out with any help if needed. The template is compatible with all major browsers.


Live Demo


To use this template first you need to create a custom Facebook IFRAME tab by reading the tutorial below:


Download Facebook Template


Kindly submit your Email ID below to receive tons of such design goodies for free straight in your inbox:


Check you inbox and activate your feeds. Once you have activated the feeds then kindly post the same ID in the comments box below with which you subscribed. We share resources with subscribers only to keep things clean.


Installation


Find all installation guide and help in this post:


Customization


To edit the navigation menu Find this code,


<li><a href="#" ><span>Link 1</span></a></li>
  <li><a href="#" ><span>Link 2</span></a></li>
  <li><a href="#" ><span>Link 3</span></a></li>
  <li><a href="#" ><span>Link 4</span></a></li> 


Replace the hash(#) sign with your Page Links /URL and replace Link1, Link2, Link3 etc. with your Page Titles. If you wish to add or delete a tab then simply add or delete this line,


<li><a href="#" ><span>Link</span></a></li>


Terms of Use


All MBT resources are copyrighted content and can not be redistributed without our permission.

Facebook Video Calling: How To Set Up & Start a Video Call?


UPDATE: Please also read Facebook Video settings for best quality color display by setting up webcam


Facebook video callingFacebook has finally started filling up the missing blanks on their social network as an answer to Google Plus Project. Together with Skype, Facebook has launched its first ever Video Calling option on there website. Facebook Users can now not only chat but they can now see their loved ones smile, wink and say lol face to face! So far there are no latency issues and video calling loads faster and works without pauses or any other pros. You don't need to install any software or application to make this function work. Below you will find some useful Facebook video calling tips.


Update: We just published an alternative method that works perfectly. Check this: Chat with Facebook friends via Skype


How do I set up video calling?


To start a video call with a friend you will first need to complete a quick, one-time setup:


  1. To call a friend, click the video icon at the top of your chat window.

  2. Simply click the “Set Up” button and follow the easy instructions for how to set up video calling on your favorite browser.

  3. Once installed successfully the video call will start automatically or you can ring back your friend by clicking the video call button at the top right corner of your friends profile


How do I start a video call with a friend?


After the one-time set up you are now ready to make your first call:

set up video call


  1. Visit your friend’s profile and click the “Call” button in the top right corner. You can also click the video icon at the top of the chat window.

  2. When your friend answers, be patient and wait for sometime till both your web cams are inter connected.

  3. If your friend is unavailable or offline, you can leave a video message. That's indeed more like Yahoo's Voice service.


For all these steps to correctly work you must make sure that both your webcam and microphone are connected to the right slots and are in a running condition. You can still use video calling even if you don't have a webcam. You will be able to talk to and see your friend but your friend will be able to hear your voice only.


UPDATE: Though Facebook video calling is still a work under progress but you may find these tips useful in future. I will keep you updated with all the latest new few features.