Now Access the Webmasters Academy in Over 40 Languages


Webmaster Academy


When you really want to achieve something, then the limit of your knowledge no longer becomes a hindrance. This has held true for a lot of webmasters, who are self-taught, and rely on their ambition to learn and implement new things that they consider useful. But whether you are a beginner, or a seasoned veteran, there's always room for some improvement - for learning something new. That is why Google set up a Webmaster's Academy to teach everyone from a total newbie to an advanced user on how to better understand Google, and how to perform better in search results. This Academy was set up last year, but was only available in the English language up until now. Now though, thanks to Google, the Webmaster Academy has gone international, with support for more than 40 languages!


The purpose of establishing this Academy was to educate and guide webmasters into creating websites that perform well in search results. For any blogger, this can serve as the ultimate guide or a complete roadmap that webmasters and bloggers can follow towards success, since the ultimate goal is getting the best performance in search results. So if you haven't still heard of the Webmaster Academy, then you should start off with it immediately.


What it has to offer?


The Webmaster Academy is a fully-fledged academy in the sense that it covers a huge scope of topics, vertically as well as horizontally.


Webmaster Academy


There are various sections in the interface for different type of users. These include Beginners, Advanced users, and Small business owners. Each section has a checklist where you can place a check-box next to each resource that you complete, and you will see your overall progress at the top. These steps are organized in a logical pattern, so you can move from one to the next in a sequential manner.


Once you're done with one section, you can move on to the next. It's a really well organized resource that you can master within no time at all. And now, it is available in a wider ranger of languages. Google says that the Academy is available in over 20 languages, but that number is actually 43, including English.


So what do you want to learn today? Head over to the Webmaster Academy, and start your training as a webmaster from Google itself! You'll be the master of your game in no time at all! All the best :)

Related Posts Widget with Thumbnails and Summary for Blogger

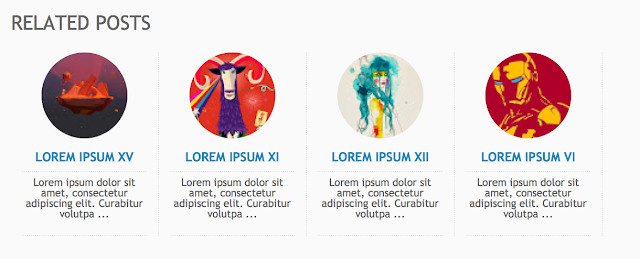
There are several tutorials quite old in which you have seen different methods for displaying related posts in Blogger like the related posts widget with thumbnails and simple related posts with post titles only. This tutorial, however, will show you how to implement a really awesome Related Posts widget with thumbnails and posts snippets that will appear in the footer of all your blog posts.

If you want to get an idea of how it looks like, please visit this demo blog.

Now let's see how to add the related posts widget with thumbnails and summary in Blogger:

Adding Related Posts Widget with Snippets to Blogger Posts


related posts widget with thumbnails and summaries

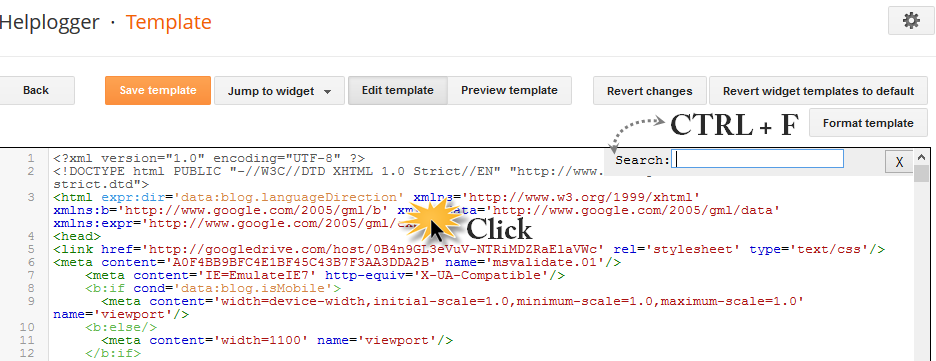
Step 1. From your Blogger Dashboard, go to Template and click on Edit HTML


Step 2. Click anywhere inside the code area and then press CTRL + F to open the Blogger search box


Step 3. Type or paste this tag inside the search box and hit enter to find it:
</head>
After you found it, paste this script just above it:
<script type='text/javascript'>
//<![CDATA[
var relatedTitles = new Array();
var relatedUrls = new Array();
var relatedpSummary = new Array();
var relatedThumb = new Array();
var relatedTitlesNum = 0;
var relatedPostsNum = 4; // number of entries to be shown
var relatedmaxnum = 75; // the number of characters of summary
var relatednoimage = "https://blogger.googleusercontent.com/img/b/R29vZ2xl/AVvXsEh6kTszFzmMIkgtim-YaBW0x2lKSGyNofPtBHrA27_JapFCPbC3OkEftljc58IbqYBvYb-0NIshq_RrcLP-TfZ_DXttLb6LC4F40SaDsL2gPNccSfUkUut42yM2s8vq6AwsIuTs0vkpckg9/s1600/no_image.jpg"; // default picture for entries with no image
function readpostlabels(e){for(var t,r,l,a=0;a<e.feed.entry.length&&(t=e.feed.entry[a],a!=e.feed.entry.length);a++){relatedTitles[relatedTitlesNum]=t.title.$t,l="","content"in t?l=t.content.$t:"summary"in t&&(l=t.summary.$t),relatedpSummary[relatedTitlesNum]=removetags(l,relatedmaxnum),r="media$thumbnail"in t?t.media$thumbnail.url:relatednoimage,relatedThumb[relatedTitlesNum]=r;for(var d=0;d<t.link.length;d++)if("alternate"==t.link[d].rel){relatedUrls[relatedTitlesNum]=t.link[d].href;break}relatedTitlesNum++}}function showrelated(){for(var e=new Array(0),t=new Array(0),r=new Array(0),l=new Array(0),a=0;a<relatedUrls.length;a++)contains(e,relatedUrls[a])||(e.length+=1,e[e.length-1]=relatedUrls[a],t.length+=1,t[t.length-1]=relatedTitles[a],r.length+=1,r[r.length-1]=relatedpSummary[a],l.length+=1,l[l.length-1]=relatedThumb[a]);relatedTitles=t,relatedUrls=e,relatedpSummary=r,relatedThumb=l;for(var a=0;a<relatedTitles.length;a++){var d=Math.floor((relatedTitles.length-1)*Math.random()),n=relatedTitles[a],s=relatedUrls[a],m=relatedpSummary[a],i=relatedThumb[a];relatedTitles[a]=relatedTitles[d],relatedUrls[a]=relatedUrls[d],relatedpSummary[a]=relatedpSummary[d],relatedThumb[a]=relatedThumb[d],relatedTitles[d]=n,relatedUrls[d]=s,relatedpSummary[d]=m,relatedThumb[d]=i}for(var u,h=0,o=Math.floor((relatedTitles.length-1)*Math.random()),g=o,f=document.URL;h<relatedPostsNum&&(relatedUrls[o]==f||(u="<div class='relatedsumposts'>",u+="<a href='"+relatedUrls[o]+"' title='"+relatedTitles[o]+"'><img src='"+relatedThumb[o]+"' /></a>",u+="<h6><a href='"+relatedUrls[o]+"' target='_self'>"+relatedTitles[o]+"</a></h6>",u+="<p>"+relatedpSummary[o]+" ... </p>",u+="</div>",document.write(u),h++,h!=relatedPostsNum))&&(o<relatedTitles.length-1?o++:o=0,o!=g););}function removetags(e,t){for(var r=e.split("<"),l=0;l<r.length;l++)-1!=r[l].indexOf(">")&&(r[l]=r[l].substring(r[l].indexOf(">")+1,r[l].length));return r=r.join(""),r=r.substring(0,t-1)}function contains(e,t){for(var r=0;r<e.length;r++)if(e[r]==t)return!0;return!1}
//]]>
</script>

Note:
- To change the number of posts that are being displayed, modify the value in red (4)
- To change the number of characters to be shown in posts summary, modify the value in green (75)
- To change the default pic for posts with no images, add your URL instead of the one marked in blue
Step 4. Now that we added the script, we will need to add the CSS style. Just paste the following code above the same </head> tag:
<style>
.relatedsumposts {
padding: 0px 10px;
text-align: center;
/* width of the related posts area */
width: 120px;
float:left;margin-bottom:15px;
border-right: 1px dotted #E5E5E5;
display: inline-block;
}
.relatedsumposts h6 {
margin: 5px 0;
}
.relatedsumposts h6 a {
/* link properties */
color: #linkcolor;
text-transform: uppercase;
font-size:12px;
}
.relatedsumposts img {
/* thumbnail properties */
height: 82px;
width: 82px;
-webkit-border-radius: 50%;
-moz-border-radius: 50%;
border-radius: 50%;

}
.relatedsumposts p {
/* summary properties */
border-top: 1px dotted #E5E5E5;
border-bottom: 1px dotted #E5E5E5;
color: #summarycolor;
font-size: 10px;
height: 4em;
line-height: 1;
margin: 5px 0 0;
padding: 5px 0 15px 0;
}
#relatedpostssum {
width: 100%;
}
.relatedpoststitle {
font-size: 19px;
margin-bottom:15px;
}
</style>

Customizing the Related Posts Widget:

- Modify the value in red (120px) to adjust the width of the widget area
- Replace #linkcolor with the hex value of your color to change the color of post titles
- If you want to change the size of thumbnails, modify the values marked in violet (82px)
- To determine the border roundness, modify the values in orange (50%)
- To change the color of the post snippet, change #summarycolor with color hex value

Step 5. Next, search (CTRL + F) for the following code snippet:
<b:includable id='postQuickEdit' var='post'>
When you find it, click the sideways arrow to expand the code and scroll down until you find </b:includable> - see the screenshot for more help:


Step 6. Just ABOVE the </b:includable> tag, add the following html code:
<!-- Related Posts with Thumbnails Code Start-->
<b:if cond='data:blog.pageType == &quot;item&quot;'>
<b:loop values='data:post.labels' var='label'>
<b:if cond='data:label.isLast != &quot;true&quot;'>
</b:if>
<script expr:src='&quot;/feeds/posts/default/-/&quot; + data:label.name + &quot;?alt=json-in-script&amp;callback=readpostlabels&amp;max-results=50&quot;' type='text/javascript'/>
</b:loop>
  <div class='post-footer-line post-footer-line-4'>
   <div class='relatedpoststitle'>RELATED POSTS</div>
<div id='relatedpostssum'>
      <script type='text/javascript'>showrelated();</script>
    </div>
    <div style='clear:both;'/>
  </div>
</b:if>
<!-- Related Posts with Thumbnails Code End-->
Screenshot

Step 7. Click on the "Save Template" button to save the changes and you're done!

Note: in case you see the 'undefined' message, make sure that you have added the appropriate labels to your posts - which can be found in at least one more post, otherwise the script might not be able to find any related posts for that entry.

How To tell Google to Remove your Content or Site from Google Services?


Opt out of Google services


Google, as you might well know has a wide, vertical range of products and services served along the main course that is Google Search. Such services include Google Shopping, Flights, Hotels, Google Advisor, Google Plus Local Search, and so on. Sometimes, some of the content on your site also gets included in these services if relevant. But in some cases, you might not want your content to appear on such products and services. Now you can ask Google not to include your content in search results through your Robots file, but that doesn't really solve the problem does it? It'll take your content off Google entirely. So how to exclude your content from the extra Google services only? Well, Google has now given you a solution in the form of an Opt-out Tool, where you can choose your content to be not included in such products and services.


How to Opt-Out?


Before we talk about the background behind this initiative, let me first tell you how you (publishers) can opt out of these five select Google services, namely Google Shopping, Google Flights, Google Hotels, Google Advisor, and Google Plus Local `Search.


This tool can be found within Google Webmaster Tools. Follow this link to the Opt-Out Tool, and choose a website you want to use this tool for. You must be logged into Google Webmaster Tools to access this tool.


Remember! This tool is only available for domain level sites. Sub-domain websites (such as example.blogspot.com) won't get this option. You will need your own domain (example.com) to access this option.


After selecting a site, and clicking on the Opt Out button will result in the removal of your site's contents from the aforementioned Google Services. However, this won't result in the immediate deletion of the records Google has of your site. That won't happen until another thirty days, giving you ample time to re-think your decision, and roll back the changes if necessary.


Notice that as yet, you can only opt out of all of the five services, or no services at all. An all-or-nothing approach, if you will. You can selectively choose a single service.


Why would you want to get your contents excluded?


Interestingly, not all of these listed services are free. Some require you to pay in order to get your content listed in them. So what exactly is the use of this tool, and why would people want to use it?


From some sites, Google picks up more than just their raw content. It also gathers things like review data from the web, and associates it with product or place listings. Not all publishers would want Google to collect such data, and deliver it in its own way, such as summarizing it, and so on.


Previously, if such publishers wanted Google to not collect such data, then the only option they had was to opt-out of Google altogether, and that includes Google Search as well. And as you might know, Google enjoys more than 66% of the search engine market share. So opting out completely would mean that publishers would lose more than two-thirds of their organic search traffic. So clearly, such an option is out of the question for most publishers.


Google took this initiative in response to its agreement with the US Federal Trade Commission (FTC) over anti-trust charges. Publishers were worried about Google's policies, since they didn't want to get de-indexed from search. Yet at the same time, their appearance in other products wasn't acceptable either. So the FTC won this battle for such publishers.


Google will give websites the ability to “opt out” of display on Google vertical properties. Under the same commitment, Google also has promised to provide all websites the option to keep their content out of Google’s vertical search offerings, while still having them appear in Google’s general, or “organic,” web search results.

So as it appears, by applying its all-or-nothing policy with its services, Google is trying to merely satisfy the FTC, without actually considering the Publishers' concerns. But at least it's a start. Further enhancements might be on their way.


Have you got any question? Feel free to ask in our comments section below. Here's to hoping Google will orient itself towards publishers better in matters like these in the near future :)

Publishers can now review Ads Landing Pages in AdSense


Google AdSense


Google AdSense empowers you with a host of options and features with which you can keep your ad-marketing campaign going smoothly. You have an Ad Review Center, where you get various controls that help with the management of ads on your site. Among other features (see a list of latest AdSense features here), you get the luxury of finding and reviewing quickly and efficiently, hence saving you a lot of time. But that's something we all already knew about. However, Google has very recently introduced a new feature in their Ad Review Center. Previously where you could only review ads themselves, now you can also review the landing pages they lead to.


How would this help?


Some of you might be saying 'meh, big deal' at this point. But if you've guessed the implications, then I'd like to congratulate you on your wit :D. Anyhow, this feature will help publishers align their website (content and ads) towards the users (we all know how big an issue user-friendliness is with Google).


Previously, you could only review ads, and see if they weren't irrelevant, or not suited for your audience. Now, you can also review the landing pages they lead to. This way, you can gauge your users' reaction ahead of time, and make adequate adjustments. For example, if you see a landing page that you think your users won't like, you can opt out of that ad.


Examples of landing pages where users might not comfortable can be irrelevant pages, cramped and spammy landing pages with a lot of ads or calls to action, inconvenient pop-ups, difficult navigation, and so on. As a general rule of thumb, if you don't like the page after clicking on the ad, then your users won't like it either.


How to get this feature?


Log into your AdSense account, and click on the Allow and Block Ads tab. Here, you can review individual ads. Hover over any ad, and you will see a magnifying glass appear on its bottom-right corner. Click on this to see the ad and the landing page it leads to. Easy as pie :)


Do note that this feature is currently available only to those accounts which have their language preference set to English. Google, however, is trying to add more language support. In the meantime, please feel free to ask questions in our comments section if you have any confusion. Stay tuned for more updates :)


P.S. Please try to keep your comments and questions as relevant as possible. This ensures easier and faster replies to your individual queries. Thank you for your cooperation :)

New Features for Verification Management in Google Webmaster Tools


Businesses these days, whether they be online or otherwise, often tend to be backed up by a partnership of some sort, where more than one individual is running the show. In such situations, the distribution of tools and online resources can be a bit tricky. For example, imagine having to share your website's passwords, or Google Analytic property with your business partner(s). An immediate problem arises here, because you cannot trust anyone with a password. Luckily, Google makes it incredibly easy to share vital tools and resources between partners, such as Google Analytics properties, website verifications through Google Webmaster Tools, mutual-sharing of fan pages, and so on. Google has  now introduced some latest features to go with its management of multiple users feature.


Verification details


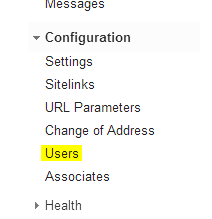
Now, for every verified owner of your website, you can view the method by which that user was verified, so that you can keep track of who you add, and who got in by somehow tricking you. To access this information, log into your Webmaster Tools account, and click on your site. Now, from the Configurations menu, click on Users.


Google Webmaster Tools configuration


Now, you'll see a Manage Site Owners option at the top-right. This will take you to the verification information.


Manage site owners


You will be able to see what owners are verified for your website, and what methods they have used. Click on the verification details next to each user to find out more.


verified owners


Unverifying an owner


You can no longer un-verify a website owner if the method(s) they used for verification still exists. For example, if verification was done through meta tags, then Google Webmaster Tools will prompt you with an error, and won't let you un-verify an owner as long as that meta tag is still there. 


CNAME verification


CNAME verification strings have now been shortened in order to support a larger number of DNS providers. Systems used by some providers restrict the number of characters that can be used for a DNS record, and as a result, many users couldn't use this method of verification. Now, with shortened strings, they will finally be able to do it. However, this won't change the existing strings, and the old ones will continue to work just fine.


Questions? Feel free to ask us. We'd love to respond to your queries. Peace and blessings :)

Google gives Guidelines for Monetizing Flash Gaming Sites


Adsense on flash sites

Small flash games account for lots of hours wasted as pastime. People love playing these small games online, just to take their minds off things for a while. Whether it be a simple game of pool, or a make-believe world of farming, people get hooked up to these games pretty fast, which is why a lot of people like to add them on their sites. There are also a lot of dedicated flash gaming websites out there, and they seem to be making quite some money out there (not a very bad idea for a new blog niche, by the way). For the flash gaming geeks who like to put such games up on their sites, here are a few guidelines from Google you need to be mindful of before monetizing your websites.


Mind your distance!


People will every now and then confuse animated ad sections with your flash games if placed very near to each other. Some games also require frantic clicking, which leads users to click outside the flash content. And while resizing a web page, or opening it on a mobile device, accidental clicks on ads instead of the flash content are inevitable.


All of this leads to invalid click activity, which might result in your AdSense account getting banned. To avoid such an inconvenience, it is recommended that you keep a distance of at least 150 pixels between flash content and ads. Check out the following image provided by Google to get a better idea.


Ads within games


What websites normally use is AdSense for Content (AFC). Most ads you see on a website are AFC. You can't however, use these kind of ads in games. It is against Google's policies. If you want to display pre-roll or mid-roll ads inside your games, you might want to look into another program by Google known as AdSense for Games (AFG).


As always, Google doesn't allow you to add sexually explicit or profane content on your flash content. It's family safety rules are pretty strict about such things. For a more detailed list on what content Google discourages on your blog, check the following link.


Still have questions? Feel free to ask in the comments below. We're here to help. Cheers :)


How To Schedule Pins on Pinterest?


Scheduling pins on pinterest


Pinterest is a pretty interesting visual social network that poses quite a conundrum. On the one hand, the idea of pinning and sharing images, and interacting with people over these images seems quite appealing. But on the other hand, there aren't very many marketing features employed by Pinterest, which causes some small businesses to ignore this really useful opportunity. With Facebook, you can schedule your posts, analyze your statistics, and generally spice up your posts. Sadly, no such functionality as stock from Pinterest. Luckily though, there is a tool that will help you schedule your Pins, and enhance/analyze them for more effectiveness.


Scheduling pins using Pingraphy


Pingraphy is a free tool that is designed to add an extra layer of features to Pinterest. You don't have to create a separate account to be able to use it. You can just log in with your Pinterest credentials. Enter your Pinterest username and password, and then proceed to the next step.


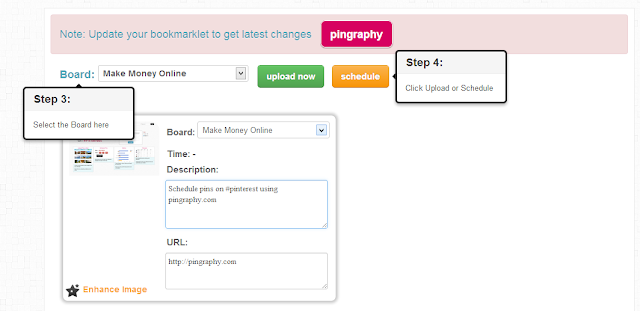
When you log in for the first time, you are prompted to add a Pingraphy bookmarklet to your browser. Just click on the button that says 'pingraphy' in Step 1, and then drop it into your browser bookmarks bar. This is a piece of JavaScript code that will help with the easy sharing of pictures you find on the web. This, however isn't necessary. But I did this anyway.


Next is Step 2, where you actually get to post or schedule pins. Click no the Schedule button, and you will see some more options. You can select a board to pin to, the picture to pin, and when to pin it. If you click on the schedule button, you will see options to set the time, and the time interval (in case you want to pin multiple images). If you want to pin multiple images at once, you will still have to set an interval. This interval can be as long or as short as you like.


Once scheduled, you can see your pins from your dashboard. Unfortunately, you can't change the schedule for a pin, and have to delete it and then schedule it again properly to change its time. But otherwise, it's a pretty useful tool that can help save a lot of time on Pinterest, and manage pins more effectively. Check it out for yourself, and let us know what you think. Cheers :)


CSS Basics. How to Apply Rounded Corners On Images #2

blogger tricks, css tricks, border radiusIn the previous post I have mentioned that we will learn about how to create rounded images using CSS, without needing to edit them one by one using a program. Now that we have seen the basics of CSS, let's try to apply it on some pictures.

What we will do in this tutorial is to upload an image (HTML) and then add some rules in the stylesheet that will transform the outer shape to look like a circle... or, at least, to appear round. This will depend on the proportions of that picture we will use.

In fact, we can apply this effect to any picture, to a specific part of our blog or to all the pictures found in our blog. This depends on your tastes.

Marking up HTML

Obviously, the first thing we need to do in order to set a rounded border around an image is to get a picture and upload it to get the html structure. The code could be a little bit more complicated, but an image is built within the img tag, which basically, looks like this:
<img src="image_URL"/>
Screenshot:


Adding this code inside the HTML of the post with the url of our image - instead of the text in blue - we will be able to display it like this image on the left.

Usually, it might also contain an alt text, and sometimes, may have some predetermined dimensions (with a specific width and/or height). When we upload an image using the Blogger post editor, the code will also have a link pointing to the original image.

But if we want to modify this image using CSS, we need to add a class selector. We can add it in two ways: within the img tag or in a parent box. The name that I have chosen for the image selector is roundedcorners, however, you can add any name you want:
<img class="roundedcorners" src="image_URL"/>


<div class="roundedcorners">
<img src="image_URL"/>
</div>

Applying style to all homogeneous elements

But that selector alone won't do anything special. It needs to be linked to a style rule telling what to do with it. The same if when we add just classes, if these are not defined within the CSS, the appearance of a picture (or a certain element) will not change.

To change the shape of the all the pictures on our blog, this is what we should add to our CSS:
img {
border: 2px solid #BADA55;
margin: 0;
padding: 0;
border-radius: 1000px;
-moz-border-radius: 1000px;
}
And how this translates to your browser?

Search for images by name tag (img) and apply the following style:
  • a solid green border of 2 pixels
  • set the margins (space outside the border) and padding (space inside the border) to zero
  • apply the rounded corner look to all the four corners
Now that we have this rule in our style sheet itself, we'll be able to see the picture as we want - take a look at the image on the right.

To declare a property correctly, we need to know what it does and how to write it - details which could be found all over the internet, although W3C is the authority in this.

For instance, the border-radius property initially requires four (4) values reading from left to right, which represent the roundness of the upper-left, upper-right, lower-right and lower-left corner. If you add a single value, it will make all the four corners to be equal with that value.

It is important to mention that when the value of the border exceeds the dimensions of the container, this border will create a circle.

How to apply the same style on the elements of the same container

Sometimes, we don't want all the images on our blog to be round, but only the ones that we choose, otherwise adding the style above within the head tag will make all the pictures taking this shape. Before, we used an HTML tag (img) and not a selector and, for this reason, the style will affect all our images.
To avoid this, we can do one of the things we saw at the beginning of this post and that was to place the image inside a div with the roundedcorners class. This way, only the images within the container with that class will be affected by the rule that will make them round.
<div class="roundedcorners"><img src="image_URL"/></div>
But the rule then should not affect the img tag directly, but the roundedcorners selector. In this case, you should write it like this:
.roundedcorners img {
border: 2px solid #BADA55;
....
}
This implies that this style applies only to images that are within the container with the roundedcorners class.

Final words

To end this tutorial on creating pictures with rounded borders, keep in mind that if these are not square, instead of becoming circular, they will look oval:


To fix this we should add the width and height with the same measure (value in pixels) to force the image cropping and to make it appear perfectly circular. That was all!

If you enjoy reading this blog, please share and subscribe. For any questions, drop a comment below ;)

CSS Basics. How to Apply Rounded Corners On Images #1

This tutorial will explain how to change the outside border of any image by using some simple CSS rules to make it round, but this is so easy doing this, that I'm finally going to make this post for other purposes.
rounded corners, css tricks, blogger tricks, blogger design
The trick today that I'm going to publish in two parts is to help you to understand, at least, a little of what CSS (Cascading Style Sheets) is.

For those who would like to learn more, please take a look at this link and for those who really want to learn thoroughly, I recommend to visit this site.

Introduction and terminology

Style sheets aim to help sort out what is the structure of a website and which is its format or appearance. So, the CSS box model is, basically, a box that wraps around HTML elements, and determines how those boxes are presented in terms of colors, fonts, width, backgrounds etc.

The advantage is that, anytime we decide to change something, we don't have to change all the pages one by one, but simply, change the properties from the style sheet and these modifications will automatically apply in all the pages.

The style sheet is a set of rules made of selectors and declarations. The selector is to be used as a nickname or name of what you want to configure from the style sheet and apply to the HTML, and declarations are properties to which we add the desired values ​​(more information on CSS syntax)

Adding the CSS selector

If we add, for example, the code above in our style sheet, we might not see anything particular happening in our website. As I have mentioned above, the selector relates to the HTML and CSS so, if we want a box to take these values ​​for width, background color, border and font size, we need to include the selector within the HTML of a page element, like this:
<div class="SelectorName">Text here</div>
Here we added a rule telling the browser to interpret that this box has to be of a certain type or class. This class or selector could have some specific properties and values ​​defined in the style sheet, as you can see in the image above.

Now let's see how this will change the look of the box, while all others that don't have the SelectorName  name will follow the standard appearance.

Basically, when we add a rule in a style sheet, or modify an existing one, what happens is that all boxes marked with that selector will change their appearance according to the properties and values that we have defined in the style sheet.


Where to add the CSS style

This style can be added in external CSS files - create the CSS file with all the rules, upload it on a hosting site and get the URL of the file. To make use of it, include the following line in the header of your template. For Blogger, you can add it between <head> and <b:skin><![CDATA[/*:
<link href="syle.css" rel="stylesheet" type="text/css"/>
Note: replace the text in blue with the url of the CSS file.

You can also add the style directly in the HTML of the template by adding the CSS between the style tags:
<style>
.SelectorName {
background-color: #EAEAEA;
border: 1px solid #444444;
width: 200px;
font-size: 12px;
}
</style>
This can be added in the HTML of a page element as well. In this case, you don't need to add any selector to indicate where the CSS style is:
<div style="background-color: #EAEAEA; border: 1px solid #444444; width: 200px; font-size: 12px;">Text here</div>
In Blogger, the rules are between the <b:skin><![CDATA[/* and ]]></b:skin> skin tags. If we access the HTML of our template, we will find a bunch of codes in between these tags, which is actually the CSS styling that defines the appearance of our blog.

For those who don't want to touch the template code, we can add the CSS directly by going to the Blogger Template designer > Advanced > Add CSS.


That's enough for today. In the next tutorial we'll get to know how to add rounded corners to our images using CSS -> how to set a rounded borders around an image using CSS.

Download Google's Latest Cheat Sheet eBook To Optimize your site


Whether you are a beginner looking to make a mark on the internet or just wanting to learn some stuff, or a pro who wants serious business online, Google is always there to help you. At the Google Webmaster Central blog, you will find any number of news, tutorials, tips, and best practices involved with webmastering. Google wants to help you out in making your content available to the world, and has released many items related to Search Engine Optimization, Google released an eBook some time ago which contained all the basic SEO tips you could think of in a nutshell. Well now, for starters, Google has released a new one-page quick-start eBook which captures the essence of SEO as it is used today.


Dubbed as a 'first steps cheat sheet' by Google, this eBook is specifically designed for people who have set up a blog or an online presence, but haven't given much thought to search. They might have made some content, but don't know the ABC of getting their website into Google Search.


This book is a very short and concise guide on search engine optimization, with tips on how to create SEO friendly design, This will help search engines like Google itself to better understand the content on your site, and hence will increase its visibility.


Take a look at this amazing one-page SEO eBook here.


How to download this eBook?


Here's the direct download link to this eBook;


Download: Google One Page SEO Guide


If you're more of an advanced user, we something for you too! You can check out the more extensive Google SEO Starter Guide that will detail you through most of the basic SEO aspects.


This eBook is free to use, and you can distribute or print it as you like! Give it a read, and share the knowledge with others too and increase awareness! All the best :)

10 Places to put Adsense ads in Blogger

In this post, we'll talk about the 10 most common places in a site or blog where we can add AdSense ads and how we can implement these. Also, we'll get to know which are the most suitable formats based on those available in our AdSense account.

AdSense Advertisements

In the Sidebar

adsense, ads, add adsense blogger

How to implement

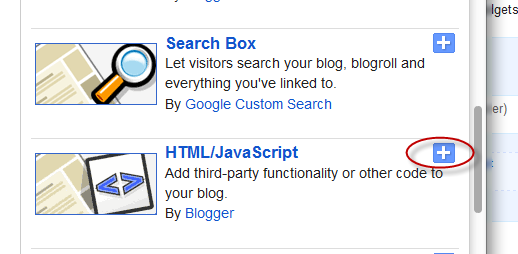
This is one of the most accessible places to put AdSense. Just go to the Page Elements (Layout), click on the "Add a Gadget" link, then add a HTML/JavaScript widget with your ad code inside it or add directly an AdSense widget.

Recommended formats: 125 × 125, 120 × 600 and 160 × 600, 300 x 600

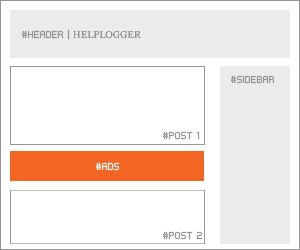
Between posts

blogger posts, blogger tricks, adsense ads

Implementation:You can add AdSense ads between your posts by going to Layout, click on the "Edit" link below the Blog Posts section, then check the "Show Ads Between Posts" option.

Recommended formats: 468 × 60, 300 × 250 and 336 × 280

Under the header

blogger header, blogger tips, adsense

Implementation:

Before anything, you need to convert your AdSense ad code - you can use this converter here:

AdSense Ad Converter

Next thing to do is to go to your Blogger Template (log in to your Blogger Dashboard, click on Template and press the Edit HTML button) and click anywhere inside the code area to search for the following code using the CTRL + F keys:
<div id='header-wrapper'>
Paste the converted code right after it.

Recommended formats: 728 × 90 and 728 × 15

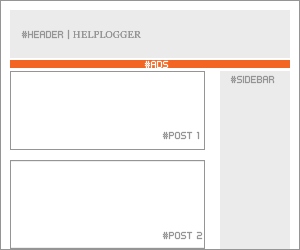
Above the blog posts

make money, adsense, blogger tutorials

Implementation:

Convert your ad code and search for <div id='main-wrapper'> in your template.

Paste the converted code right after it.

Recommended formats: 460 × 68, 468 × 15 and 336 × 280

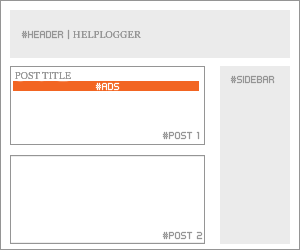
Under the post title (this will be visible on all the pages)

money online, blogger tricks, how to blogger
Implementation:

Convert your AdSense ad code and go to your Template > Edit HTML > click anywhere inside the code area and search for the following line (CTRL + F):
<div class='post-header-line-1'/>
Note: if you can't find it, search it without the ending slash /

Paste the converted code right after it.

Recommended formats: 468 × 68 and 468 × 15

Under the post title (visible only on the posts pages)

Implementation:

Convert your ad code and then go to your Template, click anywhere inside the code area and look for:
<div class='post-header-line-1'/>
Note: if you can't find it, search it without the trailing slash /

Paste the converted code, following this example:
<b:if cond='data:blog.pageType == "item"'>

<!-- Add here the code of your ad -->

</b:if>
Recommended formats: 468x68 and 468x15

In the posts' footer

post footer, adsense, blogger blogspot

Implementation:

Convert your ad code and then go to your Template > click anywhere inside the code area and look for:
<p class='post-footer-line post-footer-line-3'/>
Note: if you can't find it, search it without the trailing slash /

Paste the converted code right after this line.

Recommended formats: 468x68 and 468x15

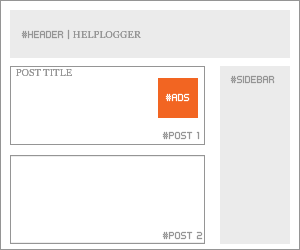
In the post's body (it will be visible on all pages)

adsense how to, blogger tricks, gadgets

Implementation:

Convert your ad code and then go to your Template > click anywhere inside the code area and look for:
<div class='post-body entry-content'>
Note: in case you don't fint this code, search only for <div class='post-body'>

And paste the converted code by following the example below:
<div style='float:right'>

<!-- Add here the code of your ad -->

</div>
Recommended formats: 125x125, 180x150, 120x240 and 200x200

In the post's body (visible only in post pages)

Convert your ad code and then go to your Template, click anywhere inside the cod area and look for:
<div class='post-body entry-content'>
Note: in case you don't find this code, search only for <div class='post-body'>

And paste the converted code by following this example:
<b:if cond='data:blog.pageType == "item"'>
<div style='float:right'>

<!-- Add here the code of your ad -->

</div>
</b:if>
Recommended formats: 125x125, 180x150, 120x240 and 200x200

Between post and comments (visible only on posts pages)


Implementation:

Convert your ad code and then go to your Template, click anywhere inside the code area and look for:
</b:includable>
<b:includable id='postQuickEdit' var='post'>
Paste the converted code just above it, following this example:
<b:if cond='data:blog.pageType == "item"'>

<!-- Add here the code of your ad -->

</b:if>
Recommended formats: 468x60, 300x250 and 336x280

In the blog's footer

blogger footer, adsense ads, make money online

Implementation:

Convert your ad code and then go to your Template, click anywhere inside the code area and look for:
<div id='footer-wrapper'>
Paste the converted code right after it.

Recommended formats: 728x90 and 728x15

FAQ

Some questions that are likely to arise:

I can't find the codes, what should I do?
When searching for a specific code, make sure that you have no spaces before/after it. These are the default codes of Blogger and should be found in all the templates unless they have been modified by the template designer.

Why should I convert my AdSense code?
The Blogger's Template reads it as text and not as code so it is better to avoid any errors when trying to save it.

The ads are not displaying properly, why is that?
The ads could be affected by the styles (CSS) selectors (divs) containing them and some templates could be wrong designed, then you should consider modifying these styles, look for another relevant place or in extreme cases, change the template.

Can I put the all 10 codes on my blog?
No, you should choose just one of the locations where you want to put the ads considering that AdSense have some limits on the number of ads that could be displayed. Try to make a balance with your content.

Why there should be only 3 ads displayed on the main page?
This is due to the limit set by AdSense. Combine the type of ads (text, rich media ads and link units) if you want to show more ads.

Hopefully, this guide will be useful to those of you who need to display AdSense ads on your blog.

Can Someone Steal Ownership of your Site in Webmaster Tools?


Site ownership

For webmasters, verifying ownership of their website is very important, since it establishes an official connection between you and your website. It is one of the factors among many others that decides a site's trust. Every webmaster has to get his site verified in Google Webmaster Tools to help Google recognize ownership for that site, and provide some advanced tools to the webmaster. But there's one thing that might concern a few people regarding ownership. There are many blogs and websites where people who aren't the owners have access to the site's source code, at least the <body> part of a website. So what if someone adds a meta tag with the body tag and steals ownership of your website?


People who have rights to post on your blog, and even people who comment have some level of access to the body section of your website, since the content they create goes into the body tag.


Usually, website verification require you to add a meta tag to your site. This meta tag is provided by the service you're verifying from, and you, being a website owner, can add this meta tag to your site's source code (usually the head section) and get your website verified.


So what if people who don't own your site add a meta tag for website verification in the <body> section of your website?


As Google's Matt Cutts clarifies, Google only checks for meta tags embedded into the <head> tag of your website. And the head does NOT mean the header. The head contains all the definitions, stylings, rules, and so on. And it is where meta tags should be added. Meta tags with the body don't make much sense.


So as long as others are only editing your website's body section, you needn't worry about any attacks or verification attempts, should any be made. But if you're giving others access to your site's head section, then you should think again by granting such permissions.


If you found anything confusing, please do let me know. I'm here to help. Cheers :)

Recent Comments Widget with Hide Author Comments function For Blogger

A few days ago, Mrpolie asked if there's a way to hide the author comments in the Recent Comments widget so that we would be able to see only readers' comments and our replies to be hidden. So, in this post I'll be sharing with you the Recent Comments widget that comes with this function. If you want to show just blog readers' comments rather than yours, you have just to change "Blogger User" text with the surname under which you are posting.

recent comments widget, recent comments, blogger

The main features of this recent comments widget:

- You'll be able to hide your comments
- Change the avatar size
- Set the number of comments to display
- Set the length of comment for the widget to display

Recent Comments Widget with Hide Author Function


Step 1. From your Blogger Dashboard, go to Layout and click on Add a Gadget link


Step 2. In the pop-up window, choose the HTML/JavaScript widget


Step 3. Copy-paste the following code:

Recent Comments Widget with Round Avatars: 

Click to see the code

Recent Comments Widget With Post Titles (no avatars): 

Click to see the code

Some changes before saving it.

- to set the number of comments to be shown, change the "5" value from the orange line
- for the number of characters, change the "67" (for the 2nd widget, it is 95) value from the green line
- to hide your comments, replace the Blogger User text TWICE with your username
- to change the size of avatar, change "50" from the blue line.
- if you don't want rounded avatars, delete this line:

-webkit-border-radius: 100px;-moz-border-radius: 100px;border-radius: 100px;
Step 4. Save your widget and you're done!