How To Submit Blogger Sitemap To Yandex

How to submit blogger sitemap to Yandex | 101helper

Before I start let me tell you something about Yandex. Yandex is a Russian company that operates the largest search engine of Russia. It is one of the most popular search engine and after Google, Bing, Yahoo, Yandex is most popular. In the beginning this search engine was available in Russian language only but now it is available in English also. As a search engine it also has features like other search engines such as webmaster tools for webmasters and bloggers. You can read more about Yandex here. Yandex is not so popular but it is one of the best way to get more traffic and a successful blogger is that who takes advantage of every means no matter its more popular or less popular. So if you are interested in getting more traffic and want to improve your seo, I recommend you to submit your sitemap to Yandex. 

Like Google and Bing, sitemap can be submitted to Yandex also but its too different from submitting sitemap to Google or Bing. Google and bing accept the normal sitemap i.e: http://yourblogurl.blogspot.com/atom.xml?redirect=false&start-index=1&max-results=500 but incase of Yandex this sitemap can not be used. Yandex will show you an error, shown in below image. So to gain visitors from Yandex you have to do something different and for the same reason I am creating this post. So follow below mentioned steps to submit your blog's sitemap to Yandex.


Error while submitting blogger sitemap to Yandex | 101helper
Error while submitting sitemap to Yandex
Step 1: Go to Yandex webmaster tools and sign-up for an account.

Step 2: After sign-up login to your Yandex account and add your site/blog.


How to submit blogger sitemap to Yandex.org | 101helper

Step 3: Verify your blog by using the meta code(go to your blog template and add the meta code below <head>).

Step 4: After verification, go to your Yandex account and click on my sites.

Step 5: Click on indexing options in the menu on left hand side.

Step 6: Choose the sub-option "Sitemap files".


How to submit blogger sitemap to Yandex search engine | 101helper

Step 7: Use the following sitemap url in sitemap url box:

http://your-blog-link.blogspot.ru/sitemap.xml


Seo tutorials for blogger | 101helper

Step 8: Click on add and you are done successfully. 

You can check your sitemap status by click on check.

Note: Don't use http://your-blog-link.blogspot.com/sitemap.xml instead of it use http://your-blog-link.blogspot.ru/sitemap.xml because incase of .com Yandex is redirected to .ru(russian domain) which results in stopping of index.


Hope you like this post and your found it helpful. If you have any question feel free to ask me in comments below or contact me. Follow and subscribe to get more seo tutorials for blogger. If you like this post, help me spread it by sharing it with others. Keep visiting 101Helper.

Search tags: Seo guide for blogger, How to increase blog traffic, How to submit blogger sitemap to Yandex, Seo tutorials for blogger, 101Helper seo tips for blogger.

jQuery "Tabs Shortcode" For Blogger!

Tabs Shortcode for blogger

We have shared several Multi Tabs widget in the past but today we are sharing the shortcode for creating responsive tabs inside blogger posts, sidebars and comments. This new method will help you add shortcodes anywhere on your blog with a single line of code. You can add multiple Tabs widgets on a single Page with as many Tabbed panels as you want. Add anything inside the panels to organize content on your blog layout and make it look more professional. The tabs supports nested shortcodes, so you can also add the jQuery accordion shortcode inside it to provide the best possible user interface to your BlogSpot readers.


How Shortcode Tabs UI works?

A Tab is a graphical control element that allows multiple panels to be contained within a single window, where switching between the documents inside the panels is done using the tabs as a navigation. All shortcodes are responsive and fluid, they will auto adjust to Mobile devices screen size.

You can also add FontAwesome icons next to tab headlines to make it more meaningful. You can also nest other shortcode objects inside the tabbed panel. The screenshot below shows a Soundcloud shortcode nested inside an accordion and the accordion itself is nested inside the Tabs Shortcode which it self is added inside a sidebar HTML/JavaScript widget.

accordion nested inside tabs

All this done with few sentences and not a code! Because a shortcode itself it not a code but a text which is processed as HTML. You can choose to add icons to tabs or not.

tab without icon

You can also add content inside tabs and embed it inside blogger threaded comments or classic comment form!

tabs inserted inside blog comments

Don't believe your eyes? Believe it! =)

Install Blogger Shortcode Plugin

First and foremost you need to install the Shortcode Plugin by following 7 easy steps shared on the tutorial link below

Add Tabs Shortcode To Blogger

1 Go To Blogger > Template > Backup your template 

2 Click Edit HTML

3 Search ]]></b:skin>

4 Paste the following CSS Styles just above it

/*-----Shortcode Tabs--------*/
.sc-tab ul.tabset.tabs li a.active{
border-bottom: 1px solid #70CF0A;
border-top: 3px solid #70CF0A;
padding: 8px 10px 10px 10px;
background: #70CF0A;
color: #fff;
border-left: 1px solid #70CF0A;
border-right: 1px solid #70CF0A;
}
.sc-tab ul.tabset.tabs li a:hover {
background: #70CF0A;
color: white;
border-color: #70CF0A;
}

.sc-tab ul.tabset.tabs {
margin: 0;
padding: 0;
list-style: none;
}
.sc-tab ul.tabset.tabs li {
float: left;
margin: 0px 4px 0px 0px;
border-right: 1px solid #EEE;
}
.sc-tab ul.tabset.tabs li a {
color: #666;
text-decoration: none;
    font-family: oswald, arial;font-size: 14px;
}
.sc-tab .tab-box {
clear: both;
position: relative;
z-index: 50;
top: 3px;
}
.sc-tab .tab_content {
display: none;
border: 1px solid #EEE;
padding: 1em;
border-bottom: 3px solid #70CF0A;
box-shadow: 2px 4px 6px #EEE;
font-family: arial;
font-size: 14px;
}
.sc-tab ul.tabset.tabs li a {
padding: 10px;
display: block;
border: 1px solid #EEE;
background: #fbfbfb;
position: relative;
z-index: 100;
}


  • To change its theme color replace #70CF0A with your preferred hexadecimal color. Use our Color Generator tool
  • To change The font type for tabs title replace oswald with your font name

6 Save your template and you are all done!

How to Create Responsive Tabs?

Creating Tabs using its shortcode is extremely easy. It follows almost a similar syntax as that of Accordion shortcode. You just need to paste the following shortcode where you want the Responsive Tabs to display:

Consider this code as TexT which you can insert anywhere like inside your blog posts, static pages, widgets and comments.

[tab]

[content title="Tab 1"] INSERT CONTENT HERE [/content]

[content title="Tab 2"] INSERT CONTENT HERE [/content]

[content title="Tab 3"] INSERT CONTENT HERE [/content]

[/tab]

Output:

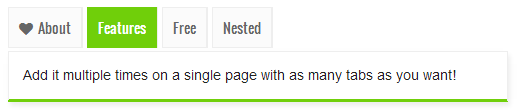
tabs without icons

  • The above shortcode will create three tabs where [content marks the start of a new panel
  • You can insert any HTML, text or even a new shortcode inside the content area represented by  INSERT CONTENT HERE
  • Title of tab is changed by replacing the text Tab 1,2,3 etc.
  • To create a new tab and panel you just need to add the following sub-shortcode above [/tab]

[content title="Title Of Tab"]INSERT CONTENT HERE[/content]

Add Icons Next To Tabs

If you wish to add FontAwesome icons next to the tab title then you just need to add the attribute icon=" " as shown below

[tab]

[content title="Facebook" icon="fa-facebook"] INSERT CONTENT HERE [/content]

[content title="Google+" icon="fa-google-plus"] INSERT CONTENT HERE [/content]

[content title="Twitter" icon="fa-twitter"] INSERT CONTENT HERE [/content]

[/tab]

Output

tabs with icons

You just need to insert the Fontawesome icon name inside the icon attribute in this format

icon="fa-iconName"

For example to insert a Tag icon we will format the attribute as

icon="fa-tag"

That simple! Browse FontAwesome Icons to pick icon of your choice

Need Help?

In coming hours we will release more fresh shortcode tutorials. Make sure you stay updated by following all latest tutorials by subscribing to our free email updates. Let me know if you needed any help or assistance. You can now also suggest which Shortcode would you like us to create.

Stay healthy and take care of your loved ones. Peace and blessings buddies =>

How To Add Javascript, HTML And CSS Code Reader In Blogger

How to add code reader in blogger  | 101helper

Code reader is a program that reads html/css/java or any other codes. An example of it is the Html/javascript option which you can see at the time of adding a gadget in your blog. That program reads your java/html and css codes and display results. Similarly now a days a new kind of website is introduced that also do the same work(reading codes and processing results). May be you are thinking what is it for? or why should I read this post, it is not of my use if yes then let me tell you the reason for why do you need to read this post. If you own a blog which have demos or a blog similar to my blog(about blogger) then you surely need this iframe to show your demos within your posts so now you don't need to create demo blogs for demos. So lets start!

Step 1: Go to Codeopen and signup for a new account.

Step 2: Login to your codeopen account and click on New Pen on the top of the page.


How to add html/css code reader in blogger | 101helper

Step 3: Create your project or demo by inserting your Html/css/java codes and save your project.


Step 4: Now click on share on the top of the page.


Html/css/java code reader in blogger | 101helper

Step 5: Click on Embed.


code box for blogger | 101helper

Step 6: Customize your demo box using the tools and grab the code of your iframe.


how to show demos in posts in blogger | 101helper

Step 7: Now go to your post or layout to add your iframe.

Step 8: Add the copied code in post or as a gadget and save it.

Congratulations! you are done successfully.

As a demo I am adding my iframe in this post, see it below:


That's it! hope you like this post and you found it interesting and helpful. Follow and subscribe for more blogger tricks. Keep visiting 101Helper and share this post with others.

Search tags: Html/CSS/Java code reader for  blogger, How to add code reader in blogger, Demo box for blogger, how to show demos in posts in blogger, code box for blogger, 101Helper tricks for blogger.


See the Pen zxQvYQ by fahimraza (@fahimraza001) on CodePen.

jQuery Accordion Shortcode For Blogger!

Blogger Accordion ShortcodeEver wondered to create custom jQuery accordions with Toggle effect in blogger using a single line of code? That dream has come true thanks to Blogger Shortcode Plugin that we just published yesterday. You can now add multiple accordions not just on your sidebar widgets but also inside your post body and even inside your blog comments! You can give it any background colors and customize it to your needs. Treat it as a text which can be typed anywhere. Almost anywhere!

Lets first view a live demo of its UI to see how it works:


How Blogger Accordion UI works?

The UI of our Accordion contains a set of panels. All panel Tabs are visible at all times, but content inside the panels is hidden. When a user clicks the header of the panel, the body content of that panel will become visible and other panel's body contents which was previously visible will become invisible.

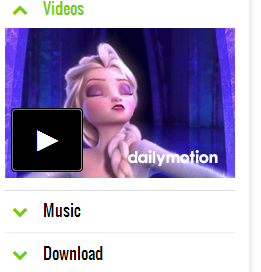
Blogger shortcode Accordion

For the first time in the history of both Wordpress blogs and Blogger, you can now  embed Accordions even inside Blog Comments. The accordion works with both classic and threaded blogger comments form. See the screenshot below

embed accordion inside comments

They can also be nested inside another Shortcode Object, take for instance the Multi tabs which we will release in a while. You can insert the accordion shortcode inside the Tabs widget to make it work!

accordion nested inside Tabs widget

Install Blogger Shortcode Plugin

First and foremost you need to install the Shortcode Plugin by following 7 easy steps shared on the tutorial link below

Add Accordion Shortcode To Blogger

1 Go To Blogger > Template > Backup your template 

2 Click Edit HTML

3 Search ]]></b:skin>

4 Paste the following CSS Styles just above it

/*------ Shortcode Accordion -----*/
.sc-accordion > h3 .anchor {
font-family: helvetica;
padding: 3px 7px;
color: #70CF0A;
margin: 0 8px 0 0;
}
.sc-accordion > h3 a {
text-decoration: none;
font: normal 16px oswald;
color: black;
border-bottom: 1px solid #eee;
display: block;
padding: 0 0 0.6em 0;
}
.sc-accordion .trigger {
border-bottom: 1px solid #DDD;
padding: 0 0 0.5em 0;
margin: 0 0 0.5em 0;
display: none;
    font-family: arial;
font-size: 14px;
}
.sc-accordion > h3.toggle {
margin: 0 0 0.5em;
}
.sc-accordion > h3 a.active {
border: none;
padding: 0;
}  
.sc-accordion > h3 a.active .anchor, .sc-accordion > h3 a.active {
color: #70CF0A;
}  
  .sc-accordion > h3 a:hover {
color: #70CF0A;
}


  • To change the color of font replace #70CF0A with your preferred hexadecimal color. Use our Color Generator tool
  • To change The font type replace oswald with your font name

6 Save your template and you are all done!

How to Create Accordion?

Now when you are done with all installation part. It is time to learn how to create toggle accordions and add them inside Posts, widgets and comments.

Creating accordion using its shortcode is extremely easy. You just need to paste the following shortcode where you want the accordion to display:


[accordion]

[item title="Title Of Tab 1"] INSERT CONTENT HERE [/item]

[item title="Title Of Tab 2"] INSERT CONTENT HERE [/item]

[item title="Title Of Tab 3"] INSERT CONTENT HERE [/item]

[/accordion]

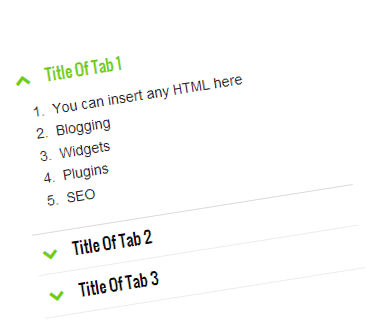
Output:

image

  • The above shortcode will create three toggle tabs where [item marks the start of a new panel
  • You can insert any HTML, text or even a new shortcode inside the content area represented by  INSERT CONTENT HERE
  • You can place your headline or title by replacing the text Title Of Tab 1,2,3 etc.
  • To create a new tab and panel you just need to add the following sub-shortcode above [/accordion]

[item title="Title Of Tab"]INSERT CONTENT HERE[/item]

Need Help?

You can insert the shortcode anywhere inside your post composer, your template or even inside the TEXT widgets or HTML/JavaScript widgets.

Let me know if you needed any help. Peace and blessings buddies =>

Introducing Blogger Shortcode Plugin

Blogger Shortcode Plugin

Surprise! After having served Blogger for over 5 years we are back again with yet another plugin that will transform blogger templates and especially blogging like never before. Equipping it with a system that will make web designing and creation of widgets a piece of cake! STCnetwork is proud to Introduce Blogger Shortcode Plugin that will let you add Web elements with very little effort without using any long complicated, ugly code. You can now insert videos, audios, photo gallery, tabs, accordions, etc. with just a single line of code inside your posts, widgets, sidebars and guess where else? also inside your Blog Comments! Embedding Objects in Blogger was never that easy before. Today we are taking blogger to the next Level. Lets get started!

What is a Blogger Shortcode?

Blogger shortcode is a macrocode i.e. a single line of code that contains a set of instructions which lets you do nifty things with no effort at all. Shortcodes can help you embed files or create objects in BlogSpot blogs with a single line of code that would normally require a lot of complex, long ugly code.

CSS3 buttons Shortcode

You can now easily insert objects such as Videos, Audios, Files, Slideshows and all important web elements such as accordions, tabs, colorful buttons, boxes etc. inside Header, Sidebar, Footer, Posts, Pages, Titles and amazingly even inside comments! It requires no prior knowledge of HTML, CSS or JavaScript. The plugin is extremely lightweight and its multiple-embed-support will reduce your Page Load time by 50%.

How Different is it From Wordpress Shortcode?

Wordpress has been our biggest source for inspiration and it would have never been possible to develop this plugin for Blogger if the logic was not already present. We simply converted the PHP functions into jQuery functions which are both platform independent and easy to implement.

Unlike Wordpress shortcodes which can only be inserted inside Post content, Blogger shortcode plugins lets you insert content even inside widgets and Comments! WP shortcode API is platform specific but our plugin offers cross-platform embedding support that is not limited to blogger blogs alone. It can surely work on any website be static or dynamic.

insert shortcodes in comments


Most exclusive feature of this plugin is to support nesting of shortcodes. You can insert a shortcode inside another one to offer full dynamic experience.

Shortcodes such as accordion and Tabs can be added a multiple times on a single page without effecting one another. This plugin optimizes and reduces Page Load time extremely well.

nested shortcodes


List of Supported Shortcodes

We have so far developed around 10 Shortcodes and we are planning to develop around 50 shortcodes within a  month inshAllah. Shortcodes will be created based on their importance and usability. We will release each shortcode with a separate tutorial.

A shortcode itself it not a code but a TEXT which is processed as HTML. Don't believe yourself? Believe it! :)

Following are the shortcodes developed so far.

Shortcode Definition
[accordion] Accordion is a vertically stacked list of items where each item can be "expanded" or "stretched" to reveal the content associated with that item. Items can be Toggled on and off easily. An example is the accordion widget
[tab] Tab widget allows multiple documents or panels to be contained within a single window, using tabs as a navigational widget for switching between sets of document. An example is the Multi Tab Widget
[code] Embeds syntax Highlighter which preserves the original formatting of source code
[table] Create responsive and fancy HTML Tables with multiple Rows and Columns
[quote] Inserts a Fancy Blockquote
[button] Inserts colorful CSS3 Buttons
[icon] Insert FontAwesome icons anywhere with custom options support
[soundcloud] Embeds SoundCloud Track
[dailymotion] Embeds Dailymotion Video
[youtube] Embeds YouTube Video
[divider] Inserts a Horizontal Separator to divide a section, also contains a Back To Top button
[num] Inserts a Number enclosed inside a circular background
[warning] Inserts a box with Warning message
[success] Inserts a box with Success message
[alert] Inserts a box with Alert message
[info] Inserts a box with Some Information message
[update] Inserts a box with Update status message
[facebook] Embeds Facebook Page Plugin
[image] Embeds Images anywhere you want in clear cut resolution!
[tooltip] Inserts a Fancy CSS3 Tooltip above or below hyperlink to show extra info

more on its way!..............


Installation Steps

Follow these steps to install the Shortcode Plugin on your blogger blog.

1 Go To Blogger > Template > Backup your template 

2 Click Edit HTML 

3 Search </body> 

4 Paste the following dynamically updated JS file just above it

<!-- Blogger Shortcode Plugin Dynamic JS File -->

<script src='http://downloads.mybloggertricks.com/shortcodes.js' type='text/javascript'></script>

5 Next Search For <head>

6 Paste the following CSS files just below it
<script src='http://ajax.googleapis.com/ajax/libs/jquery/1/jquery.min.js' type='text/javascript'></script>
<link href='http://fortawesome.github.io/Font-Awesome/assets/font-awesome/css/font-awesome.css' rel='stylesheet'/>
<link href='http://fonts.googleapis.com/css?family=Oswald' rel='stylesheet' type='text/css'/>

Note that in the above code I have included latest versions of jQuery and FontAwesome libraries. I suggest that you use these versions instead of any old versions you may already be using.

  
7 Save your template and you are all done!

New functions are dynamically inserted inside the Shortcode JS file and you need to install it only once. I will keep updating this page to introduce any update made to the script and new shortcodes created will be appended to the Table List on this page.

Shortcode Syntax

Shortcodes have a name and attributes. The attributes are options that help you configure an object. Shortcodes are symbolized by Square brackets. The braces are opened and closed just like HTML but with a much simpler format as shown below:

Suppose you need to embed a Dailymotion video inside your blog posts, sidebar or blog comments then you can do it in two ways.

[dailymotion src="x2lhjki"][/dailymotion]

or simply

[dailymotion src="x2lhjki" /]
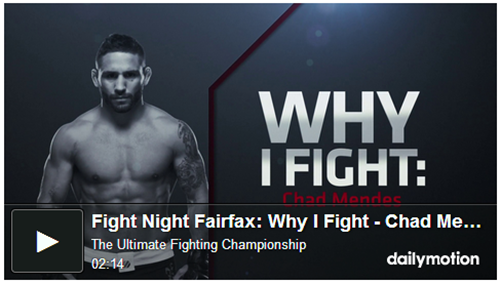
dailymotion shortcode for blogger

Now if you wish to change the color of the player button, hide player info and edit the player dimension then you can insert attributes as shown below

[dailymotion src="x2lhjki" width="100%" background="0080ff" height="100" info="0"][/dailymotion]

or simply

[dailymotion src="x2lhjki" width="100%" background="0080ff" height="100" info="0" /]

dailymotion shortcode

Note that the above is just an example, full details on how to use a dailymotion shortcode will be shared in its own tutorial

Syntax Errors

Avoid making these mistakes when typing shortcode names and attributes:

  1. Don't use camelCase or UPPER-CASE for attribute names or Shortcode names. Use only lowercase characters
  2. Don't add spaces between Shortcode Names and the Square Braces
  3. Shortcode macros may use single (') or double quotes (") for attribute values, or omit them entirely if the attribute value does not contain spaces.
    [table col='123' row=456]

    is equivalent to

    [table col="123" row="456"]


  4. A space is required between the shortcode name and the shortcode attributes. When more than one attribute is used, each attribute must be separated by at least one space.


  5. The shortcode parser does not accept square brackets within attributes.
    [tag attribute="[Some value]"]


How Does This Shortcode Plugin Works?


Shortcodes are written by providing a handler function "mbt(html)" . Shortcode handlers are broadly similar to WordPress filters: they accept parameters (attributes) and return a output. We used a jQuery function to parse through Square bracket content and attributes and then replace the Square bracket DOM with the HTML version and ignore or escape those Square braces which are enclosed across a name which is not registered through the global variable "var bhf". The Parser function recognizes registered shorctodes through the global variables only. Locations where shortcodes will work include Widgets, Blog Posts, Pages and Blog comments. Shortcodes placed elsewhere will be escaped.


Credits


© 2008-2015 STCnetwork.org.


Version: 1.0 (29-March-2015)


Creative Commons License 


Blogger Shortcode Plugin by STCnetwork is licensed under a Creative Commons Attribution-NonCommercial-ShareAlike 4.0 International License. You are most welcomed to share the plugin with your readership as long as you attach attribution link back to this blog post and avoid selling the plugin in a commercial product or service.


We have to thank a lot of people here for helping us in the Plugin development.


  • We would like to thank the helpful community at stackoverflow who helped us in optimizing the scripts as much as possible and writing down simple logics. If these shortcodes are nest-able then it is only because of the kind help I received from this community co-founded by @jeff Atwood


  • We would like to thank Wordpress for sharing their helpful API that helped us better understand some core logics. Indeed they are the pioneers behind this idea.


  • We would like to thank Tien Nguyen for providing an idea of how to traverse through a loop using jQuery and replace the Square brackets with HTML tags.


  • We would like to thank Ahmed Nasir for helping us in debugging the script and making it possible to embed shortcodes within Comment iframe windows.


What is Next?


In coming hours, we will post separate tutorials for each shortcode, new and more demanded shortcodes will be released. Embedding stuff in blogger will be at your finger tips. Get rid of those long, complicated, heavy scripts and add stuff in blogger with just one line of code!


For extra help and details on implementation and development of this plugin, please create a discussion Topic at our Forum where I am always available 24/7 for any help needed.


Do share your precious views on this plugin and let us know how can we improve it further. Do mention services for which you need a custom shortcode and we would love to develop it for you and share it for free on this blog. Peace and blessings buddies! =>

Slide Out Css/Javascript Menu For Blogger

hover_share

So far I have shared a slide in menu for blogger and today I am back with a new menu, it is a slide out menu. You can see it how it works in the above image. It is very unique menu as you can see it has icons, a responsive search box and cool follow buttons. You can see a live demo of this menu here. It is designed with css and javascript qnd it is good for those blogs which are congested or responsive, good for congested blogs because it doesn't take space on blogs, it is hidden until the trigger is clicked and good for responsive blogs because of its responsive design. Because of icons it looks more good and it resembles to wordpress menus. In this post I will show you how to add this menu in your blog and also how to customize this menu.


Follow below steps to add this menu in you blog:


Step 1: Go to your blog and click on layout in the menu on left side.


Step 2: Click on add a gadget and scroll down to Html/javascript.


Step 3: Copy below code and paste it into Html/javascript tab:


<style>
@import url(http://weloveiconfonts.com/api/?family=zocial);
/* zocial */
[class*="zocial-"]:before {
  font-family: 'zocial', sans-serif;
}
.wrapper{
  width: 325px;
  height: 50px;
  position: absolute;
top: 91%;
  left: 74%;
  margin-left: -162px;
  margin-top: -25px;
}

.icon{
  display: inline-block;
  position: relative;
  color: #bdbdbd;
  width: 50px;
  height: 50px;
  text-align: center;
  font-size: 1.47em;
  line-height: 2em;
  background-color: #fff;
  -moz-border-radius: 50%;
  -webkit-border-radius: 50%;
  border-radius: 50%;
  box-shadow: 0px 3px 0px #bdbdbd, 0px 3px 10px #bababa;
  -webkit-transition:background-color 250ms ease 0s;
  transition:background-color 250ms ease 0s;
}

.zocial-facebook{margin-left: -8px;margin-left: -2px;
  position: relative;
  top: 6px;}

.icon.facebook:hover{background-color: #4986c7;}
.twitter:hover{background-color: #4cb6e8;}
.linkedin:hover{background-color: #29a0cc;}
.youtube:hover{background-color: #a32929;}
.google:hover{background-color: #C75345;}

a{
  text-decoration: none;
}
a:hover{
text-decoration: none;
}
.icon:hover{
  color: #fff;
  box-shadow: 0px 3px 0px #686868, 0px 3px 10px #7e7e7e;
}

.icon:active{
  box-shadow: inset 0px 1px 4px #3d3d3d, 0px 0px 0px #bdbdbd;
  top: 3px;
}
</style>
<style>
span.zocial-linkedin,span.zocial-youtube,span.zocial-twitter,span.zocial-google {
  position: relative;
  top: 5px;
}
.flexsearch--wrapper {
height: auto;
width: auto;
max-width: 100%;
overflow: hidden;
background: transparent;
margin: 0;
position: static;
}

.flexsearch--form {
overflow: hidden;
position: relative;
}

.flexsearch--input-wrapper {
padding: 0 66px 0 0; /* Right padding for submit button width */
overflow: hidden;
}

.flexsearch--input {
  width: 100%;
}

/***********************
 * Configurable Styles *
 ***********************/

.flexsearch--input {
  height: 30px;
  padding: 0 50px 0 10px;
  border-color: #888;
  border-radius: 35px;
  border-style: solid;
  border-width: 2px;
  margin-top: 5px;
  color: #333;
  font-family: 'Helvetica', sans-serif;
  font-size: 18px;
  -webkit-appearance: none;
  -moz-appearance: none;
}
input.flexsearch--submit {
  background: none;
  border: none;
  color: #888;
  position: relative;
  float: right;
  position: relative;
  bottom: 28px;
  right: 10px;
  font-size: 15px;
}

.flexsearch--input:focus {
  outline: none;
  border-color: #67B045;
}

.flexsearch--input:focus.flexsearch--submit {
  color: #333; 
}

.flexsearch--submit:hover {
  color: #67B045;
  cursor: pointer;
}

::-webkit-input-placeholder {
color: #888;  
}

input:-moz-placeholder {
  color: #888
}
#cssmenu {
  background: #333;
  list-style: none;
  margin: 0;
  padding: 0;
  width: 244px;
position:relative;
right:24px;
top:0px;
}
#cssmenu li {
  font: 17px "Lucida Sans Unicode", "Bitstream Vera Sans", "Trebuchet Unicode MS", "Lucida Grande", Verdana, Helvetica, sans-serif;
  margin: 0;
  padding: 0;
  list-style: none;
text-align:center;
}
#cssmenu a {
  background: #333;
  border-bottom: 1px solid #393939;
  color: #ccc;
  display: block;
  margin: 0;
  padding: 8px 12px;
  text-decoration: none;
  font-weight: normal;
}
#cssmenu a:hover {
  background: #67B045;
  color: #fff;
  padding-bottom: 8px;
}

.menu {
    overflow-x:hidden;
    position:relative;
    left:0;
}

.menu-open {
    margin-left:241px;
}

.menu-open .menu-side {
    left:0;
}

.menu-side,
.menu {
    -webkit-transition: all 0.2s ease-in;
    -moz-transition: all 0.2s ease-in;
    transition: all 0.2s ease-in;
}

.menu-side {
    position:fixed;
    left:-231px;
    top:0;
    width:210px;
    border-right:1px solid #000;
    height:100%;
    background-color:#333;
    color:#fff;
    padding:10px;
}
</style>

        <link rel="stylesheet" href="css/main.css" />
        <header>
            <a href="#" class="menu-toggle"><img src="http://www.jacksontransit.com/images/menu.png"/></a>
        </header>
        <nav class="menu-side">
<div id='fksearch'>
<div class="flexsearch">
<div class="flexsearch--wrapper">
<form class="flexsearch--form" action="/search" method="get">
<div class="flexsearch--input-wrapper">
<input class="flexsearch--input" type="text" placeholder="search here..." name="q" />
</div>
<input class="flexsearch--submit" type="submit" value="&#10140;"/>
</form>
</div>
</div>
</div>
<div id='cssmenu'>
<ul>
   <li class='active'><a href='#'><img src="https://i61.tinypic.com/21lsl7o.png" style="
    width: 20px;
    height: 20px;
    position: relative;
    top: 3px;
" /><span>  Home</span></a></li>
<li class='active'><a href='#'><img src="http://i60.tinypic.com/wbulcl.png" style="
    position: relative;
    top: 3px;
" /><span>  About</span></a></li>
   <li><a href='#'><img src="http://i57.tinypic.com/ax0fhu.png" style="
    position: relative;
    top: 3px;
" /><span>  Product 1</span></a></li>
   <li><a href='#'><img src="http://i57.tinypic.com/ax0fhu.png" style="
    position: relative;
    top: 3px;
" /><span>  Product 2</span></a></li>
<li><a href='#'><img src="http://i62.tinypic.com/35cg6s6.png" style="
    width: 22px;
    height: 22px;
    position: relative;
    top: 3px;
" /><span>  Sitemap</span></a></li>
<li><a href='#'><img src="http://i59.tinypic.com/208gxs4.png" style="
    position: relative;
    top: 3px;
" /><span>  Advertise</span></a></li>
   <li class='last'><a href='#'><img src="http://i58.tinypic.com/2nlycu8.png" style="
    position: relative;
    top: 3px;
" /><span></span> Contact</a></li>
</ul>
</div>
<div class="wrapper">
  <a class="icon facebook" href="#"><span class="zocial-facebook"></span></a>
  <a class="icon twitter" href="#"><span class="zocial-twitter"></span></a>
<a class="icon google" href="#"><span class="zocial-google"></span></a>
  <a class="icon linkedin" href="#"><span class="zocial-linkedin"></span></a>
  </div>
        </nav>

        <script src="https://ajax.googleapis.com/ajax/libs/jquery/1.10.2/jquery.min.js"></script>
        <script>
            (function() {
                var body = $('body');
                $('.menu-toggle').bind('click', function() {
                    body.toggleClass('menu-open');
                    return false;
                });
            })();
        </script>

   <script src="https://code.jquery.com/jquery-latest.min.js" type="text/javascript"></script>


Step 5: Replace hashes(#) with your tabs and social networks links.

Step 6: Click on save and you are done successfully!

Customization:

  • Replace hashes(#) with your tabs and social network links.
  • Change code of the color in the highlighted piece of code to change hover color of tabs(  background: #67B045;).
  • Replace the text of tabs with your desired text.
  • To add a new tab add the below code in menu code section:

<li><a href='#'><img src="http://i57.tinypic.com/ax0fhu.png" style="position: relative;top: 3px;" /><span>  Product 1</span></a></li>

         Replace the black colored link with icon of your tab. Get menu icons                                  at http://iconizer.net

Hope you like this menu and it is working fine on your blog. Give me your feedback below. Share this post with others and subscribe to get latest news about blogger menus. Keep visiting 101Helper :).

Search tags: Slide out menu for blogger, blogger slide out menu, wordpress style menu for blogger, blogger menu with icons, blogger menu with social buttons, blogger menu with search box, 101helper blogger menus.