20 Best Sites with High Quality Free Stock Photos

In today's online business world, tons of people have a need for quality free stock photos for their blogs, company websites, and everything in between.

Unfortunately, there are still a lot of businesses who are settling for the corny stock photo of yesteryear, either because they don't know their options or think they are too hard to find.

That's where the good news comes in: good stock photos don't have to be expensive or hidden deep in the crevices of the internet. In our digital age, there's plenty of solid material out there - if you know where to look. Read for more good news? We have your back, and have taken the hassle out of finding these stellar stock images.

We're confident that this collection of resources will help you find exactly what you're looking for, whether it's adorable animals, minimalist interior design, and anything in between.
free stock photos

20 of the Best Sites to Download Royalty Free Stock Photos

1. Negative Space


One of the best things about Negative Space is that they are constantly updating their free stock photos every week. With Negative Space, you never need to worry about copyright restrictions, so you can use them for your project without having to jump through hoops.

Negative Space has a large selection to choose from, and the interface is very user-friendly. It's easy to sort through the photos in order to find exactly what you need.

2. Death to the Stock Photo


The founders of Death to Stock are dedicated to making beautiful photos more accessible. They knew how important it is for those running blogs and online businesses to not spend all of their profit on images for their websites.

The format is simple: just give them your email to get a new bundle of great stock pictures monthly, then just use the ones that apply to your current project. Easy!

For businesses with some extra funds to invest, Death to Stock has an affordable Premium membership which gives you access to their entire library of photos (instead of just the pre-selected ones they send), plus some of the profits from the membership are used to further the resource by financing photographers and their projects.

3. Picjumbo


Picjumbo is unique in that all of the photos come from a sole photographer, Viktor, who shares his photos from his home in the Czech Republic.

He updates the selection of photos really frequently, so there is always a fresh batch of high-quality graphics to download. To take it a step further, Viktor offers affordable paid packages for businesses that use stock images frequently. He also has a nifty plugin for the Photoshop and Sketch programs for just under 8 bucks.

4. Stokpic


Stokpic is another example of a photographer deciding to give away his photos for free. Ed Gregory decided to share 10 new photos bi-weekly that you can use in any way that suits you.

The easy user interface allows you to browse his categories like architecture, fashion, and nature.

5. Kaboompics


The site's creator, Karolina, is a Polish web designer. She is the creative engine behind this extensive stockpile of high-quality pictures. The images address a wide variety of topics. As with the rest of the sites, users can use Karolina's pictures for anything they need.

A quick visit to the About page of the site shows how big of a reach it has; during our visit to the page, the Image Downloads ticker stood at a whopping 5,051,906.

6. Startup Stock Photos

Startup Stock Photos is a company that operates on simplicity. They share pictures they're taking anyway in order to help businesses find a cheaper way to gain traction online.

You don't have to be a startup business to utilize their images, which is fine by them. The images are free, but they wouldn't say no to a donation.

7. Freerange


Freerange photos derive from a community of in-house as well as external talent.

At Freerange, their principles and motivations are clear: "Freerange Stock was formed with the goal to provide quality stock photos for commercial and non-commercial use. For free. We feel that free stock photos can be good photos." Can't argue with that.

8. Libreshot


Every photographer brings his/her own unique style to this fun brand of art. At Libreshot lives a very unique collection of free stock photos.

9. Fancy Crave


The images on Fancy Crave come without copyright restrictions, and they're free of all the corniness of typical stock photos.

Attribution is not legally required, but they note that it is recommended if possible.

Fancy Craves selects two fresh photos to upload daily, keeping things current and providing beautiful photos to suit all needs.

10. Unsplash


The creativity of the title matches the creativity of their photos. They have pages and pages of quirky, one-of-a-kind images for you to choose from.

As you've likely come to expect, these images are able to be used without any copyright restrictions.

11. StockSnap


The photos on StockSnap are of superb quality and most of them are especially great for use as backgrounds.

The selection is so interesting and versatile that it's easy to find yourself on page 50 of photos all of a sudden. And yes - they're free.

12. SplitShire


SplitShire is an Italy-based organization that offers pages of incredible free photos for you to use at will. Their philanthropic mission is simply: "Helping you to be awesome out there with great content."

13. Life of Pix

Life of Pix was created by Leeroy Advertising Agency (Montreal, Canada) and they have a real knack for supplying great pictures. Naturally, these cool graphics are fine for you to use - no strings attached.

If pictures aren't enough for your unique project, they have a sister company called Life of Vids.

14. Pexels


Unlike most of the other listed sites, Pexels handpicks their favorite photos from a pool of free image sources to ensure that you're seeing only top-tier work.

The images that survive their rigorous selection process are then able to be used in any way you see fit. The site also makes searching for your perfect stock photo as easy as possible.

15. HubSpot


HubSpot is a bit different from the rest; there's somewhat of a shortage of high-quality free stock photos available to those who need solely business-themed graphics. Hubspot has a healthy selection of corporate-style images that are perfect for a professional project.

16. Gratisography


The images on Gratisography lie a little further on the wacky side. These creations come from photographer Ryan McGuire, who is known for seeing things a bit differently. His work is significantly quirkier than some other sites (i.e. fake moustaches, pineapples wearing glasses, gummy bears in cereal) but you never know when you project might just call for something out of the ordinary.

17. Jay Mantri


Jay Mantri is yet another good-guy photographer who chose to share his amazing photos with the world. His work is quite sophisticated, and a lot of shots leave you wondering how he did it.

This is one artist we'd say to go check out anyway, even if you don't have a specific need for scenic, high-class images.

18. ISO Republic


ISO's Republic's mission is to supply only the best digital images for online businesses of all kinds.

One visit to their site will tell you immediately that they are serious about the quality of their content. The photos are top-notch quality, and while the subject matter varies, they all maintain a similar level of sophistication.

Similar to some previously listed sites, you have an option on ISO to register for their email list to get extra content not posted on the site.

19. New Old Stock


This free stock photo site embodies classic elegance. They deal exclusively in old photos, usually in black and white. Web designers and history buffs alike will enjoy their large compilation of antique photos. Though there are some unique challenges to the redistribution of old pictures, the site only posts those that have no evidence of copyright issues.

Their rules are slightly more stringent than other sites, so just make sure to read up on it before using these photos for commercial purposes.

20. Pixabay


Pixabay is our final choice of free stock photo collection. It has a great archive of plenty of public domain photos (so you can use them without worrying about copyright issues). Thank goodness they have an intuitive search mechanism since they have just shy of a million awesome graphics.

Unlike some other sites, it offers a more advanced search that allows you to filter your query as much as you need so you can always find exactly what you want.

How to Use AdSense Custom Channels to Increase RPM

If you want to boost the AdSense revenue, then you have to try and use all the tools at your disposal to increase the RPM and take your income to new heights. AdSense custom channels are some of the best tools that you can use in this regards. The best thing about these custom channels is that advertisers love them and you can easily adapt them to your needs!

What are AdSense custom channels?

When you hear about Google AdSense custom channels, you will most likely be confused in regards to what they are and what they do. But despite the name that can confuse some people, the reason why they were created is that they offer a really good value for AdSense users. Simply put, these custom channels are designed as a reporting tool, and they enable you to manage your ad inventory without that much of a hassle.

adsense custom channels
You can also use them to turn the ad inventory into a solution that advertisers can target. As a result, you will be able to boost the AdSense revenue in no time. Aside from that, you can also generate a lot of competition for the advertisers. Of course, you do need to have a good amount of traffic to be appealing to the advertisers. But if you use this tool adequately, the overall results can be downright unique. The custom channels are designed to work with a variety of content hubs as well as publishers. But of course, you have to put all your knowledge to the test.

AdSense custom channels A/B testing and analytics

In case you want to boost your revenue with custom channels, you will have to figure out which are the best ads you have, and then you add them into custom channels. You can find the Custom Channels in the Advanced Reports section.


Here you can filter the type of ads you want to track, and you can also view an overview, active views, engagements, clicks and even custom information.

Thanks to the AdSense custom channels, you will get to track things like page performance for that ad, what surrounding content was the best, ad placement results, ad size performance and other relevant info. All these things do add up very well, and they are bound to bring you a unique and distinct set of features.

A/B testing is also easy to do with AdSense custom channels. You track the performance of a text ad against another text ad, or you can opt for a more complex ad test. In fact, you can even make image to text ad comparison if you want. The idea here is to use the power of reports to see which type of ad delivers the best performance.

Depending on your niche, some types of ads will work better when compared to others. So, the idea is to pick the right one that suits your needs. It's the best approach and one that does pay off immensely in the end.

How can you track what blog portion delivers the best revenue?

This is a very good question and a tricky one to answer as well. There are many reasons why you may be unable to answer this adequately. However, it all comes down to a single comparison. For example, you have a site about technology and another one about healthy eating. Both of them are blogs, but the healthy eating one delivers a much better RPM when compared to the technology one.

Obviously, when you do A/B testing and see this, you will most likely focus on creating more healthy eating content and less tech content. But your task is to figure out what went wrong with the technology blog too. You can use the power of AdSense custom channels to figure out what caused that issue. Studying the performance over time will help you see what is wrong and this way you can adapt the situation to your advantage.

Creating a targetable ad inventory with AdSense custom channels

AdSense custom channels offer your online assets to the advertisers so that they can be targeted without a problem. Basically, the companies that have a video ad about their phone repair services will want an ad slot on your phone-related pages, not on the homepage or anything else. The idea is to opt for targeting, and that's where AdSense custom channels excel very well. Besides, advertisers have a limited budget, so they do want to get the very best results from you.

What type of benefits do you get from this? First, you will see that allowing advertiser targeted ads will bring in more competition for ad location and better performing ads. You will also work with advertisers that are knowledgeable and know what they want. Google said they select the best performing ads for your page, so obviously this will help you as well. Plus, advertisers can do smart pricing and earn more money by getting targeted audiences. Simply put, everyone wins with this type of approach, and that's what manages to deliver the very best outcome.

How can you set up AdSense custom channels?

You need to figure out what you want to measure and share to the advertisers. Basically, you create an ad unit, and you can add that to the AdSense custom channels. You can add multiple ones if you want, that is up to you to make the right pick.

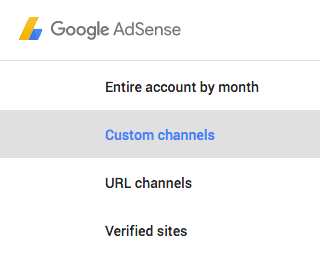
Simply put, you go to My Ads in the AdSense console > Content, and then you select Custom channels. Here you will have to press the New Custom Channel Button. Add a name to the custom channel, and then you can select the ad units that you want. It's important to let these ad units targetable; you will have a small option related to targeting under this.

new google adsense custom channel

You can also remove ad placements if necessary. If you want to see the performance, you just need to go to Performance Reports > Advanced Reports > Custom Channels.

How to optimize ad placement channels?

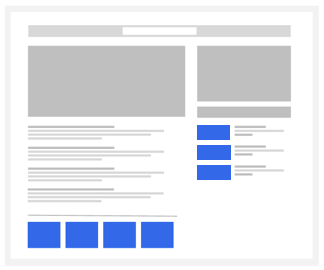
There are some methods you can use to achieve this. Edit some of the best performing channels and as we mentioned above, mark them as targetable. This will offer you a list with some interesting features. You will see the fields that are shown to advertisers. You can also pick where ads appear, and if necessary, the ad location can be for multiple places if you want.
edit adsense custom channel

At this point, you will also need to opt for a description of your website, and you should also tell the advertisers why they should be interested in placing ads on your site. Make sure that you harness all your copywriting power. It's not an easy thing to do, but it may be able to pay off extremely well in the end.

A good idea is not to make all your channels targetable. What you want is to target solely the ones that are valid for you, as that's what will make things shine for sure. It's a very important idea to try and focus on the most important channels at first. If this does work very well for you, then you can adapt it to the most important channels as you see fit.

Keep testing

It's always important to keep testing, because the more you do that, the better the results will end up being for you in the end. AdSense custom channels are designed to be an analytical tool, so it doesn't matter how many channels you have. If you have around 500, that's great, if not, experiment and try to create as many channels as you can.

You shouldn't expect each channel to deliver its best performance. It will take quite a lot of time and effort to adapt everything to suit your needs. But the idea here is that the more you focus on interacting with the audience, the better the results will be for sure. As long as you know how to handle all of this, the experience will be great, and your site will benefit from that.

Plus, you shouldn't expect AdSense custom channels to deliver the best possible value right off the bat. These things do tend to take quite a bit of time for them to work adequately. At first, it may be a bit simple, but as time passes you will see that the results get increasingly better.

The reason is simple, it will just make things a lot better for you, and the AdSense custom channels performance will increase too. Plus, you get to learn what's wrong and opt for what is meaningful. While it can take some time and effort to set up everything adequately, AdSense custom channels do work very well. So, try to create and adapt AdSense custom channels to your needs, then the AdSense RPM will increase exponentially!

Google Adsense In-Feed & In-Article Ads Update - Boost Adsense Earnings

Google Adsense is frequently improving and letting publishers use their new ad types. Recently Google Adsense updated "Matched Content" New Adsense Ad Unit which is like a related post widget and is really useful because it not only makes you money but also increase your page views.
Now Google Adsense have updated in-feed and in-article ad types which are also good and will improve your earnings. First let me tell you something about In-Article adsense ad unit.

in-article-adsense-ad-blogger

Google Adsense In-Article Ads:

These are actually native ads and they are specially for articles as indicated by their name. This ad type is good for those blogs and website which have articles about something and because of their great look these ads will improve earnings. Here is a demo of Google Adsense in-article ad.

google-adsense-in-article-ad

In-article ad is a responsive type of ad so you can't decide its width, it will adjust itself on its own. There are many options to customize ad look. You can see these options at the time of adding this ad.

Also you have option to "Show selected display ads" in the Global options section in your adsense account which allows you to to show selected display ads which can help you boost your earnings. Google decides which ads will be best for your blog or website. Here is a screenshot of customization options:

how-to-customize-in-article-adsense-ad

Adding this add is simple and exactly same as "Matched Content" New Adsense Ad Unit. To add Google adsense in-article ad in your blog's post go to your blog edit a post, switch the editor to HTML and paste the ad code where you would like the ad to show.

 Read More:  How To Put Ads Inside Posts In Blogger 


Google Adsense In-Feed Ads:

This is I guess best ad unit for smart phone and tablets devices. And it is a good ad unit to get more clicks on ads from mobile traffic. Comparing with In-article ad unit In-feed ad unit has four different types and it comes with more customization options. Take a look:

1. Image Above In-Feed Ad:


2. Image On Side In-Feed Ad:

image-on-side-in-feed-ad-unit-blogger

3. Title Above In-Feed Ad:

title-above-in-feed-ad-unit-blogger

4. Text Only In-Feed Ad:

text-only-in-feed-ad-unit-blogger

All these ad units comes with same customization option which are shown in below image.

in-feed-google-adsense-ad-cusomize-options

You can add these ads in your posts as well as in the layout above or below your post. I recommend adding in between posts to get more clicks.


 Read More:  How To Put Ads Inside Posts In Blogger 

 Read More:  How To Show Ads Below/Above Post Footer And Header In Blogger 

I hope you found this post helpful, read more from below for Google adsense tutorials.

Thanks for visiting 101Helper. Share this post with others!

Search keywords: Google adsense in-feed & in-article ads, increase,boost adsense earnings,get more clicks on adsense ads,ad units for mobile site,make money online blogging,101helper

How To Add Refreshable Random Post Widget In Blogger


I am again posting about random post widget and this is because I have made a special random post widget that can be refreshed by simply clicking on a button, I am also using this widget and so I decided to share it with you. You might be thinking why I am sharing this widget because you already have this widget but this is not an ordinary random post widget. It is a special widget and your visitors can refresh content and hence you have more reach to your older posts.

This widget is more good for big blogs which have 100 posts and visitors visit only a few pages. If you have same problem then this widget will help you, how ? the answer is obvious ! For example a visitor visits your blog from Google and read your post and see your ordinary random post widget and all the post he see doesn't grab his interest then he just leave your blog but if there is a refresh button he will just click on it and get some fresh content that will grab his interest and hence every visitor will give you atleast 5 views. I have tried this widget and it really multiply page views.

Another special thing about this widget is if your visitor doesn't refresh content it will be refreshed automatically after given time so your visitor gets fresh content any way and you get your traffic multiplied.

Features:

1. Refreshable content is available to visitors.

2. Automatically refreshable as well as can be refreshed by refresh button.

3. More exposure to visitors (old posts get reach ).

4. Increase your page views upto 5 pageviews / person.

What you need to install this widget ?

1. A Blogger blog

2. A free hosting like 000webhost or any other webhost to store your code on.

3. 5 minutes to follow below steps
Steps to Install Refreshable random post widget:

To add refreshable random post widget in your blog your need to follow below steps.

Step 1: Go to 000webhost and signup for a free account, enter your email, password and hosting website name(e.g myrandompost).

000webhost-free-webhosting

Step 2: Go to your email and click on the verification link to verify your account in the email from 000webhost.

verify-000webhost-account

Step 3: After confirming your account click on "MANAGE WEBSITE".

how-to-verify-000webhost-account

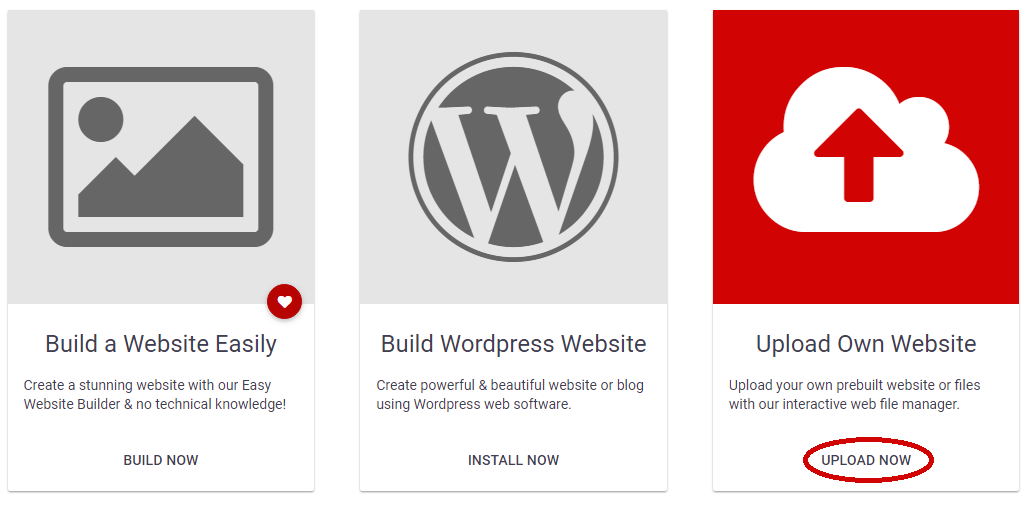
Step 4: Click on "UPLOAD OWN WEBSITE".

how-to-upload-files-in-000webhost

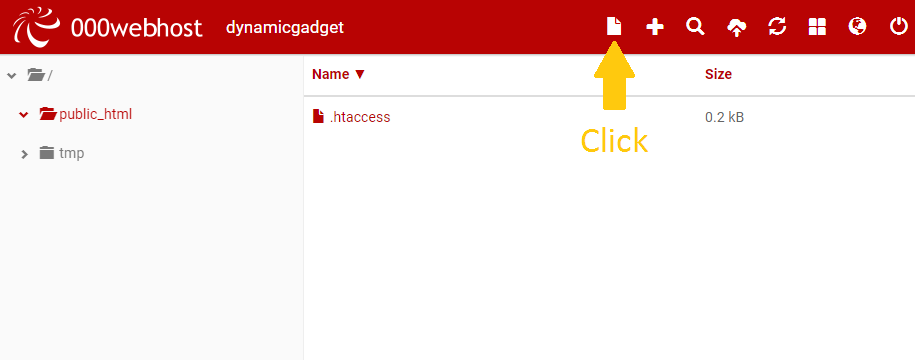
Step 5: Click on the icon as shown in the below image to create a file.

how-to-add-random-post-widget-in-blogger

Step 6: Name it "index.html" and click on create.

blogger-refreshable-random-post-widget

You are almost done keep going !


Step 7: Copy below code:
<head>
<meta http-equiv="refresh" content="40">
</head>
<div id="important">
<style>
#important h3 { font-family: trebuchet ms; position: relative; top: 5px; }
#random-posts li {list-style: none;padding: 3px 0px;border-bottom: 1px solid #ddd;}
#random-posts a {color:#3993e2;text-decoration:none;}
#random-posts a:hover {text-decoration:none}
#random-posts li:last-child {border:0}
#random-posts li { margin-bottom: 5px; list-style-type: none; width: 100%; float: left; }#random-posts img { float: left; margin-right: 5px; border: 2px solid #D9D9D9}
#random-posts {padding: 0;width: 24%;height:435px;padding: 0 0 0 5px;width:100%;list-style-type: none;padding: 0px;}
#random-posts a {font-size: 14.3px;font-family:trebuchet ms;}
#fresh { width: 100%; text-align: center; position: relative; top: 10px; }
#fresh a {font-family: trebuchet ms; font-size: 14px; font-weight: bold;color: #fff; background: #64ca64; padding: 8px 30px; width: 100%; text-decoration: none; border-radius: 100px; }
</style>
<h3>You may like reading:</h3>
<ul id="random-posts">
<script>
var randomposts_number = 5;
var randomposts_chars = 0;
var randomposts_details = 'no';
var randomposts_thumbnails = 'no'
var randomposts_comments = 'Comments';
var randomposts_commentsd = 'Comments Disabled';
var randomposts_current = [];
var total_randomposts = 100;
var randomposts_current = new Array(randomposts_number);

function randomposts(json) {
total_randomposts = json.feed.openSearch$totalResults.$t
}
document.write('<script type=\"text/javascript\" src=\"https://101helper.blogspot.com/feeds/posts/default?alt=json-in-script&max-results=0&callback=randomposts\"><\/script>');

function getvalue() {
for (var i = 0; i < randomposts_number; i++) {
var found = false;
var rndValue = get_random();
for (var j = 0; j < randomposts_current.length; j++) {
if (randomposts_current[j] == rndValue) {
found = true;
break
}
};
if (found) {
i--
} else {
randomposts_current[i] = rndValue
}
}
};

function get_random() {
var ranNum = 1 + Math.round(Math.random() * (total_randomposts - 1));
return ranNum
};
</script>
<script>
function random_posts(json) {
for (var i = 0; i < randomposts_number; i++) {
var entry = json.feed.entry[i];
var randompoststitle = entry.title.$t;
if ('content' in entry) {
var randompostsnippet = entry.content.$t
} else {
if ('summary' in entry) {
var randompostsnippet = entry.summary.$t
} else {
var randompostsnippet = "";
}
};
randompostsnippet = randompostsnippet.replace(/<[^>]*>/g, "");
if (randompostsnippet.length < randomposts_chars) {
var randomposts_snippet = randompostsnippet
} else {
randompostsnippet = randompostsnippet.substring(0, randomposts_chars);
var whitespace = randompostsnippet.lastIndexOf(" ");
randomposts_snippet = randompostsnippet.substring(0, whitespace) + "&#133;";
};
for (var j = 0; j < entry.link.length; j++) {
if ('thr$total' in entry) {
var randomposts_commentsnum = entry.thr$total.$t + ' ' + randomposts_comments
} else {
randomposts_commentsnum = randomposts_commentsd
}; if (entry.link[j].rel == 'alternate') {
var randompostsurl = entry.link[j].href;
var randomposts_date = entry.published.$t;
if ('media$thumbnail' in entry) {
var randompoststhumb = entry.media$thumbnail.url
} else {
randompoststhumb = "https://blogger.googleusercontent.com/img/b/R29vZ2xl/AVvXsEixY2clipRMAjIEZh_DSNbljOgCCyziue8lf1FRCG9Ldy0D79_To6ZcH4-bMO6nzoDOO0V2P52fIWj-AtXlKNxlSfQUOHcYoOkPGsHFuo60KUh97ouRDa4HQP0HLwPk_J4X55oN5vjLBH8/s1600/no_thumb.png"
}
}
};
document.write('<li>');
document.write('<a href="' + randompostsurl + '" rel="dofollow" target="_parent"><img alt="' + randompoststitle + '" src="' + randompoststhumb + '"/></a>');
document.write('<div><a href="' + randompostsurl + '" rel="dofollow" target="_parent">' + randompoststitle + '</a></div>');
}
};
getvalue();
for (var i = 0; i < randomposts_number; i++) {
document.write('<script type=\"text/javascript\" src=\"https://101helper.blogspot.com/feeds/posts/default?alt=json-in-script&start-index=' + randomposts_current[i] + '&max-results=1&callback=random_posts\"><\/script>')
};
</script>
</ul>
</div>
<div id="fresh"><a href="/">Refresh Content !</a></div>


Step 8: Right click on your index file you just created and edit it.

how-to-install-refreshable-random-post-widget-in-blogger

Step 9: Paste the copied code which you copied in step 7 and click on "SAVE & CLOSE"

Make following changes before saving:

1. Replace https://101helper.blogspot.com with your blog URL.

2. Change 40 if you want the widget to refresh automatically after desired time.

3. Change 5 to change number of posts.

how-to-host-files-on-000webhost

Step 10: Now again right click on your file and click on "VIEW".

Congratulations ! now your refreshable widget in ready to be installed in your blog.

Step 11: Copy your file URL from the browser and replace it with YOUR LINK HERE in below code and copy the final code.
<iframe width="90%" id="reloader" src="YOUR LINK HERE"></iframe>
<style>#reloader {width:100%;border: 0;height: 550px;}</style>

Note: Do not include https: in your URL, you URL should be without https: otherwise browser will not let it load e.g: //widget.000webhostapp.com/index.html 

Final code appearance:
<iframe width="90%" id="reloader" src="//widget.000webhostapp.com/index.html"></iframe>
<style>#reloader {width:100%;border: 0;height: 550px;}</style>

Step 12: Go to blogger > layout and click on add a gadget in the sidebar. choose HTML/Javascript.

how-to-add-gadget-in-blogger

Step 13: Paste the copied code and click on save.

Open your blog to see refreshable random post widget.

I hope you liked this widget, share your opinion in comments.

Share this post with others because ❤ Sharing is caring !

Search keywords: Refreshable Random Post Widget for Blogger, Random post widget for blogger, iframe random post widget, blogger gadgets, 101helper blogging tutorials.

"Matched Content" New Adsense Ad Unit - Boost Your Earnings


This is my another post about Google Adsense and I am happy to announce that Google Adsense has a new ad unit that is "Matched Content" ad unit and it is a great opportunity for Adsense publishers to boost their Adsense earnings plus it has some more great features that will surely impress you and you will start using this ad unit.

Here is a screenshot of this ad unit:

matched content adsense new ad unit blogger

You can see that it looks similar to Related Posts Widget and thats the special thing about this ad unit that you can not only recommend your posts but also show adsense in between them and these ads are native so Google finds most similar posts of advertisers and show them in your ad unit and people click these ads because these ads are native and they are of their interest.

So you can say that this ad unit is simply amazing and best way to boost your Adsense earnings as well as increasing page views. Also after adding this ad unit you can remove your related post widget because it works as related post widget and ad server.

Before showing you how to install this ad unit let me tell you that this ad unit is not available for every Google Adsense user, to know are you eligible for this ad unit go to your Adsense account and create a new ad unit, if matched content ad unit option is there then it means you can use this ad unit.

Eligibility to use Matched content

Depending upon your site traffic your site may fall in one of the following categories.

1. Not eligible - Your site doesn't have a minimum requirements for traffic volume and number of unique pages.

2. Eligible but can't show ads yet - Your site have a minimum requirements for traffic volume and number of unique pages but still needs improvement.

3. Eligible and can show ads - Your site have our minimum requirements for traffic volume and number of unique pages, and it can show ads.

Step to check if your site is eligible for Matched content:

1. Go to Google Adsense and login to your account.

2. Go to settings > my sites > Matched content

Or

2. Go to my ads > create ad unit > Matched content ad unit.

Read more about Match content feature at Adsense Help Center


How to Install "MATCHED CONTENT" Ad Unit In Blogger Blog ?

1. Go to Google Adsense and login to your account.

2. In the right side bar click on My ads and create a + New ad unit.

how-to-add-matched-content-adsense-ad-unit-in-blogger

3. Select Matched content ad unit.

how-to-add-matched-content-adsense-ad-unit-in-blogger-blog

4. Customize your ad unit, you can change style of ad unit and also change size of ad unit. There is a preview available!

how-to-customize-adsense-matched-content-ad-unit

5. Copy your ad code:


6. Place it where you would like to show your matched content ad unit.


Tips for placement:

1. Place your matched content unit below your articles.

2. Place your matched content unit in sidebar.


How To Install Ads In Sidebar ?

How To Show Ads Below/Above Post Footer And Header In Blogger ?

How To Show Ads In Mobile View In Blogger ?

I hope you found this post helpful. If you have any question ask me in comments. Thanks for visiting 101Helper.

Search tags: adsense matched content ads blogger,wordpress,website, how to get matched content ads in google adsense account, how to get eligibility for Google matched content ad unit, earn money from adsense tutorials 101helper.

How To Install Push Notifications In Blogger To Engage Visitors

push-notification-blogger-blog-101helper

We know that engaging visitors to blog is not easy and there are many ways people use to get people engaged to their blogs such as sending emails, social network followers, send texts to mobiles(Shopping sites) etc and the reason to get people engaged is to improve rank plus increase traffic and earnings. So in this post I am going to tell you about a new way to get people engaged and its the method some big websites such as Facebook is using. By this method you can send push notification to your subscribed visitors on Google chrome and Firefox.

Push notification is not a new thing and almost everyone know it because in smartphones it is very common but on web pages it is not common so its time to get benefit of this thing and engage people to your blog. Here is a screenshot that may tell you better about push notifications.


Best thing about this plugin is you can use it for both your desktop and mobile site and it is also for free. You can also upgrade to unlock some features but for a blog it is good to use it free unless you have a business site.

This plugin is powered by PushEngage and it need a 5 minute integration time so it is easy to use this plugin.

Features:

I always share feature of plugins to let you know about a plugin and decide whether to use it or no. Here are some features of PushEngage plugin.

1. It is for free as well as you can buy premium version.

2. Supports multiple browsers (Chome and Firefox) so you can engage visitors from any of the two browser.

3. Easy and fast integration.

4. Work on both HTTP and HTTPS links.

5. Notification scheduling feature.

6. You can connect your blogs RSS feed and notify your visitors when ever new content is published.

7. Multiple language support.

8. Works on wordpress.

9. You can use one account for multiple sites.

10. You can send text and text + image notifications to your visitors.

11. You get more traffic than Emails.

How To Install Push Notifications In Blogger?

Step 1: Go to PushEngage.

Step 2: Fill out the signup form, type your blog or custom domain URL, enter your email, type a pushengage subdomain name, enter your password and click on start your free trail.

Note: It is written "start your free trail" but you can use account for free untile you have 2500 subscribers and for more your have to upgrade.

Step 3: Scroll down and copy your code as shown in below image.
how-to-install-push-notifications-in-blogger

Step 4: Go to your blogger account and navigate to theme > Edit HTML.

how-to-edit-html-in-blogger

Step 5: Paste the copied code just below <head> in your theme and save it.

how-to-add-javascrpit-in-blogger

Step 6: Customize your notification widget in your PushEngage accoun, you can customize following things:

1. Adding RSS Feed(pro users only).
2. Welcome notification settings.
3. Subscription Dialogbox Settings.

etc.


How To Send A Notification ?

Go to your account and a click on Notifications in the menu and click on New Notification to create your notification. All the settings are easy just fill out and send.

Finalizing Article !

You can get most of it if you upgrade to premium account but its also useful if you can't upgrade because you engage atleast 2500 users. You can find more push notification senders on google and if you have a good one, please let me know so that I can create tutorial about it.

If you have any question related to this article or any other article you can contact me or ask me in comments. Thanks for visiting 101Helper don't forget to share this article with other blogger around you.

Search tags: Push notification gadget for blogger, how to add push notification in blogger blog, custom domain, how to use pushengage,engage visitors to my blog,push notification widget for blogger,101helper blogging tutorials.

Disadvantages Of Buying Custom Domain For Blogger


As you know that 101Helper was upgraded to the101helper.com some months ago and then it was again degraded to blogspot, the reason for this was that custom domain doesn't give you things that you expect and so it is not good to buy a custom domain in my opinion. So this post is on request and I am going to share my experience of why I upgraded 101helper to the101helper.com and why I degraded it back. I hope that if you are also thinking of upgrading your domain, you might get some advice from this post.

So the main goal to buy a domain is to:

1. Boost traffic.
2. Increase earnings.
3. Get popular and improve ranking.
4. Make a brand.

etc.

But actually you don't always get all the things mentioned above for example if you think you can increase your traffic after buying a domain then its wrong, reality is that after buying a domain you lose the traffic which you have gained. And similar to that if you lost your traffic you will ultimately lose your ranking, earnings etc. So here are the reasons to avoid buying a domain.

1. Its not free:

Everybody knows that buying a domain is not for free, although there are some domain name providers that give you a discount but still you have to pay atleast $10 to buy a domain. There are some fake offers too like HOSTGATER says buy a domain for $0.01 but when you come to register they ask you to pay $20 or more for two years or whatever.

I purchased my first domain at Ipage and no doubt there service was good, always available to help but they were also lying at the time of buying domain like the offer "Get $100 in Google adwords after spending $25" and when I asked them about this offer they told me that this offer is available for USA only while at the time of purchasing domain they didn't tell the truth.

Similar to Ipage other domain registrars also use these fake tricks to get more customers as I mentioned Hostgator above.

2. Rank, Shares, Backlinks Lose:

When a blogger blog is upgraded to a custom domain Alexa and other ranking websites do not include the backlinks and shares of old blog so you get traffic from these sources but the rank and backlinks you got for the blog are no more. Also Alexa forgets the old blog after sometime so you lose everything.

3. Fake Pageviews:

I am not sure about all the domain providers but when I upgraded 101Helper to the101helper.com I saw a dramatic increase in my traffic but the sources were unknown and blogger was unable to track the viewing source. So I got 2000 to 3000 pageviews but ad-views were just 600 because it was real traffic.

4. Ad networks Lose:

Some ad networks like Google Adsense, Yahoo Gemini and Content.ad do not accept new domains easily and review site again and reject it so if you have a blog and got approved for Adsense or Content.ad are you upgrade to a domain, you'll be not allowed to show their ads until you get approved and the approval process starts again and its almost impossible to get approved for the new domain. Even after specifying that its the upgraded version of the same blog you are unable to use the same account and network. So it is a very big lose I guess.

5. Search Rankings:

After upgrading to custom domain "search ranking"  is also lost. It means if your blog is on first page of search results it may go to 5th or 7th page of search results or it may even disappear and take months to re-appear again and the hard work you did to get you blog to top of search results is wasted. So if your blog is appearing on 1st or 2nd page of search results for a keyword then buying a domain would be a bad choice and your competitors will get a good chance to replace you.


6. Search Engine Results Intermixed:

You might have heard this first time but when a blogger blog is upgraded to a custom domain the search engine is confused and show mixed results and it happened with 101Helper also. When I upgraded to a custom domain, everything was fine for a month because Google, Bing and Yandex were busy in replacing old links with new domain links but after a month I found that my mobile site links with "?m=1" suffix were showing up in the desktop version of Google and I tried to fix it with Webmaster tools but unfortunately I was unsuccessful in doing so.

So visitors were viewing mobile site on desktop or desktop site on mobile which was bad for user experience and I was loosing traffic because of it.

7. Post Preview Feature Lose:

Blogger is the easiest platform for blogging and it has many features and among them a feature is that you can Preview a post while editing it or writing it or adding any ad inside it. But when a blog is upgraded to a custom domain this feature is lost (in my case it was lost) and when preview button is clicked, the whole page is crashed and nothing works so you have to close the whole browser while writing a post and it becomes very difficult to edit or write a post.

8. Encrypted Page(HTTPS) Feature Lose:

This is another feature which is lost after upgrading to a custom domain, it tells visitors that the page they are viewing is secure. So to get this feature back you have to pay for it and the amount they get for this feature is more then the domain price! So its better to get this feature for free.

9. Your Information Is Available to Everyone:

This is another thing that made me stop using custom domain which is they ask you the info and allow public to view it and to secure this info they again ask you to pay.

10. You Don't Have Full Control:

Blogger gives you full control over your blog but domain providers don't. Such as you can't make changes in your DNS in case of mine I was not able to do so. So I  had to go to support everytime I wanted to make changes in DNS. And when I asked them to let me control my domain's DNS they said you are not allowed to do so, first buy a hosting (not domain) which was of $30 and then you will be allowed to make changes in DNS.

11. Fake Offers To Get Customers:

As I mentioned above many registrars like Hostgator and Ipage have fake offers in their promo pages and banners e.g free adwords credit, seo marketing tools, FTP features(upload files), Email sending feature. All these offers are just to attract visitors and these are just tricks to get more customers and sell their packages.

Confusions And Wrong Concepts

Ad Networks Approve Custom Domains:

You might have read alot of posts on other blogs and websites that some ad networks like Google Adsense is approved when you have a custom domain which is absolutely a wrong concept. The reason for this confusion is these bloggers and website owners actually want to refer you to domain providers and get commissions.

PageRank Increase Slowly With Subdomains:

Almost all bloggers favoring custom domains write in their posts that buying a custom domain is the first requirement to gain a good rank which is again a very wrong concept because you can check many sites which are registered for years but rank is not that good.

More Shares And Followers:

Another wrong thing that I have read in some blogs and websites is that your post social media shares get increased along with your social followers when you have a custom domain which is again a wrong concept and the reality is that if you have a good, helpful, meaningful content that people like they will surely share, bookmark and read your content and also they will follow you because they like your content and they don't want to miss more content in future.

Reputation:

This is also a wrong concept that if you have a custom domain then you have a good reputation because I have seen many blogs which have better design, more followers and more readers than websites. So if you thing that purchasing a custom domain is going to help your reputation then its wrong!

Conclusion:

I am not against domain registrars, I am just sharing my experience. Although some people get success by upgrading to Domain but if you are starting a new website then you should start it from domain and not from blogger because it takes a long time and hard work to make a successful blog and then after upgrading you don't get full of it. So in my opinion if you want to start a domain later after success in blogging then its not good choice. Also if you are beginning a website then choose the best domain provider and also your website should have a topic that will rock otherwise you can't get success in websites.

If you have any questions or any suggestion or opinion please feel free to share it with me and others by leaving a comment below. Thanks for visiting 101Helper.

Search keywords: disadvantages of buying a domain, pros and cons of purchasing domain,things to consider before buying domain name,reasons not to buy a custom domain for blogger,hostgator,ipage