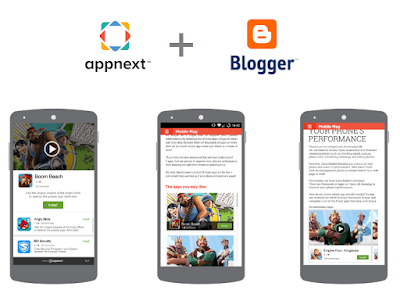
I have shared many ways of earning online with blogger blog but today I am sharing something unique and different which is good to earn bigger amounts. With this amazing network you can earn money for each cpi(cost per install) and it is only for blogger mobile sites not for desktop site. Also its not only for blogger but all mobile websites can be integrated with these ads.
These ads are powered by APPNEXT. With AppNext ads you can show ads of Google Play apps and you get paid for every download. This ad network is good for those who have a more good mobile site and get more visitors on mobile sites. With Appnext you have full control over your ads. You have following benefits:
1. Ads don't slow down your mobile site.
2. You can show apps ads from specific category e.g games, social networking, sports, videos and audio apps etc.
3. You can install page over ads as well as video and banner ads.
4. Appnext finds high rate ads automatically and display it on your site.
5. All ads work on IOS as well as Android platforms.
More over you can show ads of a specific app which is paying a high rate, you need to get that app from marketplace in Appnext.
So Appnext is really a good network for mobile sites and a good network to earn bigger.
Benefits Of Appnext:
2. Easy implementation.
3. No minimum traffic required.
4. High rates per CPI(cost per install).
5. Full control over ads.
Payment Methods:
Wire transfer - $200.Paypal - $20
Credit Card - Coming soon!
Payment Proof:
How To Earn Money From AppNext?
(1): CREATE AN APPNEXT ACCOUNT:
Step 1: Go to AppNext and click on Join Now
Step 2: Fill up the signup form and confirm it from your email.
Step 3: Login to your Appnext account, you will find two IDs from appnext one will be for IOS and other for Android, Copy and save them.
Note: If you didn't get any ID then leave it.
(2). SUBMIT YOUR WEBSITE/BLOG TO APPNEXT:
Step 1: Login to your Appnext account.
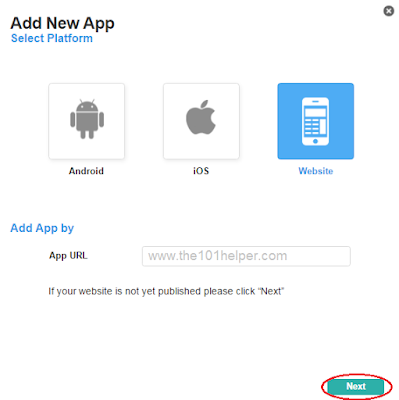
Step 2: Click on Add New App in the menu on top.
Step 3: Choose Website as your platform, enter its URL and click on Next.
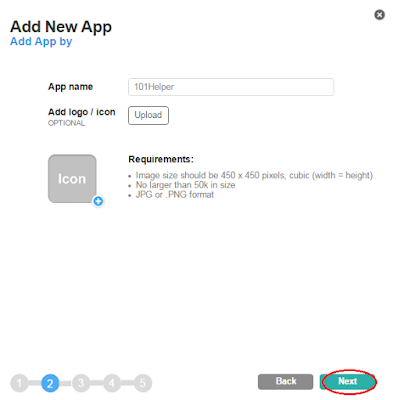
Step 4: Type your Site or Blog name and upload its logo if you like.
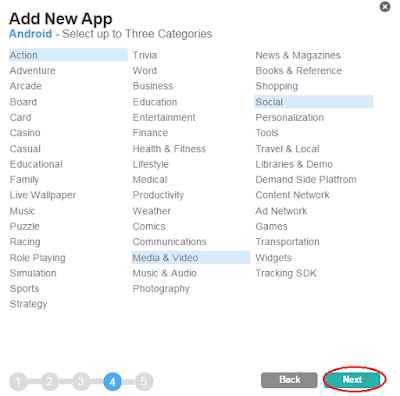
Step 5: Select up-to three categories for IOS.
Step 6: Select up-to three categories for ANDROID.
Step 7: Give a message to your advertisers in the next step or just process away by clicking on next.
After submitting your site you will get submission completed dialog along with two IDs one with the name Android Placement ID and other with IOS Placement ID. Copy both of these IDs, you will need them at the time of implementation of ads.
(3). IMPLEMENTING APPNEXT ADS IN BLOGGER MOBILE SITE:
Step 1: Go to Integration Tools page.
Step 2: Choose type of ads which you want to implement in the menu on left side under Websites heading. I am choosing Interstitial JS Tag because it will give you more downloads rather than other types of ads.
Step 3: Scroll down and copy the javascript code. Your code will be as shown below.
<script type="text/javascript">
var Appnext = {
android_id: 'Your Android Code Here',
ios_id: 'Your IOS Code Here',
cat: 'Category Name(If necessary) E.g Social Networking, Games, Casino',
pbk: '',
b_title: '',
b_color: '',
skip_url: '',
skip_title: '',
mute: '',
timeout: '',
times_to_show: '',
times_to_show_reset: '',
creative:'managed',
subid: ''
};
(function(){
var _s=document.createElement('script');
_s.type='text/javascript';
_s.async=true;
_s.src='https://appnext.hs.llnwd.net/tools/tags/video/manage_script.js';
(document.body)?document.body.appendChild(_s):document.head.appendChild(_s);
})();
</script>
Step 4: Replace the Your Android Code Here and Your IOS Code Here with ID's you just provided with at the time of submission of your website. Place your ID's carefully don't place Android ID in IOS and IOS ID in Android place.
Step 5: Copy your final code and go to blogger layout and click on add a gadget > Html/Javascript.
Step 6: Paste the code and click on save.
Step 7: Go to template and search for your gadget by ID or by name you just given to it.
Step 8: Type mobile='only' after locked='false'.
Step 9: Click on save and you are done.
Make sure that you have enabled Custom mobile template for your mobile site otherwise you will not see any ads.
You can implement other ads in your mobile site too but video ads and banner ads may slow down your site which is not good for mobile users. Follow our mobile tutorials to get more help about implementing ads in your mobile site!
1. How To Show Ads Above Comments In Blogger Mobile Site
2. How To Show Ads In Mobile View In Blogger
3. How To Optimize Blogger Blog For Mobile Phones
That's it. I hope you liked this post and found it helpful. If not please let me know.
Thanks for visiting 101Helper. Do follow us on social media and keep visiting us.


