Create CSS3 Notification Boxes in Blogger using "Shortcodes"

Notification Boxes Shortcode

Notification boxes or Alert Boxes or Messages boxes are a great way to inform the user of a variety of messages, such as: alert, update, announcement, error, success, warning etc. and general info notification. You can use. The good news is that we have developed Shortcodes for Blogger Notification Boxes which helps you insert a Responsive Message box anywhere on your blog with a single line of code. We have also used the fontawesome icons which gives a more lively touch to the boxes. Just give your box a title and message and you are all set to prompt your users of important announcements! The Boxes are fluid and responsive and auto adjusts to any screen size. Each box has a different color and can be given any title, not necessarily the five default titles we have shown in the demo page below.


In this tutorial, we are going to create most popular notification boxes using shortcodes for the following:

  1. Warning or Error Box
  2. Success Box
  3. Information Box
  4. Alert Box
  5. Update box or Announcement box

1. Install Blogger Shortcode Plugin

In order to use notification boxes you must first install the shortcode plugin for your blogger blog by following 7 easy steps shared on the link below:

Skip installing it if you have already added it in your blogger template

2. Add Styles for Appearance

First we will add the CSS styles to your template. For this following the steps below:

1 Go To Blogger > Template > Backup your template

2 Click Edit HTML

3 Search for ]]></b:skin>

4 Paste the following CSS code just above it

/*---- Shortcode Notification Boxes ---*/
.sc-notification{color:#fff;line-height:1.4em;margin:10px 0 1em;padding:.7em 1.2em;background-color:#ffffe0;border:1px solid #e1db8b;font-size:15px;font-family:helvetica;text-shadow:1px 0 6px #333;box-shadow:2px 3px 6px #D7D7D7}.sc-notification .headline{font-size:17px;font-family:oswald,arial;padding-bottom:10px}.sc-notification.sc-warning{background-color:#fc402c;border:1px solid #C91704}.sc-notification.sc-alert{background-color:#FF8377;border:1px solid #F15C4C}.sc-success.sc-notification{background-color:#2ec23e;border:1px solid #039D14}.sc-info.sc-notification{background-color:#fdce09;border:1px solid #DFB400}.sc-update.sc-notification{background-color:#29b7ff;border:1px solid #069DE9}.sc-info.sc-notification div.headline::before{font-family:FontAwesome;position:relative;content:'\f05a';font-size:20px;padding-right:10px}.sc-update.sc-notification div.headline::before{font-family:FontAwesome;position:relative;content:'\f0a1';font-size:20px;padding-right:10px}.sc-alert.sc-notification div.headline::before{font-family:FontAwesome;position:relative;content:'\f06a';font-size:20px;padding-right:10px}.sc-success.sc-notification div.headline::before{font-family:FontAwesome;position:relative;content:'\f058';font-size:20px;padding-right:10px}.sc-warning.sc-notification div.headline::before{font-family:FontAwesome;position:relative;content:'\f071';font-size:20px;padding-right:10px}


5 Save your template and you are all done!

3. Finally Add CSS3 Notification Shortcodes in Blogger

A shortcode is simply a text enclosed inside Square braces which you can add anywhere. Our Plugin then parses these braces into HTML tags. You can choose to add the message boxes inside your Blog posts, Static pages, Sidebar widgets or even inside your blog comments. Just use the shortcodes shared below to make the magic work for itself!

Update Box shortcode

To Create a Update Box use this shortcode:

[update headline="Update"]Add Your Message Here.[/update]

  • Where you can give your box any title or headline by changing the text inside headline attribute with your Title.
  • Replace "Add Your Message Here." with your Custom Message

Alert box shortcode

To Create a Alert Box use this:

[alert headline="Alert!"]Add Your Message Here.[/alert]

info box shortcode

To Create a Info Box use this:

[info headline="Info"]Add Your Message Here.[/info]

Warning box shortcode

To Create a Warning Box use this:

[warning headline="Warning!"]Add Your Message Here.[/warning]

success box shortcode

To Create a Success Box use this:

[success headline="Success"]Add Your Message Here.[/success]

Need Help?

Let me know if you needed any assistance. All we aim is to make your blogging experience even more worth while. Hope these new shortcodes may help you in easing your work load and in adding some colors to your BlogSpot blogs. Peace and blessings buddies :)

How To Improve Your Blog's Alexa Rank

alexa-rank-blogger-blog


Alexa.com is a website that keeps data about sites and blogs that are popular. They keep data of each and every blog and site. The data which Alexa keeps is bounce rate of your site, daily visitors time, traffic sources, load time, logo etc. In other words alexa helps you to know if your site is popular or not. If you are think that does Alexa rank have any effect on blog/site's traffic then let me tell you that it has a solid effect on your blog's traffic and one more thing that alexa ranking is also concerned with quality backlinks. The quality of a backlinks depends on Alexa rank of the site on which it is created. In this post I will give you some awesome tips which will definitely help you to improve your blogs Alexa rank.
(1). Quality Content:


Keeping quality content is the first and best way to improve your traffic as well as Alexa rank. Quality content means a content that doesn't need explanation and the content should be written in such a way that it could be easily understand. Images and videos are the vital part of a quality content.


You might also like: How to write a Powerful blog post.


(2). Backlinks:


After quality content second thing that affect Alexa rank most is Backlinks. Backlinks doesn't mean that they should be of low quality but they should exist, Nope! build more backlinks as you can and they should be of 100% quality or else it may decrease your blog's Alexa rank instead of increasing it.


You might also like: How to create quality backlinks.    


(3). Keep your visitors longer:


Its not easy to keep visitors longer, but it improves your Alexa rank as well as increase your blog's page-views. To keep visitors longer in your blog you should have widgets like related posts widget, recent posts widget, popular post widget.


You might also like: Tips to attract visitors to your blog.


(4). Release fresh content:


Fresh content means to release content daily. Create a new post daily or in two or three days. More posts means improved Alexa rank. It will also grab the interest of your audience.


(5). Socialize your content:


Socializing means make your every post shareable, share it on social networks. Ask your audience to share your post or try to use social exchanging sites to share your post. If you think that using social exchanging sites is black hat seo them you can share your posts on your own social fan pages. One more thing about social sharing is add social sharing buttons in your blog and let your visitors share your content easily.

You might also like: All in one social sharing buttons for blogger.  


(6). Blog design:


Design plays a vital role in Alexa rank, try to design your blog again and again. It will not only grab interest of your audience but also give a positive change in your blog's Alexa rank. It is not too important so you can neglect it.


(7). Optimize your blog's keywords:


I always use to say that optimizing blog for seo is the first way to be a successful blogger so if you want to improve your blog's Alexa rank, first improve your seo. While improving seo there are three things that are repeated again and again no.1 is title, no. 2 is description and the last one is keywords. All these things are important for seo but here I will talk about keywords because if you try to check rank of a site on Alexa you will see keywords that are used most to reach your site.


How to improve your blog's Alexa rank | 101helper

You can use these keywords is your <meta keywords> code to improve your seo.


You might also like: Seo(search engine optimization) tutorials for blogger.


(8). Social profiles:


Create your social profile pages. After creating social profile pages share your each and every post on your social fan pages. It will give you advantage in many ways like you will get quality backlinks, your fans will get latest updates about your blog posts and it will improve your Alexa rank.


(9). Rss feed and mail list:

Rss feed lets you to send updates of your new posts to your visitors, those who sign up to your feed will get updates in inbox. Rss feed not only helps you to increase your blog traffic but also plays a vital role in improving Alexa rank. Now it depends on your blog's feed that how much readers you have. So set up an Rss feed and grab some active E-mail lists and send them your blog's feed sign up invitation. It will definitely increase number of your blog readers as well as improve your blog traffic and Alexa rank. You can also add an E-mail subscription widget in your blog which will help you to collect more readers.


(10). Seo optimization:


Alexa rank improvement is totally dependent on seo of a because without seo there is no organic traffic, no page-views and no alexa rank improvement so to improve your blog's alexa rank first improve your blog's seo. 


(11). Meta tags:

Specify your country using below meta tag:

<meta content='Your country' name='geo.country'/>

(12). Alexa Browser Extension:

alexa browser extension 101helper
alexa browser extension

Install Alexa browser extension, it will help alexa to show better metrics of your site. It will tell alexa about your site traffic sources so Alexa will show better analytics of your blog. I will also show you how popular your site is and related links to your site.

It will help alexa to show your blog's rank in your own country with your globle rank.

I hope you like this post and you found it helpful. This post will definitely improve your blog's alexa rank. Share this post with others and help me improve my blog's Alexa rank :p. If you have any problem, please let me know by leaving a comment below.


Search tags: Seo tips for blogger, blogger seo, Alexa improve, Improve blog's Alexa rank,How to improve your blog's Alexa rank, 101helper seo for blogger. 

Facebook Page Plugin Shortcode For Blogger

Facebook page plugin shortcode

Facebook Like Box plugin is deprecated and will stop working on June 23rd 2015. Facebook has suggested to use the new Page Plugin instead. Therefore we are releasing today the Blogger shortcode for Facebook Page Plugin which lets you easily embed and promote any Facebook Page on your website or blog, your visitors can like and share the Page without having to leave your site. You can also show a simple feed of your Page Posts. You can now embed the Page Plugin inside blog posts, sidebar widgets and even inside blogger comments with just a simple one line code.

1. Install Blogger Shortcode Plugin

First and foremost install the Blogger Shortcode Plugin in order to make this Page Plugin work. Follow these 7 easy steps shared on the tutorial link below.

After you have installed the plugin, you can then follow the steps discussed below to start embedding the FB Plugin on your blog anywhere you want.

2. Add Facebook JavaScript SDK

(Optional Step)

If you have already added Facebook JS SDK code on your templates then you can skip this step else following these steps:

1 Go To Blogger > Template

2 Backup your template

3 Click Edit HTML

4 Paste the following code just below <body>

<div id='fb-root'/>
<script>
//<![CDATA[
(function(d, s, id) {
  var js, fjs = d.getElementsByTagName(s)[0];
  if (d.getElementById(id)) return;
  js = d.createElement(s); js.id = id;
  js.src = "//connect.facebook.net/en_US/sdk.js#xfbml=1&version=v2.3";
  fjs.parentNode.insertBefore(js, fjs);
}(document, 'script', 'facebook-jssdk'));
//]]>
</script>

5 Save your template and you are all done!

3. How to add Facebook Page Plugin Shortcode?

Add the following shortcode anywhere you want to make the Page Plugin display. You can add it almost on any location, may that be your blog composer, HTML/JavaScript widgets or Blog comments.

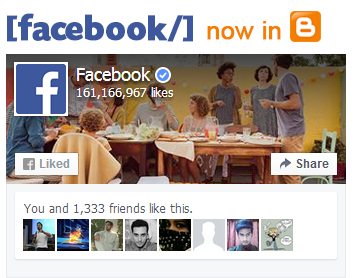
[facebook src="bloggertricks"/]

Replace bloggertricks with your Fan page username.

Output:

shortcode for facebook page plugin

That's it! =)

Complete List of Supported Attributes

Following are attributes that you can use to configure and customize the settings in shortcode.

Attribute Definition
src Points to Facebook Fanpage username.
width Changes width of the FB iFrame. Minimum allowed width is 280
height Changes height of the Page Plugin. Minimum allowed height is 130
hide-cover Setting it to "true" will hide your Cover photo. By default its value is false
posts Setting it to "true" will display your Page Posts. By default it is set to false.
faces Setting it to "false" will hide your Friend's faces i.e. Profile Display Pictures. By default the value it set to true

For example if you wish to hide the facebook cover, show page posts, and set the width & height of the page plugin then use the attributes in this format

[facebook src="bloggertricks" width="500" height="400" hide-cover="true" posts="true"/]

Output:

custom Page Plugin shortcode

Need help?

I hope this shortcode makes your job easy when it comes to sharing your FB Page on your blog. You can now embed it anywhere with a single line of code and there is no more a need to paste that ugly long Facebook code. Let me know if you needed any further assistance.

Wish you a happy sharing experience. Peace and blessings buddies! :)

What You Need To Know About Google's New Mobile-Friendly Update?


Google Algorithm Update


According to Google Webmaster Central, Google will be rolling out the most significant mobile algorithm change to date starting April 21. Google already owns the mobile revolution, with Android as the biggest mobile platform, Google Search as the biggest mobile search provider, and Play Store as the largest mobile app store. Google wants to push forward with more control over websites, and hence a 'mobile-friendly' algorithm update is inevitable. Here is what you can expect from the update starting April 21.


This is a significant change


This change will affect mobile searches in all languages worldwide and will have a significant impact in search results. What will be the actual impact of an algo change that is “significant”? It’s anyone’s guess. Already, we know that this update will be bigger than Panda or Penguin. We also know that Google considers mobile to be so significant that they are working to dominate nearly all of its manifestations. With this search update, we should brace ourselves for a major adjustment in the way that mobile search functions.


App indexing is important


App indexing is a new feature of the algorithm that will be exclusive to sites with associated Android apps. And according to Google Webmaster Central:


Starting today, we will begin to use information from indexed apps as a factor in ranking for signed-in users who have the app installed. As a result, we may now surface content from indexed apps more prominently in search.


The purpose of this feature is probably to tighten the connection between mobile search and mobile application. Eventually, there will probably be little distinction between the two. Bridging the gap via search is a logical choice.


Real-time algo


This algorithm will run in real-time, so technically, you can make changes any day, and as soon as Google picks up on the change, the site will start to benefit from the new mobile-friendly algorithm change.


Obviously, Google can only assess a site’s mobile friendliness when it crawls the page and indexes it for search. At this point, your site is scored. If the page is not mobile friendly on April 21, but becomes mobile-friendly on April 25, then we can assume that Google’s next crawl should be able to identify it as such.


Each page assessed individually


A notable feature of the mobile algorithm is that it analyzes mobile compatibility on a page-by-page basis, rather than a website-wide basis. So if your site has some mobile-optimized pages, but some non-optimized ones, then Google will look at them separately and promote the ones that are optimized. They won’t “penalize” an entire site based on the off chance that a few pages aren't optimized.


The exact details of the algo are yet to be confirmed. Let's sit tight and wait for April 21st. What we do know is, Google is leading the way forwards in mobile, and you will have to adopt to it or die in search result pages.


Best of luck :)

SoundCloud Shortcode For Blogger!

Add SoundCloud Shortcode in Blogger

SoundCloud shortcode lets you embed Soundcloud Music Players in your Blogger blogs. Using Blogger shortcode plugin, you can now embed Audio Tracks and playlists hosted at soundcloud anywhere on your blog, you can insert MP3 tracks inside your Blogspot comments, Posts, Pages and HTML/Javascript Widgets. The shortcode is a code in Textual format which can be pasted on any visual editor or composer. You can now add Top-of-the notch Sound Technology in your blogs with just a simple line of code! Our Shortcode Plugin is much more user friendly when compared to Wordpress SoundCloud Shortcode because it supports attributes instead of parameters to keep the shortcode clean and tidy. It is now time to add a new life to your blog and let your visitors hear music when they browse your site!

You can play the following files using the shortcode AIFF, WAVE (WAV), FLAC, ALAC, OGG, MP2, MP3, AAC, AMR, and WMA files. You can now upload sound files as big as 5GB in size to your SoundCloud account and then embed them anywhere on your blog using this unique Plugin.

What Can You Do with SoundCloud Shortcode?

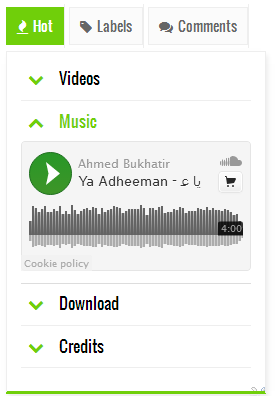
The shortcode for Soundcloud can be nested inside other shortcodes such Accordion or Tabs to make it work just perfectly

nested soundcloud player inside accordion

You can create tracks or even playlists of your favorite singers, musicians or Nasheed reciters. Add the playlist inside your Post composer, Sidebar widgets or even inside your threaded comment form!

soundcloud embedded in Comments

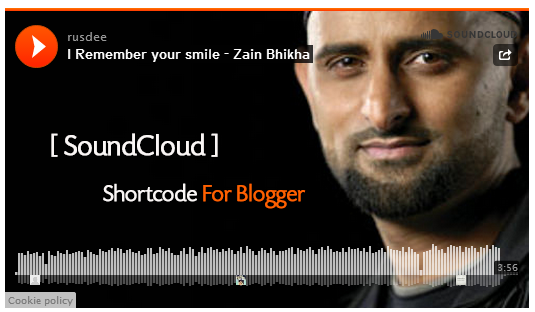
You can create both classic Player (shown below) or the new Visual Player as shown above.

Soundcloud Classic Player

Lets now learn how to add it in blogger by following these three basic steps!

1. Install Blogger Shortcode Plugin

This shortcode will not work unless you have installed the Shortcode Plugin. Follow these 7 easy steps shared on the tutorial link below

After you have installed the plugin, you can then follow the steps discussed below to start embedding Audio Tracks on your blog.

2. Grab Your Track ID or Playlist ID

In order to embed soundcloud player or playlist inside your website you need the track ID and Playlist ID respectively.

Finding the Track ID

Go to SoundCloud and find a track you like. Click the 'Share' button below the waveform and an overlay will appear.

click the share button

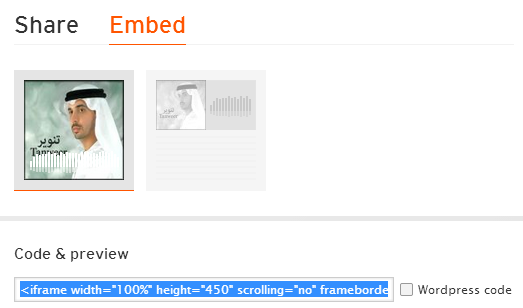
Click the embed tab and copy and paste the code inside a notepad or any editor you may have.

Click embed tab

The code inside "Code & Preview" will have the track ID inside it which looks like the one shown below.

api.soundcloud.com/tracks/106634299

In the example case above the Track ID is 106634299. You only need this track ID to make the shortcode work.

Finding the Playlist ID

Now Lets learn how to find the Playlist ID. Visit the profile of your favorite artist or singer. Click the 'Share' Button on the sidebar.

SoundCloud user profile

Click the embed tab and copy the code from "Code & Preview" . Paste the code inside notepad and you will find the Playlist ID inside it as shown below

api.soundcloud.com/users/7518543

In our example the playlist ID is 7518543

3. Adding The SoundCloud Shortcode

After you have installed the plugin and learnt how to grab the track and Playlist IDs, you can then easily embed the player in your blog using the shortcode below.

 [soundcloud src="106634299"/]


Replace the Track ID with yours inside the src attribute


Output:


SoundCloud track


To create a Playlist use this shortcode


[soundcloud height="350" playlist="1" src="7518543"/]


Replace the Playlist ID with yours inside the src attribute.


Note: For creating playlists it is important that you use the height and playlist attributes.


Output:


SoundCloud Playlist


Customize the SoundCloud Player


Following is the complete list of attributes supported by our Shortcode


Attribute Definition
src Insert Track ID or Playlist ID here
color Changes background color of the Player Button in Classic View only.
playlist By default player is displayed for playing a single Track but if you wish to display a Playlist or multiple tracks then you need to insert this attribute with value set to "1" and insert the Playlist ID inside src attribute
auto Setting this attribute to "true" will auto play the track. Setting it to "false" will turn off the auto play mode.
width Changes width of the Player iFrame. Can also be assigned in percentage for responsiveness.
height Changes height of the Player
visual Setting it to "true" will display the "Visual" Player with wide background image. Setting this option to "false" will display the old HTML5 Classic Player.
comments Setting it to "true" will display user comments on the player. Setting it to "false" will turn off displaying user comments
user Setting it to "true" will display the uploader name. Setting it to "false" will hide the uploader name.


Use the attributes in following format


[soundcloud auto="true" user="false" visual="true" comments="true" width="550" height="400" src="106634299"/]


The above shortcode will create a player which will auto play, has Visual look, hides Uploader name, shows comments, and has custom width and height dimensions.


Output:


Custom SoundCloud Track


Need Help?


I hope I have covered every single detail but still If I forget to clarify any point, feel free to post your question below. Do share your precious views and let us know your useful feedback. Shine up your blogs and stay tuned for more such awesome shortcodes because we have promised to take blogger to the next level!


Peace and blessings buddies! =>

Dailymotion Shortcode For Blogger!

dailymotion shortcode for bloggerThat day has come when you can embed videos anywhere on your BlogSpot blogs! You can now add or insert dailymotion videos inside blogger comments, posts, static pages and HTML/JavaScript widgets thanks to Blogger Shortcode Plugin that we released few days ago. Add video tracks almost anywhere on your blog with just a simple shortcode. We are creating more video shortcodes in coming days for YouTube, TED Talks, Vimeo etc. Thankfully you no more need to use that long ugly iFrame codes to embed videos inside your content, we have a much cleaner option. Lets see it in action!
Install Blogger Shortcode Plugin

This shortcode will not work unless you have installed the Shortcode Plugin. Follow these 7 easy steps shared on the tutorial link below

After you have installed the plugin, you can then follow the steps discussed below to start embedding videos on your blog.

How To Use Dailymotion Shortcode in Blogger?

First, find a Dailymotion video you would like to use. In your web browser’s address bar, copy the highlighted portion of the video’s URL illustrated below (this is called the video’s ID): You just need to copy this video ID.

dailymotion video ID

In this example the video ID is  x1ezu5y. You just need this Id to make the shortcode work.

Create a new post or page on your blog (or open a draft post or page) and add the following shortcode directly to the visual editor. You can also test it by pasting the following shortcode directly inside the comment form. Replace x1ezu5y video ID with the one you are using.

[dailymotion src="x1ezu5y"/]


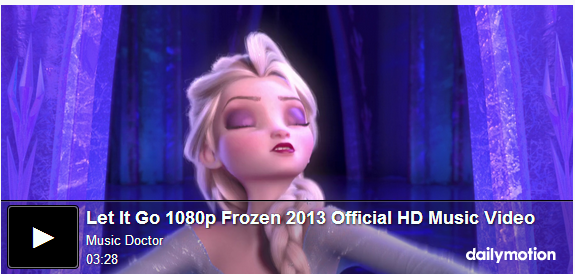
After publishing, your video will look exactly like the one shown below:


embed dailymotion in blogger


Want to Customize the Video?


You can add a background color and highlight the text to customize your video by using the following attributes inside the shortcode


Tip: Use our Color Code Generator for finding color ideas.


[dailymotion color="FFC300" highlight="FFC300" background="000000" src="x1ezu5y"/]


Output:


customized dailymotion video


To edit the dimensions of the video IFrame and also hide the title text and dailymotion logo, lets add some more attributes


[dailymotion width="80%" height="350" info="0" logo="0" color="FFC300" highlight="FFC300" background="000000" src="x1ezu5y"/]


Output:


dailymotion video with no in-player info


Always choose a percentage value for width where possible to make the video auto adjust itself on mobile devices.


Complete List of Attributes


Here is the complete list of each attribute definition that can be used with dailymotion shortcode.


Note: All attributes are in lowercase. Blogger shortcodes are all Case Sensitive.


Attribute Definition
src Insert Video ID here
color Changes color of the Video title text and Player icon
highlight Changes color of Title and Player on Mouse hover
background Change the background color of the video
width Adjusts width of video iframe. Can also be assigned in percentage for responsiveness.
height Adjusts height of video iframe
info Hides in-player video info like video Title, uploader's name and time duration. Caption is hidden by default. "0" means Hidden and "1" means Visible
logo Hide's dailymotion logo. "0" means Hidden and "1" means Visible


Need Help?


I hope you may now enjoy adding videos on your blogs to spice it up further and provide a more interesting interface for your visitors. The best thing about shortcodes is that they are treated as TEXT which can be inserted anywhere, be that inside posts, sidebar, template or even the comments. This was surely not possible before. I hope you may like it and find it useful. Do let us know if you need any help or assistance.


Peace and blessings buddies! =>

How To Submit Blogger Sitemap To Yandex

How to submit blogger sitemap to Yandex | 101helper

Before I start let me tell you something about Yandex. Yandex is a Russian company that operates the largest search engine of Russia. It is one of the most popular search engine and after Google, Bing, Yahoo, Yandex is most popular. In the beginning this search engine was available in Russian language only but now it is available in English also. As a search engine it also has features like other search engines such as webmaster tools for webmasters and bloggers. You can read more about Yandex here. Yandex is not so popular but it is one of the best way to get more traffic and a successful blogger is that who takes advantage of every means no matter its more popular or less popular. So if you are interested in getting more traffic and want to improve your seo, I recommend you to submit your sitemap to Yandex. 

Like Google and Bing, sitemap can be submitted to Yandex also but its too different from submitting sitemap to Google or Bing. Google and bing accept the normal sitemap i.e: http://yourblogurl.blogspot.com/atom.xml?redirect=false&start-index=1&max-results=500 but incase of Yandex this sitemap can not be used. Yandex will show you an error, shown in below image. So to gain visitors from Yandex you have to do something different and for the same reason I am creating this post. So follow below mentioned steps to submit your blog's sitemap to Yandex.


Error while submitting blogger sitemap to Yandex | 101helper
Error while submitting sitemap to Yandex
Step 1: Go to Yandex webmaster tools and sign-up for an account.

Step 2: After sign-up login to your Yandex account and add your site/blog.


How to submit blogger sitemap to Yandex.org | 101helper

Step 3: Verify your blog by using the meta code(go to your blog template and add the meta code below <head>).

Step 4: After verification, go to your Yandex account and click on my sites.

Step 5: Click on indexing options in the menu on left hand side.

Step 6: Choose the sub-option "Sitemap files".


How to submit blogger sitemap to Yandex search engine | 101helper

Step 7: Use the following sitemap url in sitemap url box:

http://your-blog-link.blogspot.ru/sitemap.xml


Seo tutorials for blogger | 101helper

Step 8: Click on add and you are done successfully. 

You can check your sitemap status by click on check.

Note: Don't use http://your-blog-link.blogspot.com/sitemap.xml instead of it use http://your-blog-link.blogspot.ru/sitemap.xml because incase of .com Yandex is redirected to .ru(russian domain) which results in stopping of index.


Hope you like this post and your found it helpful. If you have any question feel free to ask me in comments below or contact me. Follow and subscribe to get more seo tutorials for blogger. If you like this post, help me spread it by sharing it with others. Keep visiting 101Helper.

Search tags: Seo guide for blogger, How to increase blog traffic, How to submit blogger sitemap to Yandex, Seo tutorials for blogger, 101Helper seo tips for blogger.