The contact form that I am using on this blog is from emailmeform and it is all free but customized using CSS. I previously published a post on how to customize contact form provided by emailmeform but later due to change in the coding provided by them the styling do not work for new forms so today we will learn to create a simple contact form with no company Ads and along with an upload option that will allow your visitors to send you files straight from your website. The files can be a text file, video, audio, pdf, gif, png, anything. Follow these steps:
Live Demo
Create a Free Web Contact Form
Sign up for a free account at emailmeform
Once you are registered click the "Add a Form" button and choose the form builder option.
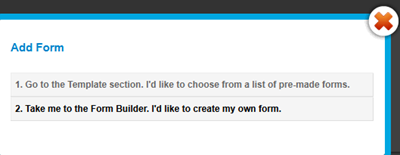
Keep your form simple with some important fields only like Name, Website URL, Email, Age, Country, Subject and Message. The form builder looks like this,
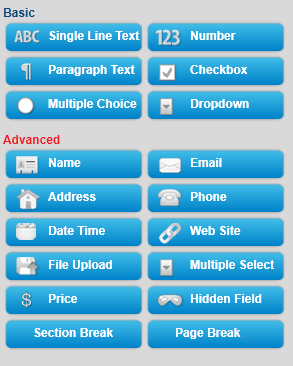
The form builder has blue buttons at left and display at right. When you click a button on left the effect is displayed on right. Now kindly follow as I instruct for keeping things simple and for creating a simple but informative contact form.
Follow this order:
- Click the Name button in advance section
- Next click Web site
- Next Email
- Next Hidden Field. Now click the hidden field section on the right and rename it as Age
- Next click Hidden Filed again and rename it as Country
- Next click File Upload (Optional you can leave this option if you don't want users to send you files via email)
- Now From the Basic section click Paragraph Text & click it to rename it as Message
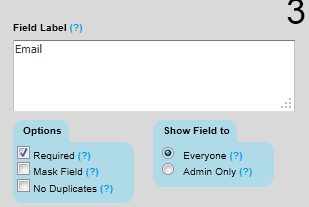
- To make a specific form option a must to fill then simply click that row and select required as shown below
Your contact form now must look something like this:
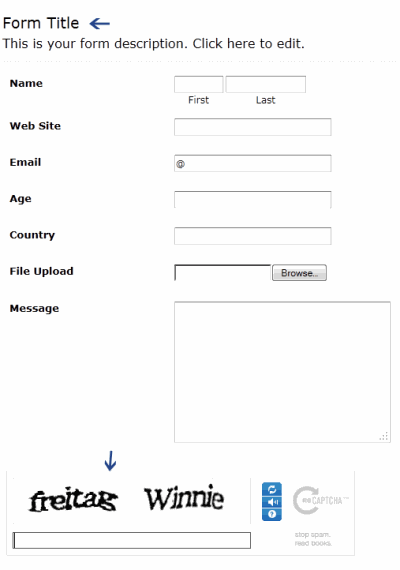
9. Click the Form Title and add some message there for your visitors. For example you can write :
We Love To Hear From You
Feel free to ask for any help. We will catch you back as soon as time allows
If you wish you can remove the form title by unchecking the box and deleting the description text. See below
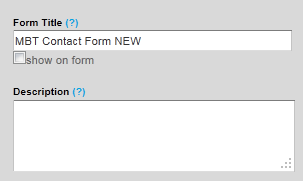
10. Now on the form settings choose Redirect URL and insert the page link of your thank you page. A thank you page is something like this
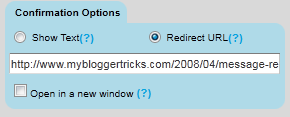
You may create a separate post for this by giving it an old publishing date. Blogger users can create a Page instead of Post.
11. Now replace send Email by submit and align it to right as shown below:
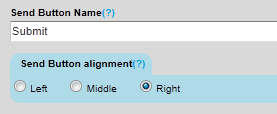
12. Next click the Captcha Code at the bottom and select the none option from the left section as shown below:

This security code is often added to prevent spam but I have never used this security code and I honestly have received not even a single spam till today. Just remove it to make the contact form even more neater.
13. Finally hit the Save Form Button and a window will appear as shown below:
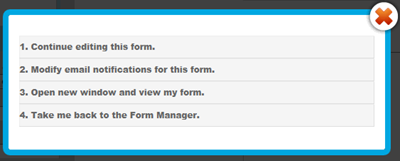
14. Choose the second option and add a recipient email ID. Choose an ID that you often use so that whenever someone leave a message you may receive it straight in your inbox. You can also add more than one recipients. See below:
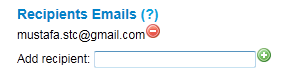
Leave other options as default. Hit Save! Now choose the third option.
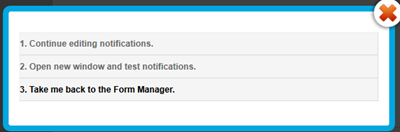
15. In Form manager Click Code

16. Choose the HTML Only option and copy the code. Make sure to enter the URL of the page where you want to embed the contact form. See below
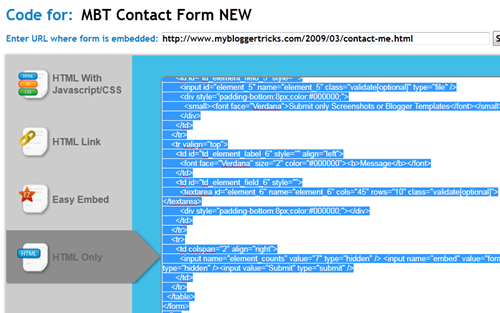
It is therefore better that first you create a Page on Blogger and publish it. Fetch its URL and paste it in the blank "Enter URL where form is embedded"
Now simply copy the code and paste it in your contact page. To delete the emailmeform logo from the contact form find and delete a similar code like the one below from the code you just copied.
<div><font face="Verdana" size="2" color="#000000">Powered by</font><span style="position: relative; padding-left: 3px; bottom: -5px;"><img src=
"http://www.emailmeform.com/builder/images/footer-logo.png" /></span><font face="Verdana" size="2" color="#000000">EMF</font> <a style="text-decoration:none;" href="http://www.emailmeform.com/"
target="_blank"><font face="Verdana" size="2" color="#000000">Forms Online</font></a>
</div><a style="line-height:20px;font-size:70%;text-decoration:none;" href="http://www.emailmeform.com/report-abuse.html?http://www.emailmeform.com/builder/form/r99G329aiV6k6" target=
"_blank"><font face="Verdana" size="2" color="#000000">Report Abuse</font></a>
Publish the page and bingo you are done! I know the steps are lengthy but the result is indeed worth it. In my coming posts you will learn how to completely customize this contact form with your own colors and styles. See our contact form as an example. I just hope you may have found today's tutorial helpful. If you need any help please do not hesitate to post your question. Have fun buddies! :)
Note: Paste the Contact Form code in Edit HTML mode only and hit the publish button on blogger Post Editor. Do not toggle to compose mode because this will collapse the form.
You may also find our previous tutorial helpful:


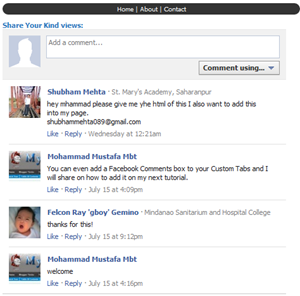 We shared detailed tutorials on how to create a custom Facebook Tab and how to design a Facebook Template. We added navigation and drop down menus to the tabs giving it a website look and the only thing it lacked was a commenting system so that your Fans may post you questions directly on your Like Page Custom Tabs. Success of any business lies in its brand presentation. Almost every web owner has a Fan Page but very few have Custom Welcome Landing Pages which may showcase your brand. See the demo below and see the different tabs on my Facebook profile to get an idea
 A blog's success lies in the quality of its content and fellowship which is also termed as readership. The more subscribers you have the more you groom as an authority and trustful resource for knowledge amongst your visitors. Blog subscribers are the integral part of your online career. You are being judged by the number of readers you have. A good subscription box boosts the Feed count and results in reader growth similar effect is applied by that little dynamic Feedburner xml button i.e Chicklets . By default the chicklet displays number of subscribers as "**** readers" The feed count is followed by the text "readers" amazingly with a little code you can change the appearance of this graphic text. You can turn readers into fans or followers. Follow up:


 If you have to login to both sites, Google+ for new taste of social networking and Facebook because some of us just can’t stop using Facebook and migrate to Google+ at once, then this trick is all about you! Although, Google has not yet come up with any of the G+ API that may provide a shortcut, but still we can try a work around to synchronize the Google Plus status with Facebook.


 All your Facebook friends contact list can now easily be transferred or migrated to your Google+ account withy simple steps. Since Facebook has blocked all chrome extensions that helps users to directly transfer Facebook contacts to Google+ therefore we will need to work around and look for a more easy 2-step method. For this tutorial to work you will need a Yahoo mail account. There are two basic steps which are: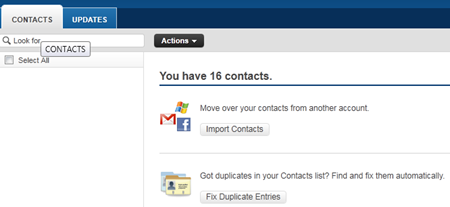


 Google Plus fortunately lets you make a backup copy of almost all information that you share online with friends. Whether it may be your photo albums, links or posts shared as stream data, profile data, buzz data or people in your contacts and circles, you can backup and download all these files in your computer hard drive. This will help you keep your files save and keep your memories alive if you ever wanted to leave this great social networking site or if in case your account password goes in the hands of wrong people. All data is downloaded in .zip format which can be compressed using winrar software except profile data which is stored with .json extension.